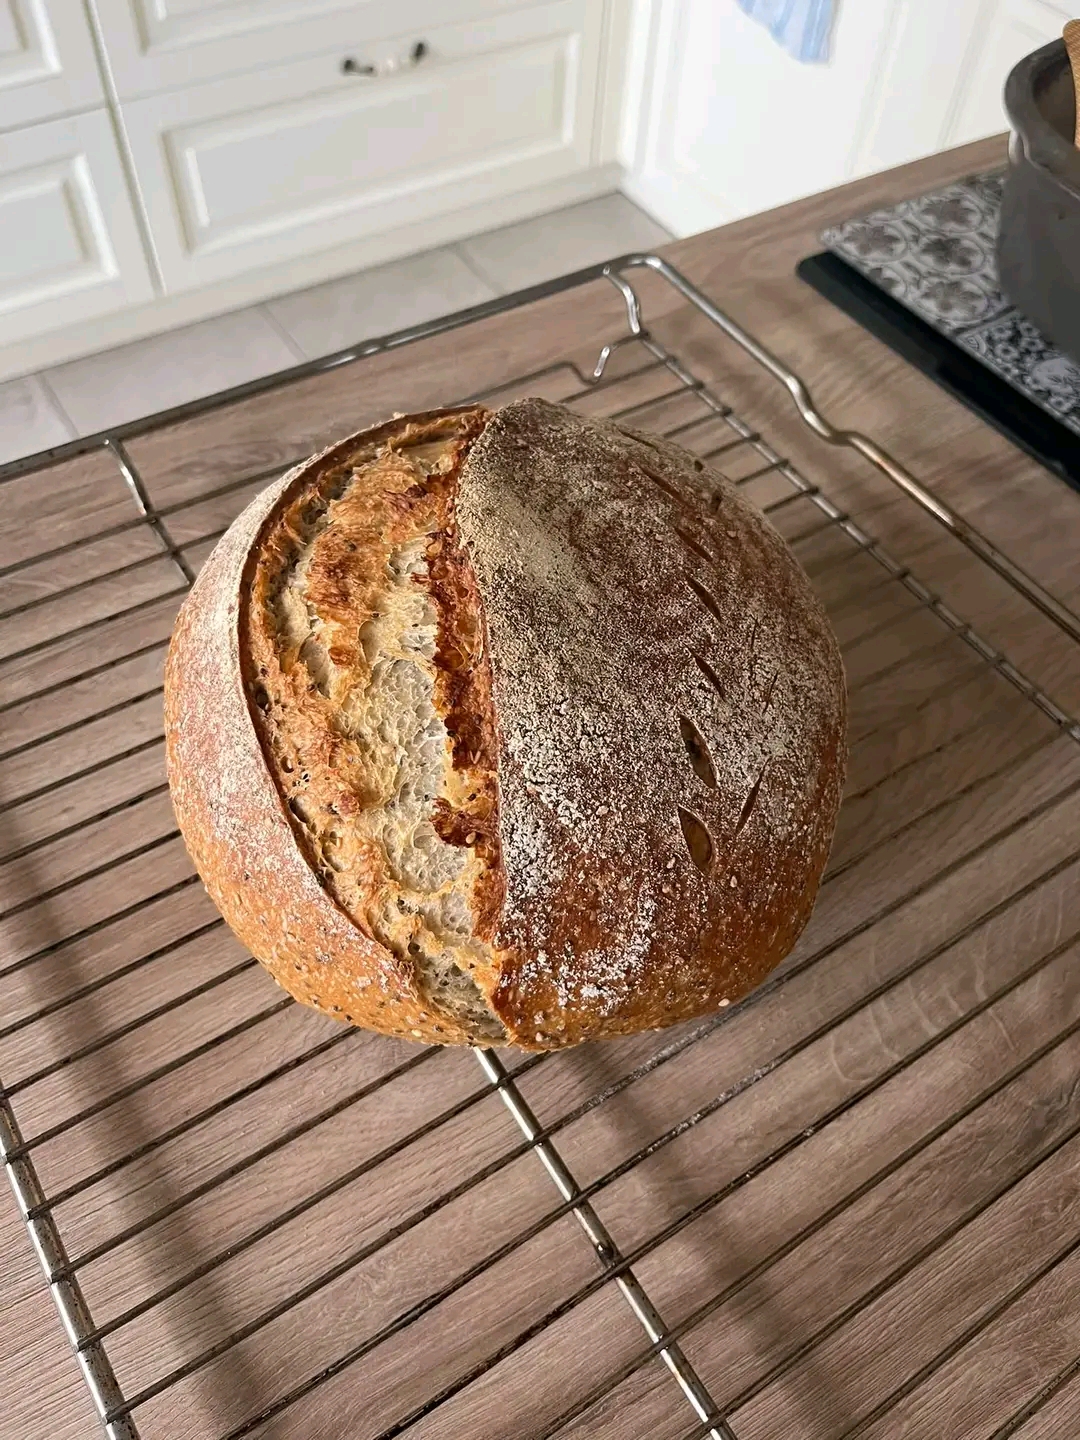
Homemade Artisan Bread A Beautiful Golden Loaf Straight from the Oven
### Introduction
There is nothing more satisfying than opening the oven and discovering a magnificent homemade loaf of bread! With its golden crust, inviting aroma, and soft, airy interior, this artisan-style bread is a wonderful reminder of the simple pleasures of home baking.
Whether you are an experienced baker or just beginning your bread-making journey, this recipe offers a rewarding way to create a beautiful loaf using everyday ingredients. The secret lies in giving the dough enough time to develop flavor, handling it gently, and baking it until the crust is beautifully browned.
Preparation time: 25 minutes Rising time: 2–4 hours, depending on room temperature Baking time: 35–45 minutes Total time: Approximately 3–5 hours Yield: 1 large loaf
### Origin
Bread-making is one of the world’s oldest culinary traditions, dating back thousands of years. Over time, different cultures developed their own techniques for creating everything from flatbreads to richly flavored sourdough loaves.
The rustic artisan loaf is inspired by traditional European baking, where simple ingredients, careful fermentation, and high-temperature baking produce bread with a crisp crust and a tender crumb.
Today’s home bakers often combine traditional techniques with modern ovens, Dutch ovens, and long fermentation methods to recreate the quality of bakery bread at home.
This recipe provides a versatile artisan-style loaf that can be adapted to your preferred flour, fermentation schedule, and baking equipment.
### Cultural Significance
Freshly baked bread has long represented nourishment, hospitality, and togetherness. In German-speaking countries, homemade bread is especially appreciated for its variety of crusts, textures, and flavors. Baking bread at home is also a popular hobby, with sourdough baking inspiring many people to experiment with fermentation and shaping.
A beautiful loaf fresh from the oven can become the centerpiece of a family breakfast, a weekend brunch, or a shared meal. The satisfaction of making bread yourself comes not only from its taste but also from watching simple ingredients transform into something extraordinary.
### Ingredients Quantity

For one large artisan loaf
* 500 g bread flour
* 350 g lukewarm water
* 7 g instant dry yeast
* 10 g salt
* 1 tsp sugar or honey (optional)
* 1 tbsp olive oil (optional, for a softer crumb)
* Extra flour for dusting
For a sourdough variation: Replace the commercial yeast with approximately 100 g active sourdough starter and reduce the water and flour slightly to account for the starter. Fermentation times will vary considerably.
### Optional Additions
Customize your loaf with these flavorful additions:
* Sunflower or pumpkin seeds: Add 2–3 tablespoons for texture and a nutty flavor.
* Rolled oats: Sprinkle on top before baking for a rustic finish.
* Fresh rosemary: Add 1–2 teaspoons of finely chopped rosemary.
* Roasted garlic: Fold in a few roasted cloves for a savory loaf.
* Whole-wheat flour: Replace 100–150 g of bread flour for a heartier flavor.
* Rye flour: Replace up to 100 g of bread flour for a deeper, earthy taste.
* Black or green olives: Add approximately 75 g of chopped, well-drained olives.
* Walnuts: Add 50 g of chopped walnuts for a satisfying crunch.
### Tips for Success
* Weigh your ingredients. A kitchen scale provides more reliable results than measuring flour by cups.
* Avoid adding too much flour. A slightly tacky dough can produce a more open crumb than a stiff, dry dough.
* Develop the gluten. Knead the dough until it becomes elastic, or use several rounds of stretch-and-folds during the first rise.
* Watch the fermentation. The dough should become noticeably expanded and airy. Rising times depend on room temperature and yeast activity.
* Shape with care. Create surface tension by gently pulling the dough into a round without squeezing out all the air.
* Preheat thoroughly. A properly heated oven helps the loaf rise and develop a strong crust.
* Use steam safely. Steam during the beginning of baking can improve crust development. A covered Dutch oven is a convenient alternative.
* Allow the loaf to cool. Wait at least an hour before slicing so the crumb can finish setting.
### Instructions

Step 1: Combine the ingredients
Mix the flour and yeast in a large bowl. Add the water and optional sugar or honey, then mix until a rough dough forms. Add the salt and combine thoroughly.

Step 2: Knead the dough
Knead for 8–10 minutes by hand, or about 5–7 minutes in a stand mixer, until the dough becomes smoother and elastic. If the dough is sticky, use lightly dampened hands rather than adding lots of extra flour.

Step 3: Let the dough rise
Cover the bowl and leave it in a warm place for approximately 1–2 hours, or until the dough has expanded substantially. The exact time depends on the temperature of your kitchen.

Step 4: Shape the loaf
Turn the dough onto a lightly floured surface. Gently shape it into a round or oval, folding the edges toward the center and creating a taut outer surface.

Step 5: Complete the final proof
Place the dough seam-side up in a floured proofing basket or seam-side down on parchment paper. Cover and let it rise for another 30–60 minutes, until slightly puffy.

Step 6: Preheat and score
Preheat the oven to 230°C (445°F). If using a Dutch oven, preheat it according to its manufacturer’s instructions. Turn the dough onto parchment paper, if needed, and score the top with a sharp blade.

Step 7: Bake the bread
Bake for approximately 35–45 minutes. If using a Dutch oven, bake covered for about 20–25 minutes, then uncover and continue baking until the crust is deep golden brown. The loaf should sound hollow when tapped on the bottom.

Step 8: Cool and enjoy
Transfer the bread to a wire rack and allow it to cool for at least an hour before slicing. Enjoy the crisp crust and soft, fragrant interior.
### Description
This artisan loaf has a beautifully browned crust that gives way to a soft, chewy interior. Its simple wheat flavor makes it ideal for sandwiches, toast, soups, and cheese boards.
The combination of proper gluten development, sufficient fermentation, and a hot oven helps produce a loaf with an attractive shape and satisfying texture. Every loaf will have its own character, making home baking both rewarding and enjoyable.
### Nutritional Information
The following estimates are for one slice, assuming the loaf is divided into 12 equal slices and the optional oil and sweetener are omitted.
| Nutrient | Approximate amount |
| ————- | —————— |
| Calories | 145–155 kcal |
| Protein | 4–5 g |
| Carbohydrates | 29–32 g |
| Fat | 0.5–1 g |
| Fiber | 1–2 g |
| Sugars | Less than 1 g |
Actual values depend on the flour used, the loaf’s final weight, and the number of slices. Whole-wheat flour increases fiber, while seeds and nuts increase calories and healthy fats.
### Conclusion
A magnificent homemade loaf is a reminder that some of the most satisfying foods begin with the simplest ingredients. With flour, water, yeast, and salt, you can create bread that looks beautiful, smells wonderful, and tastes even better.
The key is to be patient with fermentation, handle the dough gently, and allow the loaf to bake until its crust develops a rich golden color.
### Recommendation
Enjoy this bread while it is fresh, served with olive oil, homemade spreads, or your favorite savory toppings. It also makes excellent toast the following morning.
For longer storage, keep the completely cooled loaf in a bread bag at room temperature for a day or two, or slice and freeze it for later. Toast frozen slices directly when needed.
If you enjoy experimenting with bread, try a version made with part whole-wheat flour or a slow-fermented sourdough version for a more complex flavor.
### Embracing Healthful Indulgence
Homemade bread gives you control over the ingredients and allows you to adapt the recipe to your preferences. You can reduce unnecessary additives, experiment with whole-grain flour, and add seeds for extra fiber and nutrients.
For a more balanced meal, pair a slice with eggs, hummus, or another protein-rich topping and include fresh vegetables. If you prefer to avoid white flour, replace some or all of the bread flour with a suitable alternative, keeping in mind that the dough’s hydration and texture may need adjustment.
Most importantly, enjoy the process of baking. A beautiful loaf fresh from the oven is not just food; it is the pleasure of creating something nourishing and sharing it with others.