The Ultimate Moist Banana Bread Recipe How to Bake the Perfect Classic Loaf at Home
Few aromas can evoke an instant sense of home, warmth, and nostalgia quite like a freshly baked loaf of homemade banana bread pulling hot out of the oven. It is the quintessential comfort food—sweet, incredibly tender, and universally loved across generations. Whether you are looking for a reliable way to utilize those overripe, speckled bananas sitting on your kitchen counter or you simply want to master a foolproof weekend baking project, having an exceptional banana bread recipe in your culinary repertoire is an absolute must. While it is classified as a simple quick bread, achieving a texture that is exceptionally moist without becoming dense, heavy, or underbaked in the absolute center requires understanding a few basic baking principles. If you have ever sliced into a loaf only to find it dry and crumbly, or disappointingly gummy, you are in the right place.
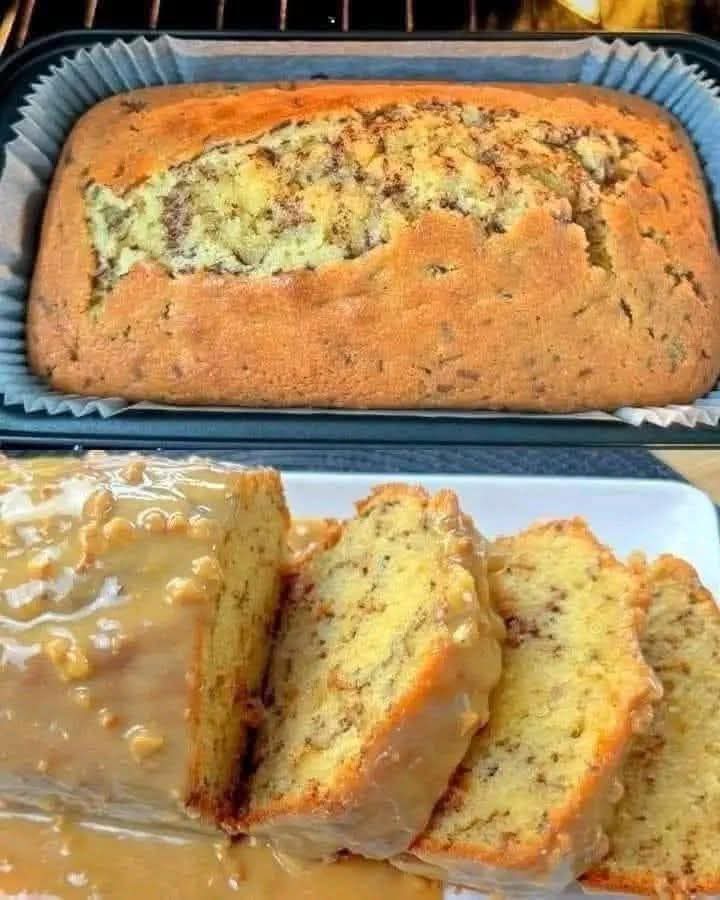
The mouthwatering culinary transformation captured in the visual reference 1000005725_2.jpg showcases exactly what a perfectly executed home bake should look like. In the top panel of 1000005725_2.jpg, we see a beautifully risen, golden-brown banana loaf fresh from the oven, complete with that signature rustic center crack that bakers strive to achieve. The bottom panel reveals the reward of patience: clean, moist, and uniform slices that show off a tender interior crumb structure. This comprehensive guide will walk you through the precise ingredient science, technical tips, and step-by-step methods required to bake the most tender banana bread of your life right in your own kitchen.
The Food Science Behind a Perfect Banana Loaf
To bake a superior quick bread, it helps to understand how the core ingredients interact with one another during the mixing and baking stages. Unlike traditional sandwich breads that rely on yeast and lengthy proofing times, banana bread uses chemical leaveners to achieve its rise, meaning the structural development happens rapidly once heat is applied. Balancing your wet and dry components perfectly is what guarantees the flawless structural results displayed in 1000005725_2.jpg.
The Power of Ultra-Ripe Bananas
The absolute most important component of this recipe is the condition of your bananas. You cannot make an exceptional banana bread with yellow, pristine, or slightly green fruit. To get the deep flavor and incredible moisture profile seen in 1000005725_2.jpg, you need fruit that is heavily speckled with dark brown spots or completely black. As a banana ripens, its complex starches naturally break down into simple sugars, which dramatically increases its sweetness and liquefies its internal texture. This natural fruit sugar acts as a powerful humectant during the baking cycle, locking in moisture and ensuring your sliced loaf remains incredibly soft and fresh for days.
Choosing Your Baking Fats: Butter vs. Oil
Bakers often debate whether butter or vegetable oil produces a better quick bread. Butter provides an unmistakable, rich, old-fashioned flavor profile that adds immense depth to the sweet bananas. However, because butter contains roughly 16% to 18% water, that moisture evaporates in the oven, which can occasionally leave a loaf slightly dry if overbaked. Neutral vegetable oils, on the other hand, remain liquid at room temperature and coat the flour proteins efficiently, preventing excess gluten development and keeping the crumb velvety smooth. This recipe utilizes a strategic combination of both: melted unsalted butter for unmatched flavor, and a touch of vegetable oil to secure long-lasting moisture.
The Acid Catalyst: Sour Cream or Yogurt
To achieve the beautiful, high-rising dome and distinct rustic split featured in the top baking tray of 1000005725_2.jpg, your chemical leavening agent needs an acidic ingredient to activate it properly. Introducing a thick, cultured dairy product like full-fat sour cream or plain Greek yogurt does double duty in your batter. The natural lactic acid reacts immediately with the baking soda to create tiny carbon dioxide bubbles, lifting the heavy batter as it cooks. Concurrently, the high fat content in sour cream adds a luxurious richness to the liquid base, breaking up the protein bonds in the flour to ensure a meltingly tender mouthfeel in every single bite.
Complete Ingredients Checklist for Your Classic Loaf
Before you begin assembling your mixing bowls, ensure all your refrigerated items, especially the eggs and sour cream, are brought to room temperature. Room temperature ingredients emulsify much more effectively, creating a cohesive, uniform batter that traps air efficiently.
- 3 very large or 4 medium ultra-ripe bananas, thoroughly mashed (approx. 1.5 cups)
- 2 cups of all-purpose flour, leveled accurately
- 1 teaspoon of baking soda
- 0.5 teaspoons of fine sea salt
- 0.5 cups (1 stick) of unsalted butter, melted and cooled slightly
- 2 tablespoons of neutral vegetable oil (such as canola, corn, or avocado oil)
- 0.75 cups of packed light brown sugar (adds moisture and a deep molasses undertone)
- 0.25 cups of granulated white sugar
- 2 large eggs, room temperature
- 0.33 cups of full-fat sour cream or plain Greek yogurt
- 2 teaspoons of pure vanilla extract
- 0.5 cups of chopped walnuts or pecans (optional, if you prefer an added crunch)
Step-by-Step Baking and Assembly Guide
To replicate the picture-perfect results of 1000005725_2.jpg, follow these steps with care, paying close attention to the mixing style and baking times.
Preparing Your Baking Station
Preheat your oven to 350°F (175°C). Position your primary oven rack right in the center slot to ensure completely uniform heat distribution around the entire pan. Lightly grease an 8.5×4.5-inch loaf pan with a bit of butter or non-stick cooking spray. For effortless removal post-bake, line the pan with a sheet of parchment paper, leaving a slight overhang on the two longer sides to serve as a sling, matching the neat paper lining visible in the top portion of 1000005725_2.jpg.
Sifting the Dry Components
In a medium mixing bowl, combine your all-purpose flour, baking soda, and fine sea salt. Whisk these dry ingredients together vigorously for about 30 seconds. This process breaks up any dense pockets of flour or compacted baking soda, ensuring that your rising agent is distributed perfectly evenly throughout the flour mixture, preventing uneven pockets or large holes from forming inside the bread.
Combining the Wet Ingredients
In a separate large bowl, mash your ultra-ripe bananas thoroughly using a fork or a potato masher until they form a smooth purée with only minor fruit chunks remaining. Pour in your melted unsalted butter and the vegetable oil, whisking to combine. Add your packed light brown sugar and granulated white sugar, beating the mixture firmly with your whisk until the sugars begin to dissolve into the fats. Whisk in your room temperature eggs one at a time, ensuring the first is fully incorporated before adding the second. Finally, gently stir in your full-fat sour cream and the pure vanilla extract until you have a smooth, highly aromatic liquid base.
The Golden Rule: Emphasizing the Gentle Fold
Pour your whisked dry ingredients directly into the large bowl containing your wet banana mixture. Switch from your whisk to a large rubber spatula. Gently fold the ingredients together using a sweeping, circular motion—cutting down through the center of the batter, sweeping across the bottom of the bowl, and folding up over the top. Stop mixing the exact moment the very last streak of dry white flour disappears into the wet base. The resulting batter should look incredibly thick, heavy, and slightly lumpy. Overmixing at this stage activates the gluten strands in the flour, turning what should be a tender, cake-like bread into a tough, rubbery loaf filled with dense tunnels. If you choose to use chopped nuts, fold them in gently with your last two strokes.
The Long, Slow Bake
Scrape the thick batter into your prepared loaf pan, smoothing out the top surface gently with your spatula. Slide the pan onto the center rack of your preheated oven and bake for 50 to 60 minutes. Because banana bread is exceptionally dense and moisture-rich, it requires a long, slow bake to cook completely through to the center. Around the 40-minute mark, check on the color of your loaf; if the top crust is browning too quickly but the center still jiggles slightly, loosely tent a piece of aluminum foil over the top of the pan to protect the crust while the inside finishes baking. Your banana bread is officially done when a wooden skewer or long toothpick inserted into the absolute deepest center of the loaf comes out entirely clean, or with just a few moist crumbs attached. Remove from the oven and let the loaf rest inside the warm pan for exactly 10 minutes, allowing the structure to firm up, before using your parchment paper sling to lift the bread out onto a wire cooling rack.
Professional Tips for Perfect Presentation and Slicing
Achieving the clean, uniform slices displayed on the white serving platter in the bottom half of 1000005725_2.jpg requires incorporating a couple of professional cooling and cutting techniques.
Exercising Patience During the Cool Down
The absolute biggest mistake home bakers make is attempting to slice into a loaf of banana bread while it is still piping hot from the oven. When the bread is hot, its internal starches and melted sugars are still fluid and fragile. Slicing it immediately will compress the crumb, making the bread look gummy and causing the slice to crumble apart under the weight of the knife. For those pristine, beautiful slices seen in 1000005725_2.jpg, allow your loaf to cool on a wire rack for at least 45 to 60 minutes. This resting period allows the crumb structure to set completely, locking the moisture into the cells of the bread.
Mastering the Clean Cut
When you are ready to serve your creation, skip standard smooth-bladed chef’s knives, which can crush the delicate top crust of the bread. Instead, opt for a long, sharp serrated bread knife. Use a gentle, back-and-forth sawing motion rather than pressing straight down firmly. Let the teeth of the serrated blade do the work for you, which results in clean, professional cuts that show off the beautiful internal texture without altering the shape of the loaf.
Optimal Storage Solutions to Maintain Freshness
Because this recipe leverages the high moisture content of mashed bananas, oil, and sour cream, your homemade loaf will naturally stay soft and delicious far longer than standard baked goods.
Room Temperature Storage
To preserve the soft texture of your banana bread, store any leftover slices or the remaining half-loaf in an airtight container or a heavy-duty zip-top bag at room temperature. Kept on your kitchen counter out of direct sunlight, it will maintain its optimal moisture and flavor for up to 4 days.
Freezing for Long-Term Enjoyment
Banana bread freezes beautifully, making it an excellent option for meal prep or advanced baking. You can wrap the completely cooled entire loaf, or individual pre-cut slices, tightly in a double layer of plastic wrap, followed by a sturdy layer of aluminum foil. Label it with the date, and store it in your freezer for up to 3 months. When a craving strikes, simply thaw a slice on your counter for 20 minutes, or pop it directly into a toaster oven for a few minutes for a warm, comforting, fresh-baked experience.
Elevating Your Baking Routine
Mastering a classic banana bread is a deeply rewarding culinary milestone that turns simple, everyday ingredients into an absolute masterpiece of comfort food. By honoring the basic science of quick breads—selecting ultra-ripe fruit, balancing your fats, using an acid catalyst, and committing to a gentle folding technique—you guarantee a perfect, tender result every single time you bake. The stunning visual balance between a perfectly cracked, golden crust and a moist, uniform interior shown in 1000005725_2.jpg is easily within your reach. Fire up your oven, prepare your loaf pan with care, and enjoy the wonderful process of crafting a timeless bakery favorite right in the heart of your home.