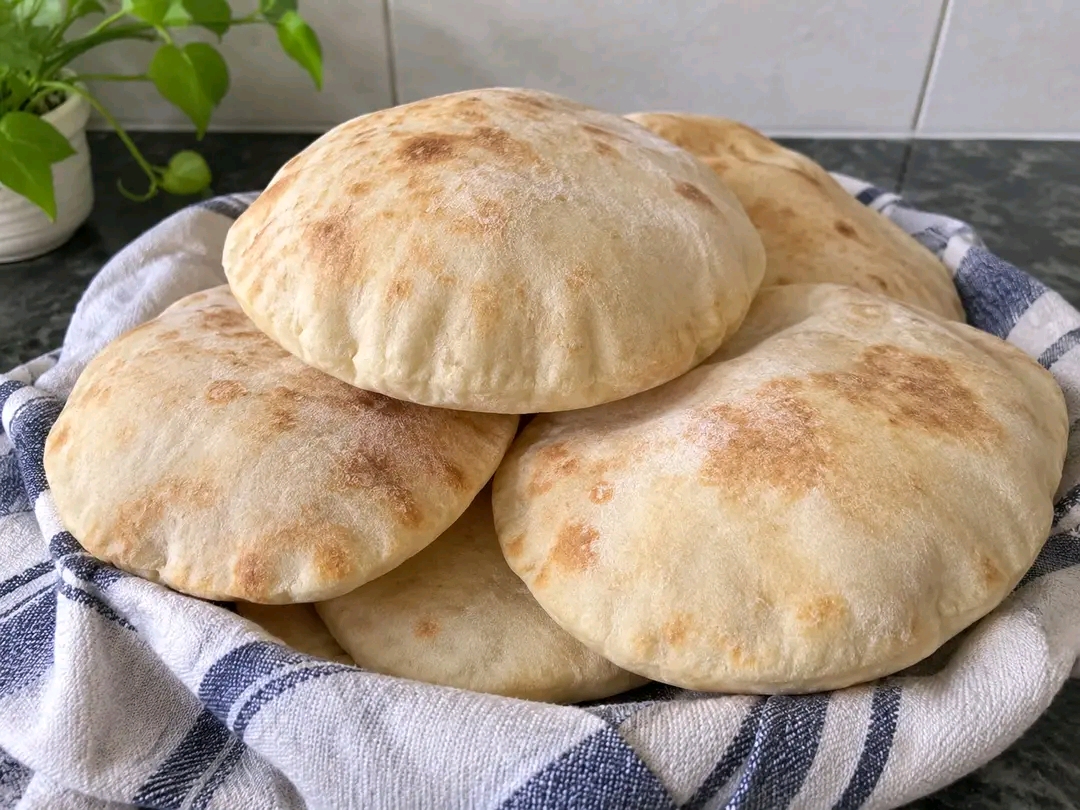
Homemade Sourdough Pita Bread Soft, Flavorful, and Perfectly Puffed
### Introduction
Homemade sourdough pita bread is a delicious way to turn a simple sourdough starter into soft, chewy flatbreads with beautiful, hollow pockets. Made with a handful of basic ingredients and a little patience, these pitas develop a wonderful flavor thanks to a long, cold fermentation in the refrigerator.
The most exciting part is watching each round of dough puff up during baking, creating a natural pocket perfect for filling with hummus, grilled vegetables, chicken, falafel, or fresh salads. With the right dough consistency, a hot cooking surface, and proper rolling, you can achieve impressive results even on your first attempt.
This recipe makes approximately 15 small sourdough pita breads, ideal for family meals, meal preparation, and sharing with friends.
Preparation Time: 30 minutes Fermentation Time: 12–18 hours in the refrigerator, plus time for the dough to rise Cooking Time: 2–4 minutes per pita, depending on the cooking method Total Yield: Approximately 15 pita breads
### Origin
Pita bread has a long history throughout the Middle East and the eastern Mediterranean, where flatbreads have been an essential part of everyday cooking for centuries. Different versions are enjoyed across countries such as Lebanon, Syria, Jordan, Greece, Turkey, and Egypt.
Traditional pita is commonly made with wheat flour, water, yeast, and salt. When exposed to intense heat, the moisture inside the dough turns into steam, separating the layers and creating the familiar hollow pocket.
Sourdough pita adds another dimension to this traditional bread. Instead of relying entirely on commercial yeast, it uses a sourdough starter containing naturally occurring yeasts and beneficial bacteria. The extended fermentation develops a more complex flavor and gives the bread its distinctive character.
### Cultural Significance
Pita is much more than a type of bread. Across many Middle Eastern and Mediterranean households, it is a practical staple served alongside soups, stews, grilled meats, vegetables, and dips.
Its pocket makes it particularly useful for preparing sandwiches and wraps, while its soft texture makes it perfect for scooping up hummus, baba ganoush, and other flavorful spreads.
Making sourdough pita at home combines this longstanding food tradition with the modern popularity of sourdough baking. The process encourages patience, reduces reliance on store-bought bread, and turns simple ingredients into something satisfying and versatile.
Sharing a basket of warm, freshly baked pita is also a wonderful way to bring people together around the table.
### Ingredients Quantity
The following is a practical formula for approximately 15 small sourdough pita breads. The original post does not provide exact ingredient measurements, so these quantities are a suggested starting point.
| Ingredient | Quantity |
| ————————————— | ——– |
| Active sourdough starter | 150 g |
| Bread flour or strong all-purpose flour | 500 g |
| Water, room temperature | 300 g |
| Fine sea salt | 10 g |
| Olive oil, optional | 15 g |
Important: Use an active, healthy sourdough starter for the most predictable fermentation. If your starter is sluggish, the dough may need considerably more time to rise.
### Optional Additions
You can customize your sourdough pita with a few simple additions.
* Whole-wheat flour: Replace 50–100 g of the white flour with whole-wheat flour for a nuttier flavor and more fiber.
* Olive oil: Adds tenderness and a subtle Mediterranean flavor.
* Dried herbs: Add a little oregano, thyme, or za’atar for an aromatic variation.
* Garlic: Mix a small amount of garlic powder into the dough for extra savory flavor.
* Sesame seeds: Sprinkle them over the surface before cooking if you enjoy a little crunch.
* Fresh herbs: Serve the finished pita with chopped parsley, mint, or cilantro.
* Sea salt: A light sprinkle on the warm bread enhances its flavor.
For the best chance of getting a full pocket, keep the basic dough simple when making this recipe for the first time.
### Tips for Success
1\. Use a lively starter. Your sourdough starter should show good activity after feeding. A weak starter may produce dense bread that does not puff properly.
2\. Allow enough fermentation time. Refrigeration develops flavor, but cold dough ferments slowly. Depending on your starter and refrigerator temperature, you may need additional time at room temperature before shaping.
3\. Keep the dough soft but manageable. The dough should be supple and slightly tacky rather than dry and stiff. Add water gradually if your flour absorbs more than expected.
4\. Roll the dough evenly. Uneven thickness can prevent the pita from inflating. Aim for rounds approximately 3–4 mm thick, with no thick edges or thin spots.
5\. Preheat the cooking surface thoroughly. A scorching-hot baking steel, cast-iron plate, or heavy baking tray helps create the rapid burst of steam needed to form the pocket.
6\. Avoid excessive flour when rolling. Too much loose flour can burn on the cooking surface and affect the flavor.
7\. Do not keep opening the oven. It is tempting to watch the pitas inflate, but maintaining a high, consistent temperature is more important.
8\. Cover the finished bread. Place the cooked pitas under a clean kitchen towel to keep them soft and flexible while you finish the batch.
### Instructions
### Step 1: Mix the dough
In a large bowl, combine the active sourdough starter and water. Stir until the starter is mostly dissolved.
Add the flour and mix until a rough dough forms. Let it rest for approximately 20–30 minutes, then incorporate the salt and optional olive oil.
Knead by hand or with a mixer until the dough becomes smooth, elastic, and cohesive. This may take about 5–10 minutes, depending on your method.
### Step 2: Begin fermentation
Cover the bowl and let the dough rest at room temperature until it becomes slightly puffy and shows signs of fermentation.
The time required will depend on the strength of your starter and the temperature of your kitchen. Avoid waiting for the dough to double if it is already becoming very airy and elastic.
### Step 3: Refrigerate overnight
Cover the dough well and refrigerate for approximately 12–18 hours.
This slow fermentation helps develop the sourdough’s flavor while making the baking process easier to organize the following day.
### Step 4: Bring the dough toward room temperature
Remove the dough from the refrigerator and allow it to rest until it is easier to divide and roll.
If it has not fermented sufficiently, let it continue rising at room temperature before proceeding. The dough should feel alive and extensible rather than dense and resistant.
### Step 5: Divide into 15 pieces
Turn the dough onto a lightly floured work surface. Divide it into 15 equal portions, approximately 64–65 g each.
Shape each piece into a smooth ball. Cover the balls and let them rest for 15–25 minutes so the gluten can relax.
### Step 6: Roll the pita rounds
Roll each dough ball into an even circle approximately 12–15 cm across and 3–4 mm thick.
Keep the rounds covered while you work to prevent them from drying out. If the dough keeps shrinking, let it rest for a few minutes before rolling again.
### Step 7: Preheat the oven and cooking surface
Preheat your oven to its highest suitable temperature, ideally around 250–275°C (480–525°F), if your oven allows it.
Place a baking steel, baking stone, or heavy inverted baking tray inside while the oven heats. Allow the surface to become thoroughly hot before baking.
Use cookware rated for the temperature of your oven, and follow the manufacturer’s instructions.
### Step 8: Bake until the pockets inflate
Carefully place one or two pita rounds on the hot surface, leaving enough room for them to expand.
Bake for approximately 2–4 minutes, watching as the dough begins to balloon. Once fully puffed and cooked, remove the pita carefully with suitable utensils.
Cooking time will vary with the oven, dough thickness, and surface temperature. If you prefer a cast-iron plate on the stovetop, preheat it thoroughly and cook each round, turning as needed, until puffed and lightly browned.
### Step 9: Keep the pitas soft
Transfer each cooked pita to a clean kitchen towel and cover it while you bake the remaining rounds.
The trapped warmth helps preserve their soft, flexible texture.
### Step 10: Serve and enjoy
Serve the pita while warm, or let it cool before storing. Cut each round open to reveal the pocket and fill it with your favorite ingredients.
Try them with hummus, cucumber and tomato salad, grilled chicken, falafel, roasted vegetables, or a simple olive oil and herb dip.
### Description
These sourdough pita breads are soft, lightly chewy, and full of character. Their exterior develops delicate golden spots, while the inside forms a hollow pocket that makes them ideal for sandwiches and dipping.
The overnight fermentation gives the bread a deeper flavor than many quick flatbread recipes. Each puffed pita feels like a small baking achievement, especially when the pocket forms naturally without any extra effort.
They are delicious served straight from the oven, but they are also convenient for lunches, snacks, and easy weeknight dinners.
### Nutritional Information
The following values are estimates based on the suggested ingredient quantities and 15 pita breads. Actual nutrition will vary with the flour, starter composition, and optional olive oil.
| Nutrient | Approx. per pita |
| ————- | —————- |
| Calories | 145–160 kcal |
| Protein | 4–5 g |
| Carbohydrates | 28–31 g |
| Fiber | 1–2 g |
| Fat | 1–2 g |
| Sugar | Less than 1 g |
| Sodium | 250–300 mg |
Sourdough fermentation changes the dough’s flavor and structure, but it does not make ordinary wheat pita carbohydrate-free or automatically gluten-free. People who need to avoid gluten should use a specifically developed gluten-free recipe.
For a more filling meal, pair one pita with protein-rich hummus, beans, eggs, grilled chicken, or lentils, and add plenty of fresh vegetables.
### Conclusion
Homemade sourdough pita is a rewarding recipe that transforms simple ingredients into beautifully puffed, flavorful bread. The overnight cold fermentation adds depth, while careful rolling and a very hot cooking surface help create the signature pocket.
Once you understand how your starter behaves and how your oven performs, this recipe becomes easier to repeat. You can make a batch for family dinners, freeze extras for busy days, or enjoy warm pita whenever you prepare hummus or other Mediterranean-inspired dishes.
### Recommendation
For your first batch, keep the ingredients simple and concentrate on three essentials: a healthy starter, evenly rolled dough, and a thoroughly preheated cooking surface.
Serve these pitas with homemade hummus, a fresh tomato-and-cucumber salad, roasted vegetables, or grilled chicken. For convenient meal preparation, let the bread cool completely, store it in an airtight bag, and freeze any extras. Reheat briefly in a hot pan or oven to restore their softness.
If your pitas do not puff the first time, check the dough thickness, fermentation, and cooking temperature before changing the recipe. Small adjustments often make a noticeable difference.
### Embracing Healthful Indulgence
One of the joys of making bread at home is being able to choose your ingredients and decide how to serve it. These sourdough pitas contain no necessary added sugar and can be made with a modest amount of olive oil or without it altogether.
For a more balanced meal, pair them with vegetables, legumes, and a source of protein. You can also replace a portion of the white flour with whole-wheat flour for additional fiber, although this may change the dough’s texture and pocket formation.
Because ordinary pita is still a wheat-based carbohydrate food, portion size and accompanying ingredients matter if you are watching your carbohydrate intake. Enjoy it in a way that suits your needs, savor the flavor of slow fermentation, and appreciate the satisfaction of creating fresh bread in your own kitchen.