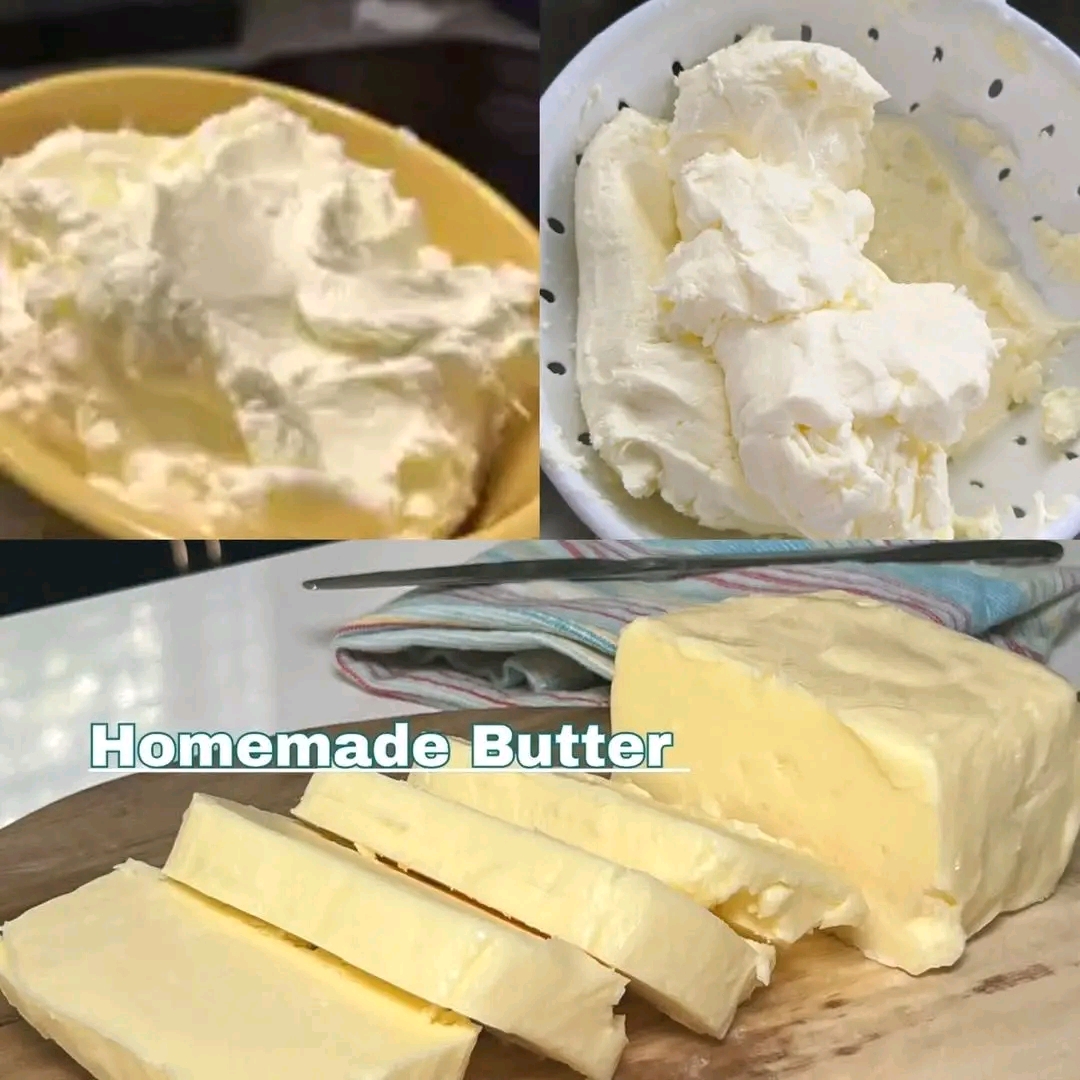
Homemade Butter in 5 Minutes Fresh, Creamy, and Easy to Make!
### Introduction
Making homemade butter is surprisingly simple! With just one main ingredient and a few minutes of mixing, you can transform ordinary heavy cream into fresh, creamy butter right in your own kitchen.
This easy recipe is perfect for anyone who loves homemade food and wants to know exactly what goes into their butter. The result is rich, flavorful, and wonderfully versatile. Spread it on warm sourdough bread, melt it over vegetables, or use it in your favorite baking recipes.
The best part? You don’t need a traditional butter churn or complicated equipment. An electric hand mixer, stand mixer, or food processor can do most of the work.
Preparation time: 5–10 minutes Servings: Approximately 100–120 g butter, depending on the cream used Main ingredient: Heavy whipping cream
Note: Five minutes is possible with some mixers, but the process may take 5–10 minutes or longer depending on the cream, equipment, and temperature.
### Origin
Butter-making is an ancient food-preservation technique that dates back thousands of years. Before modern refrigeration, people discovered that agitating milk or cream could separate its fat into butter, leaving behind a liquid known as buttermilk.
Traditional butter was made by shaking cream in animal-skin containers, wooden churns, and other vessels. Over time, butter-making techniques developed across Europe, the Middle East, Africa, and Asia, becoming an important part of many regional food traditions.
Today, homemade butter is easy to prepare with modern kitchen appliances, allowing home cooks to recreate this traditional process in just a few minutes.
### Cultural Significance
Butter has played an important role in kitchens around the world. It has been used for spreading on bread, enriching sauces, baking pastries, and adding flavor to everyday meals.
In many households, homemade butter represents simplicity, self-sufficiency, and the satisfaction of preparing food from scratch. It also allows cooks to customize the flavor with salt, herbs, garlic, or other seasonings.
For anyone who enjoys homemade bread, fresh butter is an especially satisfying companion. A slice of warm sourdough topped with freshly made butter is a simple pleasure that celebrates traditional home cooking.
### Ingredients Quantity
### Ingredients for homemade butter
* 500 ml heavy whipping cream, preferably with at least 35% milk fat
* ¼ teaspoon fine salt, optional
* Cold water or ice water, for rinsing
Equipment needed:
* Electric hand mixer, stand mixer, or food processor
* Large mixing bowl
* Fine-mesh strainer
* Spatula
* Airtight storage container
Yield: Approximately 180–220 g butter from 500 ml of cream, depending on its fat content and how thoroughly the butter is drained.
### Optional Additions
Once your butter is ready, you can customize it with delicious flavors.
* Garlic butter: Mix in finely minced garlic and chopped parsley.
* Herb butter: Add fresh chives, thyme, rosemary, or dill.
* Honey butter: Blend in a little honey for a sweet spread.
* Cinnamon butter: Add cinnamon and a small amount of your preferred sweetener.
* Lemon herb butter: Mix in finely grated lemon zest and fresh herbs.
* Smoked paprika butter: Add a pinch of smoked paprika for a savory finish.
* Sea salt butter: Sprinkle in flaky sea salt for a more pronounced buttery flavor.
For the best storage life, add fresh herbs and garlic only to small portions that you plan to use promptly.
### Tips for Success
* Choose high-fat cream. Heavy cream with at least 35% fat generally produces a good yield.
* Use a deep bowl. When the cream separates, liquid can splash, so a deep mixing bowl helps keep your kitchen clean.
* Be patient during mixing. The cream first becomes whipped cream, then thickens further before separating into yellow butter solids and liquid buttermilk.
* Watch for the separation stage. Once the butter forms, the liquid will separate noticeably. Stop the mixer when distinct butter clumps have formed.
* Rinse the butter thoroughly. Washing away residual buttermilk helps it keep longer.
* Press out excess water. Use a spatula or clean hands to work out as much liquid as possible.
* Add salt gradually. Start with a small amount, taste, and adjust to your preference.
* Keep everything clean. Clean equipment and careful refrigeration help preserve freshness.
### Instructions
### Step 1: Pour the cream into a bowl
Pour the cold heavy whipping cream into a deep mixing bowl. Make sure the bowl is large enough to accommodate splashing as the cream separates.
### Step 2: Beat the cream
Using an electric mixer, begin beating the cream on medium speed.
First, it will become fluffy whipped cream. Continue beating, and it will thicken further before suddenly separating into yellow butter clumps and a thin, pale liquid.
This usually takes around 5–10 minutes with an electric mixer, although timing varies.
### Step 3: Separate the butter
Once the butter has clearly separated, stop mixing.
Pour the liquid through a fine-mesh strainer into a clean container. This liquid is buttermilk, which can be saved for pancakes, biscuits, or other recipes if handled and refrigerated appropriately.
### Step 4: Rinse the butter
Transfer the butter solids to a bowl of very cold water.
Gently knead and press the butter with a spatula or clean hands to release the remaining milky liquid. Replace the water and repeat until the water stays nearly clear.
### Step 5: Remove excess moisture
Press the butter firmly with a spatula to remove as much water as possible.
This step is important because excess moisture and leftover buttermilk can shorten the butter’s storage life.
### Step 6: Add salt
If you prefer salted butter, add approximately ¼ teaspoon of salt and mix thoroughly. Taste and adjust as desired.
For unsalted butter, simply skip this step.
### Step 7: Shape and store
Shape the butter into a small block or place it in a clean, airtight container.
Refrigerate immediately. For longer storage, freeze it in a well-sealed container or wrap it tightly in portions.
### Description
Homemade butter is rich, creamy, and naturally flavorful, with a fresh taste that can be noticeably different from some commercially produced varieties.
The finished butter should be soft enough to spread after a short time at room temperature, yet firm when chilled. Salted butter has a pleasant savory finish, while unsalted butter offers a clean, creamy flavor that works beautifully in baking.
Its uses are practically endless: spread it on toast, melt it over vegetables, stir it into sauces, or use it to enrich homemade breads and pastries.
### Nutritional Information
Approximate nutritional values per 100 g of homemade butter made from heavy cream:
| Nutrient | Approximate amount |
| ————- | ———————- |
| Calories | 700–750 kcal |
| Protein | 0.5–1 g |
| Total fat | 78–83 g |
| Saturated fat | 48–53 g |
| Carbohydrates | 0.5–1.5 g |
| Sugars | 0.5–1.5 g |
| Sodium | Varies with added salt |
Values vary depending on the cream’s fat content and how thoroughly the butter is drained. Salted butter will contain more sodium.
Butter is energy-dense and high in saturated fat, so a moderate serving is a practical way to enjoy its flavor.
### Conclusion
Homemade butter is one of the simplest and most satisfying kitchen projects. With heavy cream, a mixer, and a little patience, you can make fresh butter without special equipment or complicated techniques.
It is delicious, customizable, and a wonderful way to make everyday meals feel a little more special. Once you try it, you may find yourself reaching for homemade butter whenever you have cream to use.
### Recommendation
For the best results, use fresh heavy cream and rinse the finished butter thoroughly. If you want to experiment, divide the butter into small portions and flavor each one differently.
Try garlic and parsley for savory dishes, fresh herbs for grilled vegetables, or a little honey for breakfast toast.
Store homemade butter in a clean, airtight container in the refrigerator and use it within about 5–7 days as a conservative home-storage guideline, especially if you are unsure how thoroughly it was washed. Freeze extra portions for longer storage. Always discard it if it develops an unusual smell, appearance, or taste.
Remember that homemade butter is not necessarily cheaper than store-bought butter; the cost depends on the price and fat content of your cream.
### Embracing Healthful Indulgence
Making butter at home gives you control over the ingredients and lets you avoid unnecessary flavorings or additives. You can choose unsalted butter, adjust the seasoning, and make only the quantity you need.
Here are a few ways to enjoy it thoughtfully:
* Practice portion awareness: A teaspoon adds rich flavor without requiring a large amount.
* Pair it with nourishing foods: Enjoy a little butter with whole-grain bread, vegetables, or a balanced homemade meal.
* Choose unsalted butter when useful: This allows you to control the amount of salt in your cooking.
* Customize the flavor: Fresh herbs, lemon zest, and spices can make a small amount feel especially satisfying.
* Reduce waste: Save the separated buttermilk for suitable recipes rather than throwing it away.
Homemade butter is still a dairy product rich in saturated fat, so making it yourself does not automatically make it healthier than commercial butter. The real benefit is freshness, ingredient control, and the enjoyment of making something from scratch.
Enjoy the process, savor the flavor, and share your homemade butter with family and friends!