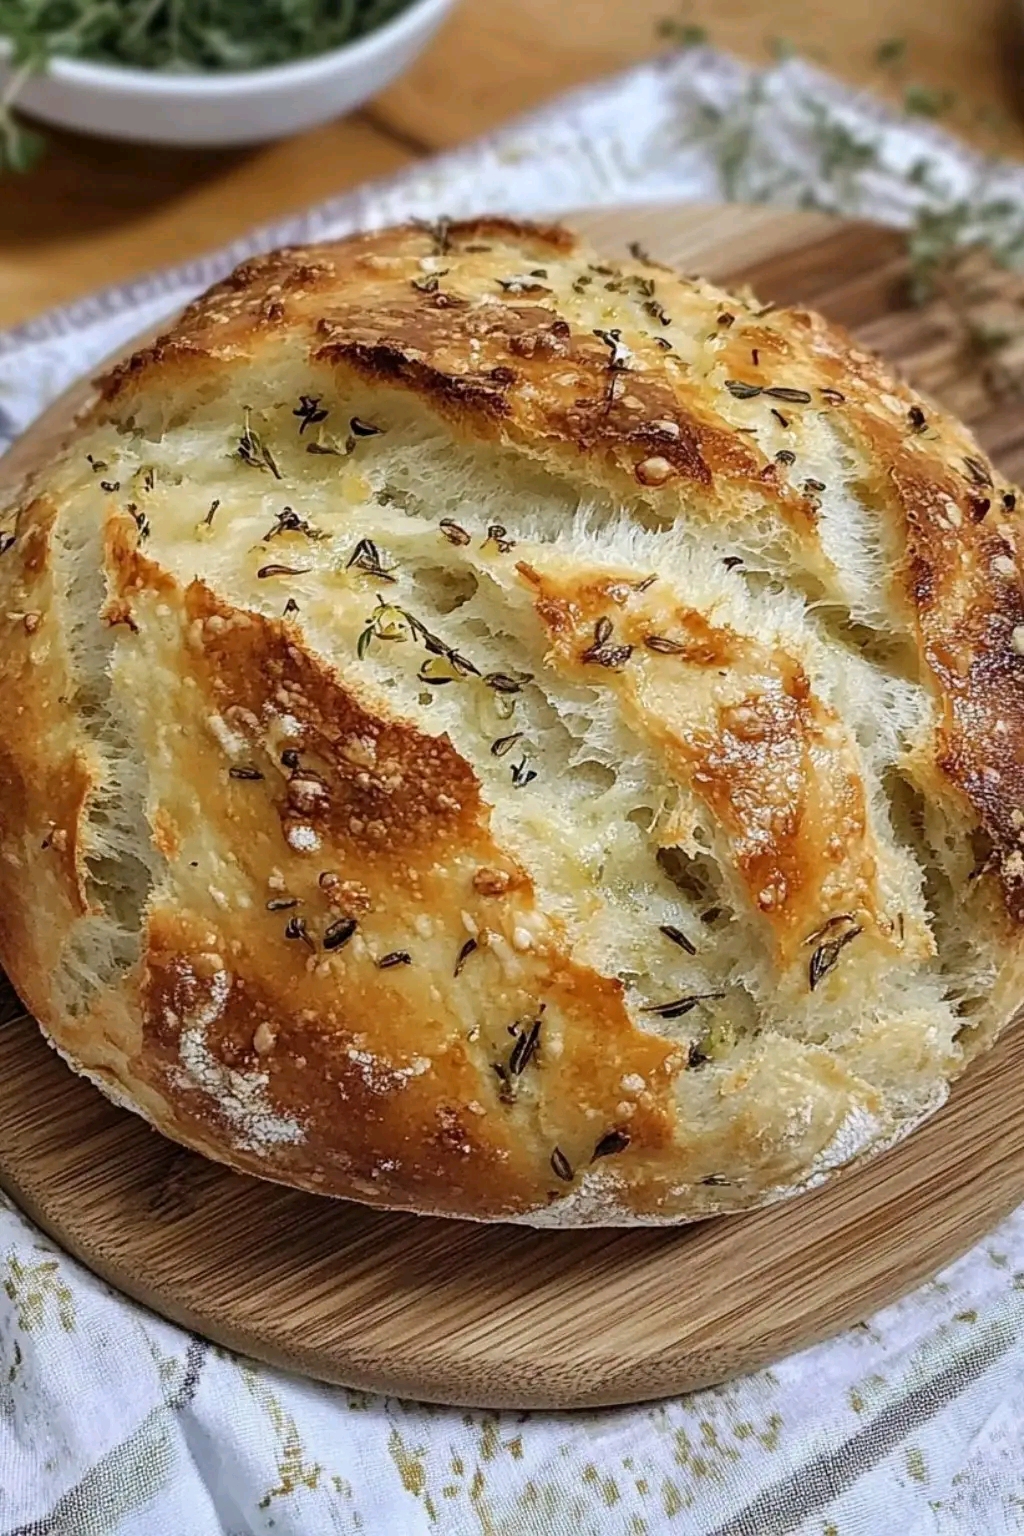
Easy No-Knead Garlic Bread A Simple Cup-Measured Recipe
### Introduction
There is nothing quite like the smell of freshly baked garlic bread filling your kitchen. This Easy No-Knead Garlic Bread is wonderfully crusty on the outside, soft and fluffy on the inside, and bursting with delicious garlic flavor. The best part? You don’t need a stand mixer, complicated techniques, or hours of kneading.
Using a simple cup-measurement method, this recipe is perfect for beginners and experienced home bakers alike. Just mix the ingredients, let the dough rise, add the garlic flavor, and bake until golden brown. It’s an easy homemade bread that pairs beautifully with soups, pasta, salads, and hearty family meals.
### Origin
Garlic bread is strongly associated with Italian-American cooking and the tradition of serving bread with garlic and olive oil or butter. Its inspiration comes partly from Italian preparations such as bruschetta, in which toasted bread is rubbed with garlic and dressed with olive oil.
The no-knead method became popular among home bakers because it allows time and fermentation to develop the dough’s texture and flavor instead of relying on extensive kneading. Combining this convenient technique with the familiar taste of garlic bread creates a simple, rustic loaf suited to everyday cooking.
### Cultural Significance
Bread has been a central part of family meals across many cultures for centuries. Homemade bread often represents hospitality, comfort, and the pleasure of sharing food with loved ones.
Garlic bread has become a favorite accompaniment at family dinners, Italian-inspired gatherings, and casual celebrations. This no-knead version makes that tradition more accessible, allowing anyone to enjoy the warmth and satisfaction of freshly baked bread without special equipment.
### Ingredients Quantity
Preparation time: 10–15 minutes Rising time: 1½–2 hours, depending on room temperature Baking time: 30–40 minutes Total time: Approximately 2½–3 hours Yield: 1 medium loaf
Since the original post doesn’t provide exact quantities, the following is a complete, practical version of the recipe.
### For the Bread
* 3 cups (375 g) all-purpose flour or bread flour
* 1 cup (240 ml) lukewarm water
* 2 teaspoons instant yeast (about 7 g)
* 1 teaspoon salt
* 1 teaspoon sugar, optional, to help the yeast get started
* 1 tablespoon olive oil
### For the Garlic Topping
* 3–4 garlic cloves, finely minced
* 2 tablespoons olive oil or melted butter
* 1 tablespoon chopped fresh parsley
* A small pinch of salt, to taste
* 2 tablespoons grated Parmesan cheese, optional
### Optional Additions
Customize your garlic bread with these delicious additions:
* Italian seasoning: Add 1 teaspoon to the dough or garlic topping.
* Fresh herbs: Use rosemary, thyme, or extra parsley for a fragrant loaf.
* Cheese: Sprinkle Parmesan or shredded mozzarella over the top before baking.
* Chili flakes: Add a pinch for a gentle spicy kick.
* Roasted garlic: Replace some of the raw garlic with roasted garlic for a milder, sweeter flavor.
* Seeds: Sprinkle sesame or sunflower seeds over the loaf for extra texture.
* Whole-grain flour: Replace a portion of the white flour with whole-wheat flour, adding a little extra water if needed.
### Tips for Success
* Measure the flour carefully. Spoon flour into the measuring cup and level it off rather than packing it down. A kitchen scale gives the most consistent results.
* Use lukewarm water. Very hot water can damage the yeast, while cold water may slow the rise.
* Expect a sticky dough. No-knead dough is usually softer and stickier than traditional bread dough. Avoid adding too much extra flour.
* Give the dough enough time. Let it rise until noticeably larger and airy. Cooler kitchens may require additional time.
* Don’t overload the dough with garlic oil. Too much oil mixed into the dough can affect its structure. Applying most of the garlic topping near the end of baking helps preserve the bread’s texture.
* Create a crisp crust. Preheat the oven thoroughly before baking.
* Check that the loaf is done. The crust should be golden brown, and the loaf should sound hollow when tapped on the bottom.
* Allow it to cool. Wait at least 15–20 minutes before slicing so the crumb can finish setting.
### Instructions
### Step 1: Mix the Dough
In a large mixing bowl, combine the flour, instant yeast, salt, and optional sugar. Add the lukewarm water and olive oil.
Stir with a wooden spoon until all the flour is incorporated and a rough, sticky dough forms. No kneading is necessary.
### Step 2: Let the Dough Rise
Cover the bowl with a clean kitchen towel or plastic wrap. Leave it in a warm place for approximately 1–2 hours, or until the dough has risen noticeably and looks airy.
The exact rising time will depend on the temperature of your kitchen.
### Step 3: Shape the Loaf
Lightly flour your work surface and turn out the dough. With lightly floured hands, gently shape it into a round or oval loaf.
Avoid working the dough excessively. Transfer it to a piece of parchment paper or a lightly greased baking tray.
Cover and let it rest for another 20–30 minutes while the oven preheats.
### Step 4: Preheat the Oven
Preheat your oven to 425°F (220°C).
If you prefer a softer crust, you can bake at 400°F (200°C), allowing a little more time for the loaf to cook through.
### Step 5: Prepare the Garlic Topping
In a small bowl, combine the minced garlic, olive oil or melted butter, parsley, and a pinch of salt.
Mix well and set aside. If you prefer a milder garlic flavor, lightly sauté the garlic in the oil for about 30 seconds, taking care not to burn it.
### Step 6: Bake the Bread
Bake the loaf for approximately 25–30 minutes, until the crust is golden brown.
Brush the top with the garlic mixture during the final 5–10 minutes of baking. If using Parmesan, sprinkle it over the loaf at this stage.
Continue baking until the garlic is fragrant and the bread is cooked through. Keep an eye on the garlic to prevent it from burning.
### Step 7: Cool and Serve
Remove the bread from the oven and brush with any remaining garlic oil, if desired.
Let it cool for 15–20 minutes before slicing. Serve warm for the best flavor and texture.
### Description
This no-knead garlic bread features a rustic golden crust, a tender interior, and a wonderful aroma of fresh garlic and herbs. Olive oil adds richness, while parsley brings freshness and color.
The dough comes together in minutes, making it a convenient option when you want homemade bread without complicated preparation. Serve thick slices alongside a comforting soup, pasta with tomato sauce, roasted vegetables, or your favorite family meal.
### Nutritional Information
Estimated nutrition per serving, assuming the loaf is divided into 8 portions and prepared with olive oil:
* Calories: 190–230 kcal
* Protein: 5–7 g
* Carbohydrates: 32–38 g
* Fat: 4–7 g
* Saturated fat: 0.5–2 g
* Fiber: 1–2 g
* Sugar: 0–2 g, depending on whether sugar is added
* Sodium: 250–400 mg
These values are approximate and vary with the flour, amount of oil, toppings, and portion size.
### Conclusion
Easy No-Knead Garlic Bread proves that homemade bread doesn’t need to be complicated. With a handful of everyday ingredients, a simple cup-measuring method, and a little patience while the dough rises, you can create a delicious loaf with a crisp crust and soft center.
Whether you’re baking for your family, preparing a weekend meal, or simply craving the aroma of fresh bread, this recipe is a wonderful addition to your kitchen.
### Recommendation
Serve this garlic bread fresh from the oven with tomato soup, vegetable soup, pasta, lasagna, roasted chicken, or a fresh garden salad.
For extra flavor, brush the warm loaf with a little olive oil mixed with fresh parsley and garlic. Leftovers can be sliced and toasted the next day or frozen in individual portions for convenience.
For the best results, store cooled bread in a bread bag or airtight container at room temperature for up to 2 days. Reheat slices briefly in the oven to restore some of their crispness.
### Embracing Healthful Indulgence
Homemade garlic bread can be enjoyed as part of a balanced diet. Making it yourself gives you control over the ingredients, salt, and amount of added fat.
For a more fiber-rich version, replace up to one-third of the white flour with whole-wheat flour and add a little extra water if the dough feels too stiff. Olive oil provides unsaturated fats, while fresh garlic and herbs bring plenty of flavor without requiring excessive salt.
For a flour-free or sugar-free approach: this traditional recipe is not suitable as written because it relies on wheat flour. You can experiment with a specifically developed gluten-free bread blend, but the water requirements and texture will differ. The optional sugar can be omitted without necessarily preventing the dough from rising, although fermentation may take a little longer.
Enjoy a warm slice mindfully, pair it with protein and vegetables, and savor the pleasure of freshly baked homemade bread. Sometimes, the simplest recipes bring the greatest comfort.