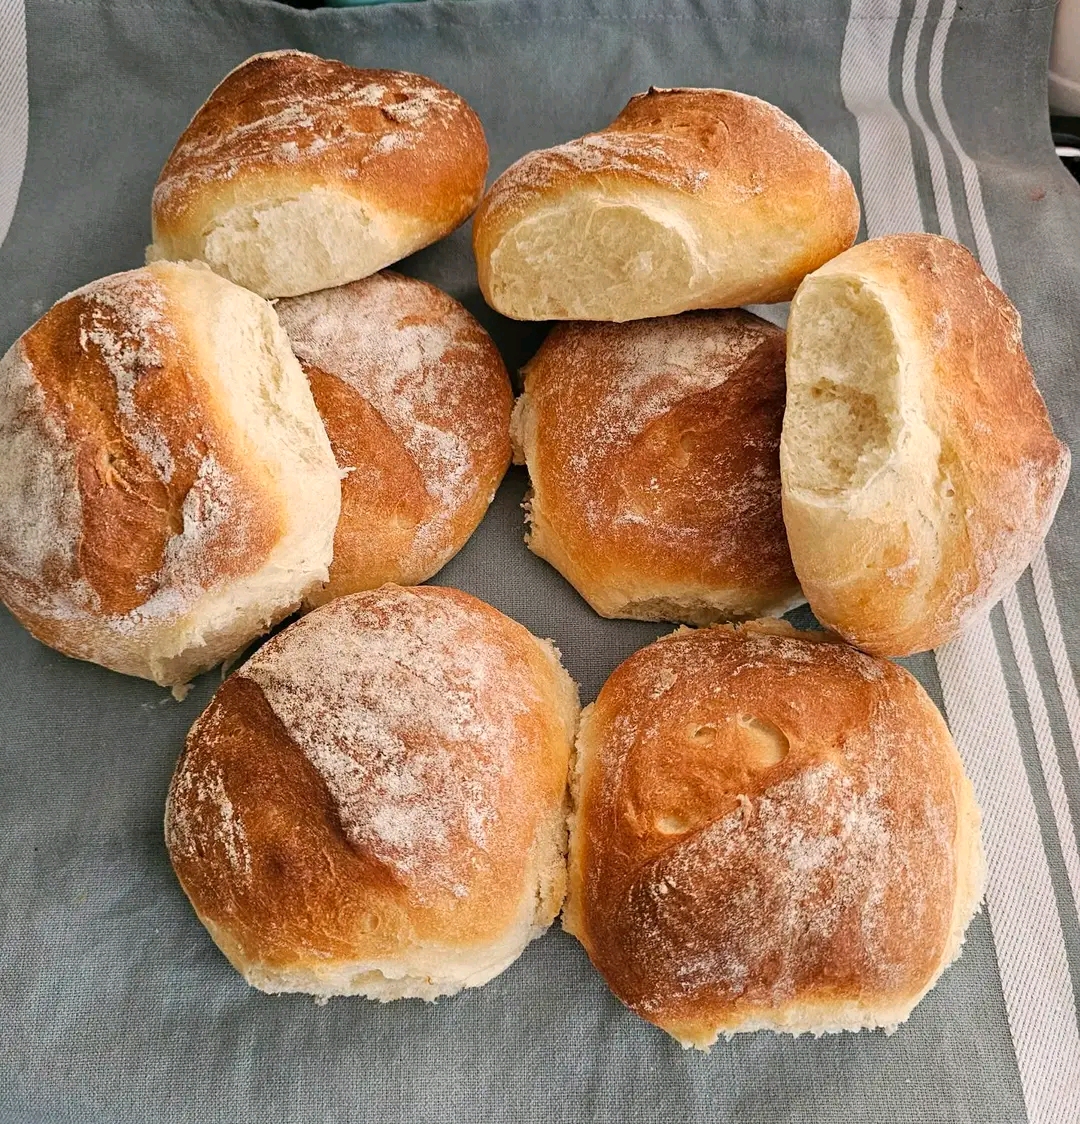
Homemade Bread Rolls Easy No-Fuss Milk Bread Rolls
### Introduction
There is something truly special about the smell of freshly baked bread filling the kitchen. These homemade bread rolls are simple, soft on the inside, and beautifully golden on the outside, making them perfect for breakfast, lunch, or dinner.
With just a handful of everyday ingredients, you can create eight delicious rolls without complicated techniques or special equipment. The combination of milk, water, a little butter, and honey gives the bread a lovely flavor and tender texture, while a light dusting of flour creates that classic bakery-style appearance.
After 54 years of cooking and baking, returning to homemade bread is a wonderful reminder that some of life’s simplest pleasures are also the most rewarding. Whether you’re an experienced baker or just beginning your bread-making journey, this recipe is a lovely place to start.
### Origin
Homemade bread rolls have a long history across European baking traditions. Bakers have used flour, yeast, water, milk, and salt for generations to create everyday breads that are both practical and delicious.
Milk-enriched rolls became popular in many households because milk and butter help produce a softer crumb and a more delicate flavor than lean bread dough. Small individual rolls are especially convenient because they can be served alongside soups, stews, roasted meats, or enjoyed with butter and jam.
This particular recipe combines traditional bread-making methods with the convenience of instant yeast, making fresh homemade rolls achievable even on a busy day.
### Cultural Significance
Bread has always represented comfort, hospitality, and togetherness in many cultures. A basket of warm rolls on the table can turn an ordinary meal into something special.
For many home cooks, baking bread is also connected to family memories, recipes passed down through generations, and the satisfaction of creating something by hand. Returning to bread-making after years of cooking and baking is a beautiful way to reconnect with an old passion.
These simple rolls celebrate that tradition: no elaborate ingredients, no complicated equipment, just the pleasure of making and sharing fresh bread at home.
### Ingredients Quantity
Yield: 8 bread rolls
Preparation Time: 20 minutes First Proof: 45 minutes Second Proof: 30 minutes Baking Time: Approximately 25 minutes Total Time: Approximately 2 hours, including resting and shaping
* 500 g bread flour
* 7 g salt
* 200 ml milk
* 160 ml water
* 10 g butter
* 1 teaspoon honey
* 7 g instant yeast
* A little extra flour for dusting
* Water for creating steam in the oven
### Optional Additions
You can customize these rolls to suit your taste:
* Sesame or poppy seeds: Sprinkle over the rolls before baking for extra texture.
* Mixed herbs: Add 1–2 teaspoons of dried rosemary, thyme, or mixed herbs to the flour.
* Garlic butter: Brush the warm rolls with melted garlic butter after baking.
* Wholemeal flour: Replace up to 100 g of the bread flour with wholemeal flour for a heartier texture. You may need a little extra water.
* Cheese: Add 50–75 g of grated cheese for savory rolls.
* Olive oil: Replace the butter with olive oil for a slightly different flavor.
* Seeds and grains: Add sunflower seeds or pumpkin seeds for extra crunch.
### Tips for Success
* Check the liquid temperature. Warm the milk and water to approximately 30°C. The liquid should feel comfortably warm, not hot.
* Measure accurately. Weighing the flour and other ingredients helps produce consistent results.
* Know your yeast. Instant yeast can usually be mixed directly into the flour. If you want to check that it is active, you can first mix it with the warm liquid and honey, although instant yeast does not always visibly bloom like active dry yeast.
* Keep the dough covered. Covering it during proofing prevents the surface from drying out.
* Use flour sparingly when shaping. Too much extra flour can make the rolls dry and prevent the dough from sticking together properly.
* Shape gently. Folding each portion and rolling it into a ball helps create a smooth surface and an even rise.
* Allow enough proofing time. Dough rises according to temperature and yeast activity, so look for visibly puffed rolls rather than relying entirely on the clock.
* Create steam safely. Place a sturdy oven-safe dish in the oven before preheating and add hot water carefully. Avoid pouring water onto the oven floor or glass door.
* Check for doneness. The rolls should be golden and sound slightly hollow when tapped underneath. If they need more time, continue baking rather than relying only on the timed oven shutoff.
### Instructions
### Step 1: Prepare the liquid mixture
Warm the milk and water together to approximately 30°C. Add the butter and honey, stirring until the butter begins to soften and the honey dissolves.
Stir in the instant yeast. Leave for about 5 minutes if you wish to check its activity.
### Step 2: Mix the dough
Place the bread flour and salt in a large mixing bowl. Pour in the liquid mixture and stir with a spatula until a rough dough forms.
Fold the dough toward the center repeatedly until the ingredients come together. The dough should be soft and slightly tacky.
### Step 3: First proof
Cover the bowl with clingfilm or a clean, damp tea towel. Leave the dough in a warm place for approximately 45 minutes, or until it has visibly risen.
### Step 4: Divide the dough
Lightly flour your work surface and turn out the dough. Gently press it down to release some of the air, then shape it into a rectangle.
Divide it into eight equal portions. For evenly sized rolls, weigh the portions if possible; each piece will weigh approximately 110 g before baking.
### Step 5: Shape the rolls
Take one piece of dough and flatten it gently into a small rectangle. Fold it into thirds, then roll it up from one side.
Turn the dough seam-side down. Cup your hand around it and gently pull it toward you across the work surface to create a smooth, round ball.
Repeat with the remaining seven pieces.
### Step 6: Arrange and score
Place the rolls on a parchment-lined baking tray, leaving enough space between them for expansion.
Dust the tops lightly with flour and make a shallow slit across each roll using a sharp knife or bread lame.
### Step 7: Second proof
Cover the rolls loosely and leave them to rise for approximately 30 minutes, or until they look noticeably puffier.
Meanwhile, preheat the oven to 220°C fan (approximately 240°C conventional). Place a sturdy oven-safe dish inside to heat, ready for the steam.
### Step 8: Bake the rolls
Carefully add hot water to the preheated oven-safe dish to create steam. Place the tray of rolls in the oven.
Bake for 15 minutes at 220°C fan. The original method then switches off the oven and leaves the rolls inside for another 10 minutes.
Important baking note: Oven-shutoff baking depends on the oven retaining sufficient heat, so it may not work consistently in every oven. For reliable results, keep the oven on and bake until the rolls are golden and cooked through, usually around 20–25 minutes in total. Adjust the time as needed for your oven.
### Step 9: Cool and enjoy
Remove the rolls from the oven and transfer them to a wire rack. Let them cool before serving so the inside has time to finish setting.
Enjoy them warm with butter, alongside your favorite meal, or filled with delicious sandwich ingredients.
### Description
These homemade milk bread rolls have a delicate crust, a soft interior, and a subtle sweetness from the honey. The milk and butter give them a tender crumb, while the steam helps the crust develop during baking.
Their rustic flour-dusted tops and simple round shape make them look like rolls from a traditional bakery. They are delicious fresh from the oven and versatile enough for almost any meal.
### Nutritional Information
Estimated nutrition per roll, based on eight rolls:
* Calories: 240–270 kcal
* Protein: 7–9 g
* Carbohydrates: 45–50 g
* Fat: 3–4 g
* Fiber: 1.5–2.5 g
* Sugar: 2–4 g
* Sodium: Approximately 300–400 mg
These figures are estimates and will vary according to the flour, milk, roll size, and amount of flour used for dusting.
### Conclusion
Homemade bread does not have to be complicated to be delicious. These easy milk bread rolls demonstrate how a few everyday ingredients and a little patience can produce something truly satisfying.
The soft crumb, golden crust, and comforting aroma make them ideal for family meals, weekend baking, or simply enjoying with your favorite spread. Best of all, making bread at home gives you control over the ingredients and the pleasure of serving something made with your own hands.
Whether you have baked for decades or are only just rediscovering the joy of bread-making, this recipe is worth keeping in your collection.
### Recommendation
Serve these rolls warm with butter, homemade soup, roasted vegetables, or a hearty stew. They also make excellent breakfast rolls with eggs or avocado, and they are perfect for sandwiches the following day.
For storage, keep completely cooled rolls in an airtight container at room temperature for up to 2–3 days. Freeze them for longer storage, ideally for up to 3 months, and thaw at room temperature before reheating.
For a crisp crust, warm the rolls in an oven at 160–180°C for a few minutes. If you prefer a softer crust, wrap them loosely in foil while reheating.
My favorite tip: Bake a double batch and freeze half. That way, you can enjoy fresh-tasting homemade bread whenever you need it without starting from scratch.
### Embracing Healthful Indulgence
Homemade bread can be part of a balanced eating pattern. Preparing it yourself lets you choose the ingredients, control the salt, and avoid unnecessary additives commonly found in some commercial products.
For a little more fiber, replace a portion of the white bread flour with wholemeal flour. You can also add seeds for additional texture and nutrients, keeping in mind that they will change the nutritional values.
If you are avoiding added sugar, the teaspoon of honey can be omitted; it contributes only a small amount to the whole batch. The rolls will still rise because the yeast can use carbohydrates naturally present in the flour.
For anyone avoiding white flour, a different recipe using wholegrain flour or a suitable flour alternative would be needed, as simply replacing all the bread flour can substantially change the dough’s texture and rise.
The real joy of homemade bread is finding a balance between nourishment, tradition, and pleasure. A freshly baked roll enjoyed mindfully alongside a nourishing meal can be a wonderful part of everyday life.