The Ultimate Brazilian Cheese Bread Pão de Queijo Golden Cheesy and Pillowy Perfect
Few baked goods spark immediate culinary joy quite like a warm, freshly baked batch of authentic cheese bread. Originating from the heart of Minas Gerais, Brazil, traditional pão de queijo has transformed from a regional specialty into a beloved global phenomenon. What makes this bread completely unique is its remarkable, contrasting textures—an incredibly crispy, golden outer crust that gives way to a soft, stretchy, and delightfully chewy center. Unlike standard wheat-based dinner rolls, this delicacy relies on alternative starches, making it naturally gluten-free without sacrificing an ounce of structure or satisfying elasticity. Bringing a batch to life in your own kitchen fills your home with an irresistible, rich cheese aroma and offers a comforting treat that pairs beautifully with a morning cup of black coffee or an evening gathering.
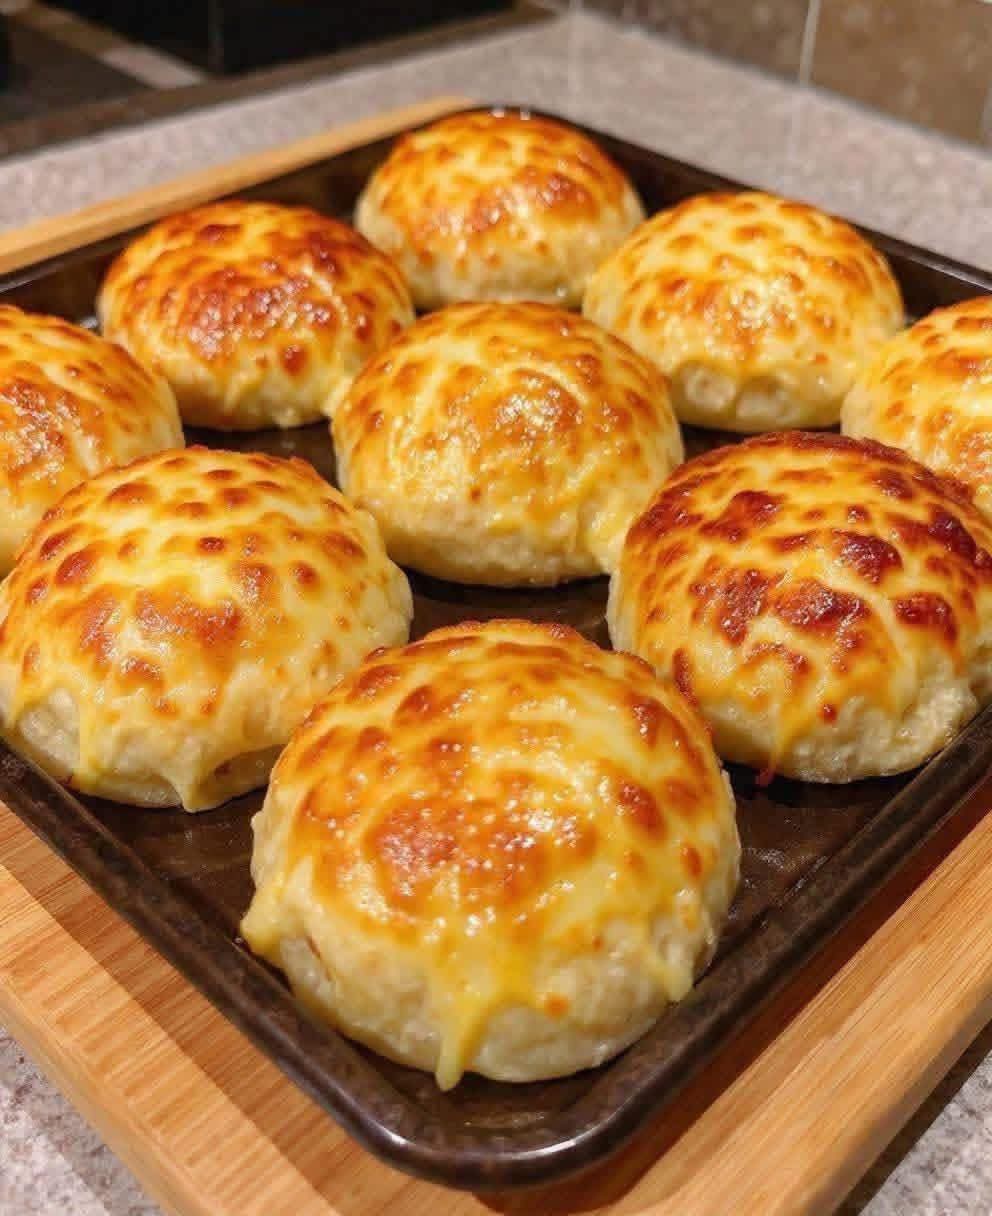
Crafting premium cheese rolls requires understanding a few simple, non-traditional baking techniques designed to gelatinize starches and build a pillowy structure. By prioritizing flavorful, aged cheeses and the correct variety of tapioca, you can achieve the spectacular, professional results displayed in 1000005826.jpg. As you can see in the visual guide, a flawlessly executed batch bakes into uniform, puffed domes covered in a gorgeous, bubbling leopard-spotted cheese crust. Transforming basic kitchen staples into these indulgent, golden spheres is highly accessible, requires zero specialized bread-kneading machinery, and delivers a quick path to homemade comfort that will delight your entire household.
The Chemistry of the Perfect Chewy Rise
To truly master this unique bread, it helps to understand the fascinating science behind its distinctive texture. Traditional breads rely on gluten networks to trap gas and create a light structure. Cheese bread completely bypasses wheat, achieving its characteristic chewy internal web through a process known as starch gelatinization.
Why Tapioca Flour Changes Everything
The foundational bedrock of this recipe is tapioca flour, also commonly sold as tapioca starch, which is derived from the dried cassava root. Cassava starch contains a remarkably high ratio of amylopectin, a complex molecule that becomes incredibly sticky, elastic, and clear when mixed with hot liquids. When you scald the tapioca flour with boiling milk, water, and oil during the initial preparation phase, you are physically cooking the starch granules, causing them to swell and burst. This creates a thick, elastic paste that functions exactly like gluten, allowing the dough to expand dramatically in the oven and retain its moisture, resulting in that iconic, pillowy interior pull.
The Role of Aged Cheeses in Flavor and Form
While the tapioca provides the physical framework, the cheese selection dictates the ultimate flavor profile and surface appearance. Authentic Brazilian recipes utilize Queijo Minas Padrão or Queijo Canastra, which are semi-hard, aged cow’s milk cheeses with a distinct sharp, salty tang. In international kitchens, a combination of sharp white cheddar, nutty unpasteurized Parmesan, or aged Gruyère creates an impeccable flavor match. As the rolls bake, the oils in the cheese melt into the expanding starch matrix. The cheese resting on the outer surface undergoes the Maillard reaction, caramelizing into the gorgeous, deeply browned, and mottled crust showcased in 1000005824.jpg and 1000005826.jpg, which locks in the internal steam and keeps the centers incredibly soft.
Step-by-Step Ingredients and Sourcing Guide
Achieving the vibrant color, high puff, and rich flavor profile displayed in the baking pan from 1000005826.jpg requires sourcing the correct type of starch. Building your grocery list around high-quality whole foods ensures your homemade cheese rolls are completely free from the artificial thickeners or stabilizers found in commercial freezer alternatives.
The Ingredients Checklist
- 2 cups Tapioca Flour (Tapioca Starch): Ensure you purchase pure tapioca flour. For a more authentic, slightly sour, and airy Brazilian variation, look for polvilho azedo (fermented sour cassava starch) at a local international market, though standard sweet tapioca flour (polvilho doce) works beautifully for a denser, more uniform roll.
- 1/2 cup Whole Milk: Adds necessary fat and lactose sugars to help the dough tenderize and promote even browning on the crust.
- 1/2 cup Filtered Water: Combines with the milk to provide the perfect liquid volume required to thoroughly scald the starch granules.
- 1/3 cup Neutral Cooking Oil or Unsalted Butter: High-quality avocado, canola, or melted butter introduces crucial lipids that coat the starch membranes, keeping the interior of the rolls soft and pliable.
- 2 large Eggs: Room temperature. Eggs act as the primary emulsifier and secondary leavening agent, providing the protein lift needed to puff the dough into perfect round spheres.
- 1 cup Packed Finely Shredded Sharp Cheddar or Monterey Jack: Provides a rich, gooey body and excellent melting characteristics inside the dough matrix.
- 1/2 cup Finely Grated Parmesan or Romano Cheese: Adds an indispensable, sharp, salty umami note that creates the intense, mottled golden crust visible in 1000005826.jpg.
- 1/2 teaspoon Fine Sea Salt: To elevate the natural flavors of the dairy and cassava starch.
Step-by-Step Culinary Assembly Instructions
Bringing these spectacular cheese rolls to life requires a medium saucepan to boil your liquids and a sturdy mixing bowl or stand mixer to incorporate the sticky dough. Patience during the cooling phase before adding the eggs will pay massive dividends, preventing the eggs from scrambling and ensuring a smooth, cohesive batter.
Scalding the Starch Base
Begin by preheating your oven to 400°F (205°C) and lightly greasing a non-stick baking sheet or a specialized muffin/tart pan, similar to the structured baking tray layout featured in 1000005826.jpg. In a medium saucepan, combine the whole milk, filtered water, neutral cooking oil (or unsalted butter), and fine sea salt. Place the pan over medium-high heat and bring the liquid to a full, rolling boil, stirring occasionally to ensure the oil and dairy are thoroughly integrated.
While the liquid is heating, place your 2 cups of tapioca flour into a large, heat-safe mixing bowl. The moment the liquid mixture boils up to the top of the pan, remove it from the heat and immediately pour it all at once directly into the tapioca flour. Use a sturdy wooden spoon or a silicone spatula to vigorously stir the mixture. The flour will instantly transform from a fine white powder into a thick, incredibly sticky, and slightly lumpy white paste. Continue stirring for 2 to 3 minutes to ensure no dry pockets of flour remain, then spread the dough out against the sides of the bowl and let it rest undisturbed for 5 to 7 minutes until it cools down to a lukewarm temperature.
Incorporating Dairy and Shaping the Dough
Once the scalded starch has cooled slightly, add the first egg to the bowl. If using a stand mixer equipped with a paddle attachment, turn it to medium-low speed; if working by hand, prepare for a brief workout as the dough will resist integration initially. Beat continuously until the egg is completely absorbed into the shiny paste. Add the second egg and repeat the process, mixing until a smooth, thick, and highly cohesive batter forms. The mixture should feel incredibly sticky and elastic, holding its shape when lifted with a spoon.
Dump in your shredded sharp cheddar and finely grated Parmesan cheeses. Mix vigorously for another minute until the cheeses are uniformly distributed throughout the elastic dough. To shape the rolls without the sticky dough adhering to your skin, lightly coat your hands in a few drops of cooking oil or water. Scoop out roughly 2 tablespoons of dough and roll it gently between your palms to form a smooth, neat sphere about the size of a golf ball. Place the portioned spheres onto your prepared baking sheet, leaving about two inches of space between each roll to allow for their dramatic expansion.
Masterclass Baking and Serving Protocols
The final transformation from pale dough spheres into the magnificent, bubbling cheese delicacies seen in 1000005826.jpg depends on maintaining a hot oven environment and serving them during their peak freshness window.
Achieving the Leopard-Spotted Crust
Slide the loaded baking tray onto the center rack of your preheated 400°F oven. Bake undisturbed for 15 to 20 minutes. Avoid opening the oven door during the first 10 minutes of baking, as the sudden drop in temperature can disrupt the expanding steam pockets, causing the puffed centers to collapse. As the rolls cook, they will balloon outward into perfect, smooth domes.
To match the rich, artisanal appearance displayed in 1000005826.jpg, look for the outer surface to turn a light cream color flecked with deep, caramelized golden-brown spots. The cheese should bubble actively on the crust, forming a crunchy, savory outer shell. If the rolls are fully puffed but still pale at the 15-minute mark, you can leave them in for an additional 2 to 3 minutes, watching closely to ensure the delicate dairy oils do not scorch.
The Peak Consumption Window
Remove the tray from the oven and allow the cheese bread to cool down on a wire rack for a mere 2 to 3 minutes. Unlike heavy yeast loaves that require a long cooling window to settle their crumb, pão de queijo is designed to be eaten hot, straight from the oven. Breaking one open while steaming reveals an incredibly airy, soft, and stretchy interior texture that melts in your mouth. Serve them immediately in a napkin-lined basket to trap the residual warmth, keeping the melted cheese interior perfectly pliable throughout your meal or snack time.
Inspiring Flavor Variations and Customizations
The rich, comforting dairy backdrop of this traditional recipe makes it an excellent blank canvas for a wide array of gourmet herb, spice, and protein infusions depending on your culinary goals.
Aromatic Herb and Savory Adjustments
If you want to bake complex, modern flavors directly into the traditional dough structure, try these simple modifications during the final mixing phase:
- The Garlic Herb Twist: Finely mince 2 cloves of fresh garlic and a tablespoon of fresh rosemary or chives. Fold them into the batter along with the cheeses to create an intensely fragrant, savory roll that pairs perfectly with pasta or grilled meats.
- The Spicy Bacon Infusion: Fold in 1/3 cup of finely chopped, crisply fried bacon bits and a pinch of smoked paprika. The smoky bacon fat pairs exceptionally well with the sharp cheddar, creating a highly decadent, pub-style snack.
- The Jalapeño Popper Variation: Seed and finely dice half of a fresh jalapeño pepper, folding it directly into the dough. The sharp capsaicin heat cuts through the heavy dairy richness, providing a delightful, warming contrast with every bite.
Advanced Storage and Future Reheating Protocols
Because these cheese rolls take minimal time to assemble and shape, preparing a double batch to store for future quick breakfasts or unexpected guests is an excellent, time-saving strategy for busy home cooks.
Freezing Raw Dough for Instant Baking
One of the most extraordinary attributes of this recipe is how well the raw dough balls preserve in the freezer. After portioning and shaping the dough spheres with oiled hands, place them side-by-side on a parchment-lined baking sheet and slide the entire tray into the freezer for 2 hours until the balls are frozen completely solid. Transfer the frozen spheres into a heavy-duty, freezer-safe zip-top bag and store them for up to 3 months. When you are ready to enjoy fresh bread, there is no need to thaw the dough; simply place the frozen balls directly onto a baking sheet and bake them in a preheated 375°F (190°C) oven for 22 to 25 minutes until they puff up beautifully into the golden, blistered rounds shown in 1000005826.jpg.
Reheating Baked Leftovers
If you have leftover already-baked cheese rolls, store them in an airtight container inside the refrigerator for up to 4 days. Never consume them cold straight from the fridge, as the starches temporarily tighten up, making the bread feel dense and rubbery. To fully restore them to their original pillowy perfection, avoid the microwave, which can make the tapioca dough excessively tough. Instead, place the cold rolls into a toaster oven or standard oven at 350°F (175°C) for 5 to 6 minutes until the outer crust crisps back up and the cheese center becomes completely gooey and melted once more.
Frequently Asked Questions
Can I use regular wheat flour instead of tapioca flour?
No, regular all-purpose or bread flour cannot be used as a substitute in this recipe. The entire structural elasticity, unique chew, and dramatic puff of pão de queijo depend explicitly on the unique high-amylopectin behavior of cassava root starch. Using wheat flour with this liquid ratio will result in a heavy, liquid batter rather than a shapeable dough ball.
Why did my cheese rolls turn out flat and dense instead of puffing up?
If your rolls fail to expand into the beautiful round domes visible in 1000005826.jpg, the culprit is almost always omitting or rushing the liquid boiling phase. If the milk, water, and oil mixture is merely warm rather than a full, rolling boil when it hits the tapioca flour, it will fail to cook and gelatinize the starch granules. Ensure your liquid is bubbling vigorously right up to the rim of your pan before pouring it over the flour to guarantee a strong, structurally sound rise.
Is it normal for the dough to feel incredibly sticky during shaping?
Yes, because of the high moisture and starch content, this dough is naturally far stickier than traditional yeast doughs. To make shaping effortless and maintain clean hands, simply rub a few drops of neutral cooking oil or a splash of cool water over your palms before rolling each ball.
Cultivating Joy with Simple Baking Traditions
In a busy modern world full of complex recipes and temperamental baking windows, returning to the honest simplicity of traditional cheese bread provides a grounding sense of joy and vitality. This authentic pão de queijo serves as a magnificent reminder that the most satisfying, comforting foods are often born from a minimal collection of wholesome, accessible ingredients handled with care. By mastering the simple art of scalding starch and allowing premium cheeses to blister over a hot flame, you transform basic root flours and dairy into a golden masterpiece that brings warmth to your table. Set a beautiful basket, break open a steaming roll, and savor the timeless comfort of a homemade tradition crafted entirely by your own hands.