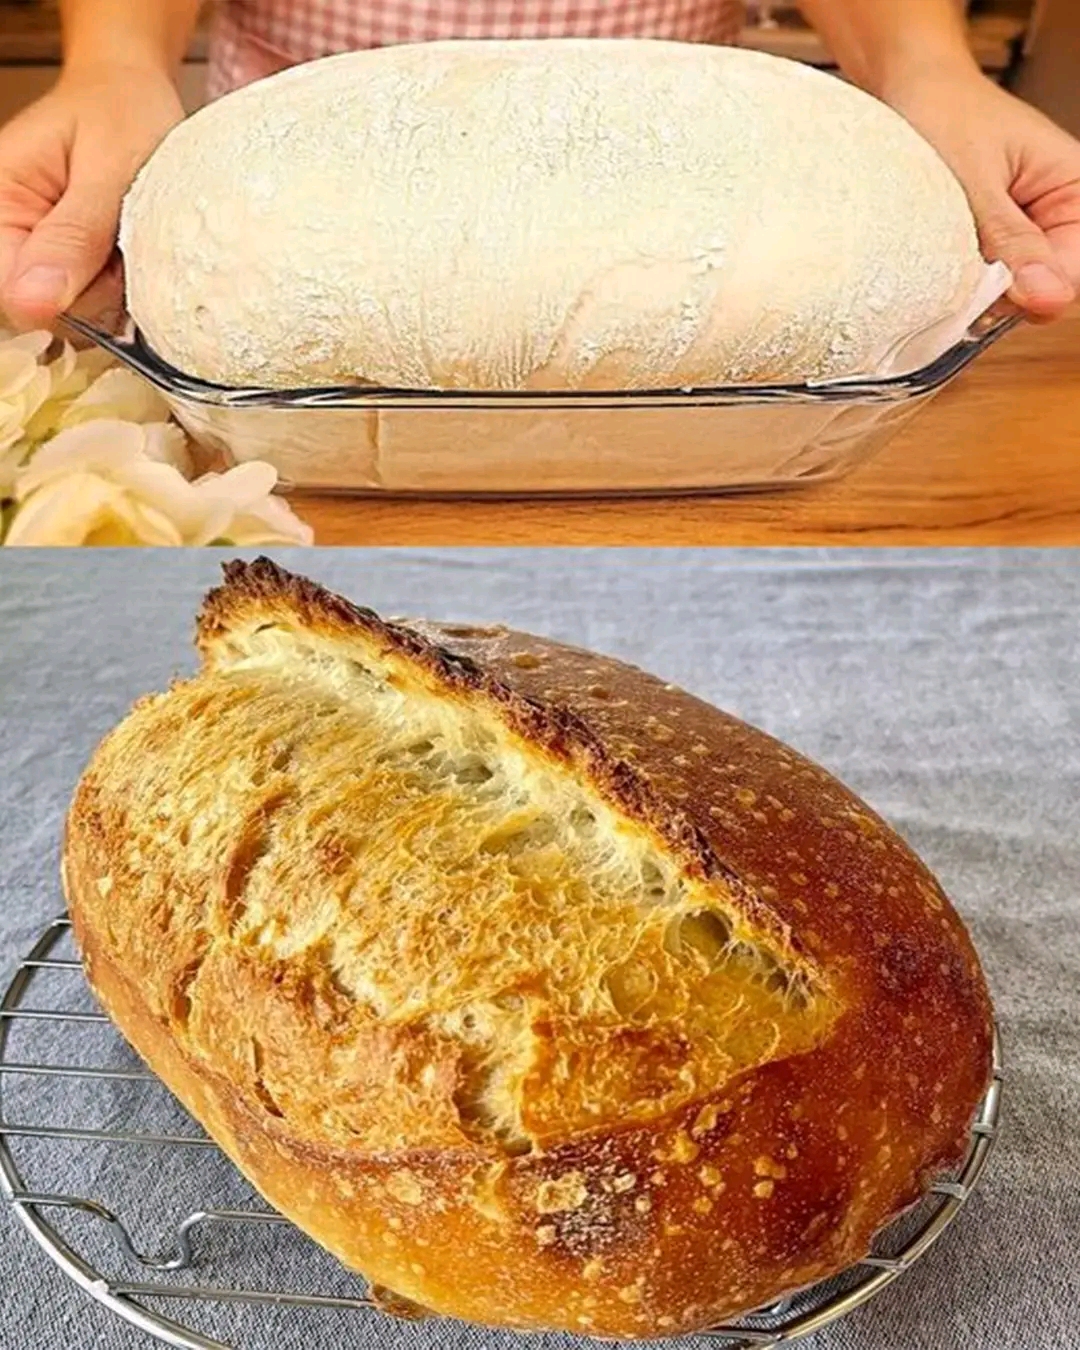
Traditional German Bread Baked in a Romertopf (Römertopf-Hausbrot
Preparation Time: 20 minutes Rising Time: 1½–2 hours Cooking Time: 55–65 minutes Total Time: Approximately 3 hours Servings: 1 large loaf (10–12 slices) Difficulty: Easy
### 1\. Introduction
There is something truly special about the smell of freshly baked homemade bread filling the kitchen. This traditional German-style house bread, baked in a Römertopf (clay baking pot), delivers everything you could want from a homemade loaf: a beautifully crispy golden crust, a soft and aromatic interior, and a wonderfully rustic appearance.
The secret lies in the clay pot, which retains moisture during baking and creates an environment similar to a traditional bread oven. The result is delicious bakery-quality bread without complicated equipment or advanced baking skills.
Once you discover how easy it is to bake bread this way, you may find yourself buying bread from the store much less often!
### 2\. Origin
The Römertopf is a traditional German clay cooking pot that became especially popular in German households during the 1960s and 1970s. Inspired by ancient Roman-style clay cooking vessels, it was designed to cook food gently while preserving moisture and flavor.
Although originally used for preparing meat, vegetables, and casseroles, home bakers soon discovered that the clay pot was also excellent for baking bread.
German farmhouse bread, known as Hausbrot, has a long tradition. It was commonly prepared at home using simple ingredients such as flour, water, yeast, and salt. Baking bread in a covered clay pot brings together this traditional approach and modern home baking convenience.
### 3\. Cultural Significance
Homemade bread holds an important place in German food culture. Bread is traditionally enjoyed at breakfast, dinner, and throughout the day, often served with butter, cheese, cold cuts, or homemade spreads.
The German tradition of Abendbrot, or evening bread, celebrates simple meals built around fresh bread and delicious toppings.
Baking bread in a Römertopf also represents the comfort of traditional home cooking. It encourages people to slow down, prepare something from scratch, and enjoy the satisfaction of sharing a freshly baked loaf with family and friends.
### 4\. Ingredients Quantity
For one large homemade loaf:
* 500 g wheat flour (Type 550 or bread flour)
* 350 ml lukewarm water
* 7 g dry yeast (or 21 g fresh yeast)
* 10 g salt
* 1 teaspoon sugar or honey (optional, to help activate the yeast)
* 1 tablespoon olive oil (optional)
* 1 tablespoon vinegar (optional, for a slightly more flavorful dough)
For preparing the Römertopf:
* Cold water for soaking the clay pot, if required by the manufacturer’s instructions
* A little flour for dusting
### 5\. Optional Additions
Customize your homemade bread with these delicious additions:
* Sunflower seeds: Add 2 tablespoons for a nutty flavor.
* Pumpkin seeds: Add 2 tablespoons for extra crunch.
* Flaxseeds: Add 1–2 tablespoons for additional fiber.
* Rolled oats: Replace 50 g of flour with oats for a heartier loaf.
* Rye flour: Replace 100 g of wheat flour with rye flour for a more traditional rustic taste.
* Chopped walnuts: Add 50 g for a rich, earthy flavor.
* Dried herbs: Rosemary, thyme, or oregano create a fragrant loaf.
* Garlic: Add 1–2 minced cloves for a savory variation.
### 6\. Tips for Success
* Use the correct water temperature: Lukewarm water helps activate the yeast. Avoid hot water, which can damage it.
* Measure accurately: Bread dough depends on the correct balance of flour and water.
* Knead thoroughly: Knead for approximately 8–10 minutes until the dough becomes smooth and elastic.
* Allow enough rising time: The dough should approximately double in size before baking.
* Prepare the clay pot correctly: Follow the manufacturer’s instructions for soaking and temperature changes. Some modern clay pots do not require soaking.
* Avoid sudden temperature changes: Traditional clay pots can crack if exposed to thermal shock.
* Create a crispy crust: Remove the lid during the final 10–15 minutes of baking.
* Let the bread cool: Allow the loaf to cool before slicing so the inside can finish setting properly.
### 7\. Instructions
Step 1: Prepare the yeast
Pour the lukewarm water into a large mixing bowl. Add the dry yeast and optional sugar or honey. Stir gently and let stand for approximately 5–10 minutes until the yeast begins to activate.
Step 2: Mix the ingredients
Add the flour, salt, and optional olive oil and vinegar. Mix everything until a rough dough forms.
Step 3: Knead the dough
Transfer the dough to a lightly floured surface. Knead for 8–10 minutes until smooth, elastic, and slightly tacky.
Step 4: First rise
Place the dough in a lightly greased bowl. Cover with a clean kitchen towel and leave it in a warm place for approximately 1–1½ hours, or until doubled in size.
Step 5: Shape the bread
Gently remove the dough from the bowl and shape it into a round or oval loaf. Avoid pressing out all the air. Place it on baking parchment and allow it to rest for another 20–30 minutes.
Step 6: Prepare the Römertopf
Prepare your clay pot according to its manufacturer’s instructions. If soaking is required, soak it in cold water as directed. Make sure the pot is ready for the dough.
Step 7: Transfer the dough
Carefully place the shaped loaf into the Römertopf, using parchment paper if desired. Lightly dust the surface with flour and score the top with a sharp knife.
Step 8: Bake the bread
Place the bread inside the prepared clay pot and cover with the lid.
For a traditional unheated clay Römertopf, place it in a cold oven and then set the oven to 220°C (425°F). Bake for approximately 45–50 minutes, depending on your pot and oven.
Always follow your particular pot’s temperature instructions. If using a model designed for preheated ovens, follow its specific baking guidance instead.
Step 9: Create the crispy crust
Carefully remove the lid and continue baking for another 10–15 minutes until the bread develops a deep golden-brown crust.
Step 10: Cool and serve
Remove the bread from the clay pot and transfer it to a wire rack. Allow it to cool for at least 45–60 minutes before slicing.
Enjoy your homemade German house bread!
### 8\. Description
This Römertopf homemade bread has a beautiful rustic appearance with a golden, crunchy crust and a soft, fluffy interior. Every slice offers a satisfying texture and a delicious homemade aroma.
The clay pot helps maintain moisture during baking, allowing the bread to develop a wonderful crust while keeping the inside tender.
It is perfect for breakfast with butter and jam, alongside soups and stews, or served with cheese, olives, and fresh vegetables.
### 9\. Nutritional Information
Estimated nutritional values per slice (based on 12 slices):
| Nutrient | Amount |
| ————- | ——– |
| Calories | 155 kcal |
| Protein | 4.5 g |
| Carbohydrates | 31 g |
| Fat | 1 g |
| Fiber | 1.2 g |
| Sugar | 0.5 g |
| Sodium | 325 mg |
Values are approximate and depend on the flour used, optional ingredients, and slice size.
### 10\. Conclusion
Baking homemade bread in a Römertopf is a wonderful way to bring traditional German baking into your kitchen. With just a handful of everyday ingredients and a little patience, you can create a loaf that tastes fresh, comforting, and delicious.
The crispy crust, soft interior, and beautiful rustic appearance make this bread a recipe worth keeping. Once you experience the difference, homemade bread may become a regular part of your kitchen routine.
### 11\. Recommendation
Serve this bread warm with butter, homemade herb spread, avocado, or your favorite cheese.
It also pairs beautifully with:
* Homemade vegetable soup.
* Beef stew or hearty casseroles.
* Fresh tomato and cucumber salad.
* Scrambled eggs for breakfast.
* Olive oil and herbs for dipping.
For the best experience, slice the bread only after it has cooled sufficiently. Store leftovers in a breathable bread bag or bread box to help preserve the crust.
### 12\. Embracing Healthful Indulgence
Homemade bread offers an opportunity to enjoy simple ingredients while having control over what goes into your food.
You can make this recipe more nutritious by incorporating whole-grain flour, rye flour, oats, flaxseeds, or sunflower seeds. These additions can increase the fiber and mineral content of the loaf.
For a version without added sugar, simply leave out the optional honey or sugar. The yeast can still ferment using naturally available sugars from the flour.
If you prefer to avoid white flour, you can experiment with whole-wheat flour, but you may need to adjust the water quantity and expect a denser loaf.
The beauty of homemade baking is that you can adapt recipes to your preferences without sacrificing the pleasure of enjoying fresh, delicious bread. ❤️