Homemade Sourdough Starter How to Create, Feed, and Maintain Your Own Doughboy!
### Introduction
There is something truly special about having your own sourdough starter. It’s more than just an ingredient; it’s a living culture that grows, develops, and helps transform simple flour and water into delicious homemade bread.
Whether you call yours Doughboy, Bubbles, Breadzilla, or something completely unique, maintaining a sourdough starter can become one of the most rewarding parts of home baking.
A healthy, active starter produces beautifully risen bread with a delicious tangy flavor, chewy texture, and crisp crust. Once you learn how to care for it, your starter can become a faithful baking companion for years!
### Origin
Sourdough is one of the oldest forms of leavened bread-making, dating back thousands of years. Long before commercial baker’s yeast became available, people relied on naturally occurring wild yeast and beneficial bacteria to make their bread rise.
Traditional sourdough techniques developed across ancient civilizations, including Egypt and regions of the Middle East and Europe.
The process involves capturing naturally occurring microorganisms from flour and the surrounding environment, allowing them to ferment and create a living starter that can be maintained and reused.
### Cultural Significance
Sourdough bread holds a special place in baking traditions around the world.
For generations, families have passed sourdough starters from one baker to another, sometimes maintaining the same culture for decades. In many households, starters are treated almost like family members and given funny, affectionate names.
Sourdough also represents patience, creativity, self-sufficiency, and the joy of homemade food.
Today, home bakers enjoy experimenting with different flours, fermentation times, hydration levels, and baking techniques to create their own signature loaves.
### Ingredients Quantity
Preparation Time: 10 minutes per feeding Fermentation Time: Approximately 5–7 days for a new starter Total Time: 5–7 days or longer, depending on activity Yield: Approximately 150–200 g of starter, depending on feeding schedule
### Ingredients for a New Sourdough Starter
* 50 g whole-wheat flour or rye flour
* 50 g unchlorinated water, at room temperature
### Daily Feeding Ingredients
* 50 g existing sourdough starter
* 50 g bread flour or all-purpose flour
* 50 g water
The daily feeding quantities use a 1:1:1 feeding ratio by weight.
### Optional Additions
You can experiment with different flours to develop your starter:
* Whole-wheat flour: Provides nutrients that encourage fermentation.
* Rye flour: Often helps starters become active more quickly.
* Bread flour: Creates a reliable starter for bread baking.
* Unbleached all-purpose flour: A convenient everyday option.
* Filtered water: Useful if your tap water contains high levels of chlorine.
* Whole-grain spelt flour: Adds variety to your feeding routine.
You don’t need sugar, honey, or commercial yeast to create a traditional sourdough starter.
### Tips for Success
* Use a clean glass jar with enough room for the starter to expand.
* Weigh your ingredients using a kitchen scale for consistent results.
* Keep your starter at a comfortable room temperature, ideally around 70–78°F (21–26°C).
* Use a loose-fitting lid rather than sealing the jar tightly.
* Feed consistently according to your starter’s activity and temperature.
* Mark the starter’s starting level with a rubber band so you can monitor its growth.
* Don’t panic if your starter smells slightly sour, fruity, or tangy.
* A starter is generally ready for bread-making when it reliably doubles in volume after feeding.
* Avoid using a starter with fuzzy mold or unusual pink or orange discoloration.
* Be patient! Every starter develops at its own pace.
### Instructions
### Step 1: Day One – Create Your Starter
In a clean glass jar, combine:
* 50 g whole-wheat or rye flour
* 50 g room-temperature water
Mix until no dry flour remains.
Cover loosely and leave at room temperature for 24 hours.
### Step 2: Day Two – First Feeding
Check your starter for small bubbles or changes in smell.
Discard all but 50 g of starter.
Add:
* 50 g flour
* 50 g water
Mix thoroughly, cover loosely, and leave for another 24 hours.
### Step 3: Days Three and Four – Build Activity
Continue feeding your starter every 24 hours using the same quantities:
* 50 g starter
* 50 g flour
* 50 g water
You may notice bubbles, expansion, and a slightly sour aroma.
Sometimes a new starter rises dramatically on the third day and then becomes quiet. This is normal and doesn’t mean it has failed.
### Step 4: Days Five Through Seven – Strengthen the Starter
Continue the daily feeding routine.
As the wild yeast and beneficial bacteria establish themselves, the starter should become more predictable.
Look for:
* Numerous small bubbles.
* A pleasantly tangy smell.
* Consistent rising after feeding.
* A doubling in volume within approximately 4–8 hours under suitable conditions.
Some starters need 10–14 days or even longer before they become strong enough for baking.
### Step 5: Maintain Your Starter
Once your starter is reliably active, you can maintain it in different ways.
Room-temperature maintenance:
Feed regularly, often once or twice daily depending on temperature and feeding ratio.
Refrigerator maintenance:
If you bake less frequently, store the starter in the refrigerator and feed approximately once a week. Before baking, give it one or more room-temperature feedings until it becomes active again.
### Step 6: Use Your Starter for Baking
When your starter reaches its peak after feeding, use the amount required by your favorite sourdough bread recipe.
Remember to keep some starter behind so you can continue feeding and maintaining your beloved Doughboy!
### Description
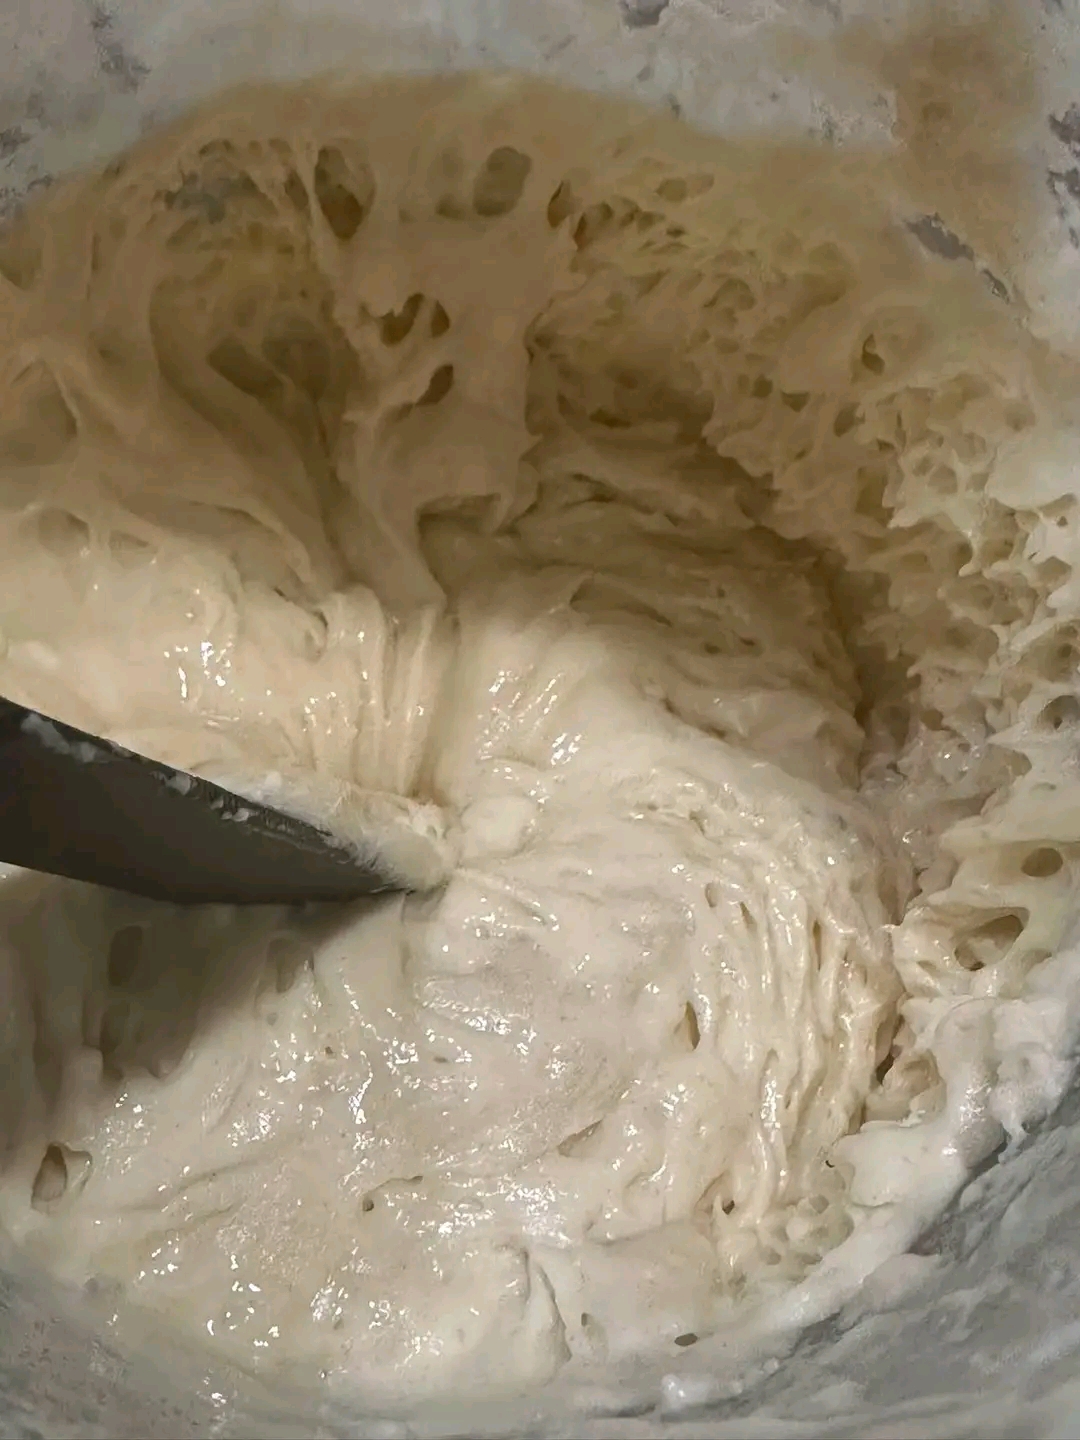
A healthy sourdough starter is thick, bubbly, stretchy, and full of natural fermentation activity.
After feeding, it gradually expands as wild yeast produces carbon dioxide. Its aroma develops from mild and floury to pleasantly tangy and fermented.
Every starter has its own personality. Some rise quickly, others take their time, and each develops unique characteristics depending on flour, temperature, hydration, and feeding routine.
The best part? Once established and properly maintained, your starter can keep producing delicious homemade bread again and again.
### Nutritional Information
Sourdough starter is primarily made from flour and water. Its nutritional values depend on the flour used and how much starter is included in a finished recipe.
Approximate nutritional values per 100 g of 100% hydration starter:
| Nutrient | Amount |
| ————- | ——– |
| Calories | 165 kcal |
| Protein | 5.5 g |
| Carbohydrates | 34 g |
| Fat | 0.7 g |
| Fiber | 1.5 g |
| Sugar | 0.2 g |
These are estimates for a whole-wheat and white-flour mixture. Fermentation changes some carbohydrates and organic compounds, so actual values vary.
### Conclusion
Creating and maintaining a sourdough starter is a beautiful baking tradition that rewards patience and consistency.
With just flour, water, and regular feedings, you can develop a living culture that helps produce flavorful homemade bread.
Whether your starter is called Doughboy, Bubbles, or something entirely different, taking care of it can become one of your favorite kitchen routines.
And remember, a strong starter is built through consistency, not perfection!
### Recommendation
Here are a few wonderful ways to enjoy your sourdough starter:
* Bake a classic artisan sourdough loaf.
* Make homemade sourdough pita bread.
* Prepare fluffy sourdough English muffins.
* Try sourdough pizza dough.
* Make homemade sourdough tortillas.
* Use sourdough discard for pancakes, crackers, and savory flatbreads.
My favorite suggestion: Keep a small baking journal recording feeding times, flour types, room temperature, and how long your starter takes to double. This makes it much easier to understand its behavior.
### Embracing Healthful Indulgence
Sourdough baking can be part of a balanced approach to homemade eating. Fermentation develops distinctive flavors and organic acids, and some sourdough breads may have a different glycemic response compared with conventional breads, depending on the recipe and fermentation process.
For a more fiber-rich loaf, experiment with whole-grain rye, whole-wheat flour, or seeds.
If you prefer avoiding white flour, you can maintain a starter using whole-grain rye or whole-wheat flour and explore suitable whole-grain sourdough recipes.
Remember that sourdough bread is not automatically gluten-free or carbohydrate-free, even when naturally fermented.
A little flour, a little water, plenty of patience, and a whole lot of love. That’s the magic of sourdough! ❤️
Let’s talk sourdough! What have you named your starter? Is yours Doughboy, Bubbles, or something even funnier? Share its name in the comments!