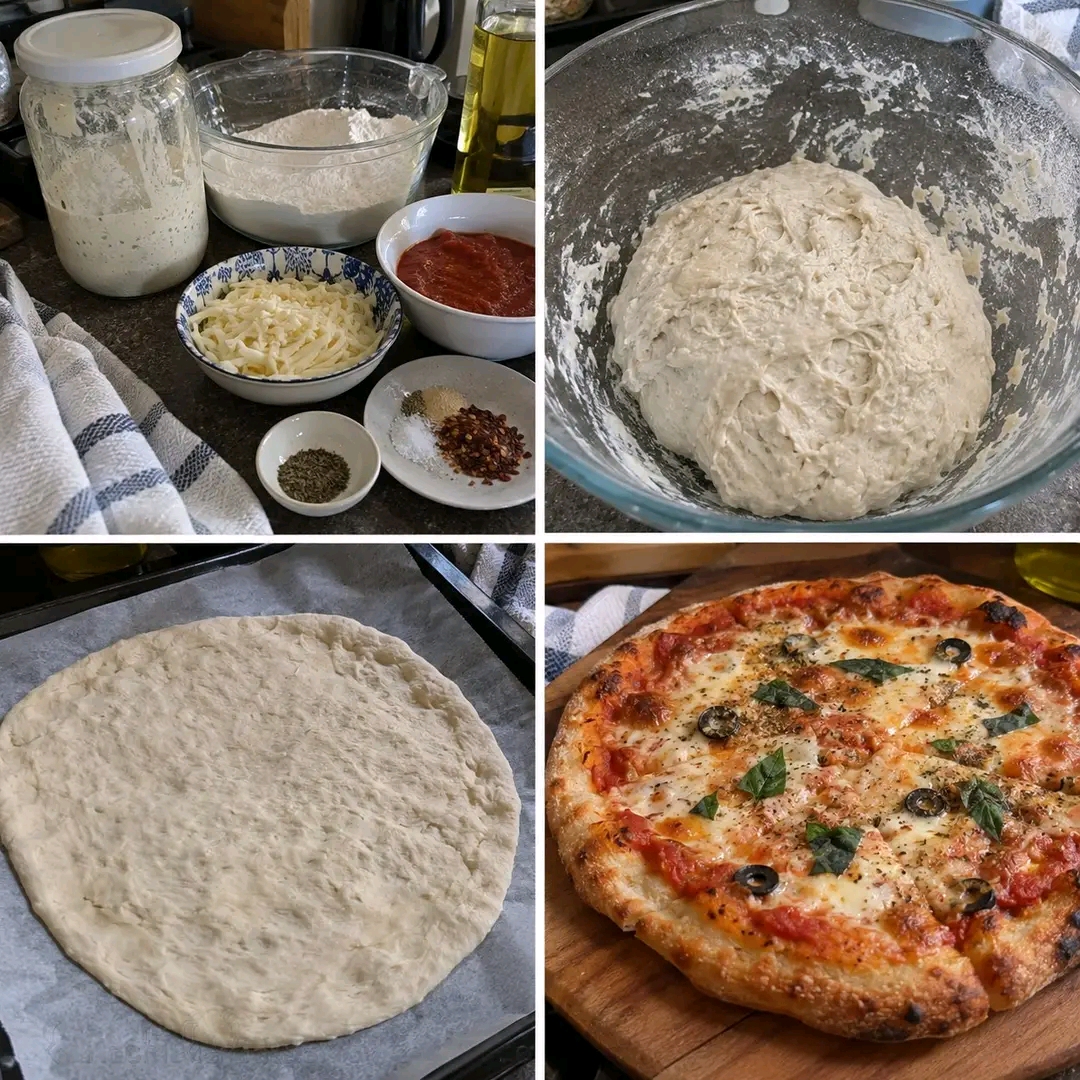
Homemade Pan Pizza with a Crispy, Bubbled Crust
### 1\. Introduction
Once you master this homemade pan pizza method, frozen pizza may become a thing of the past! With a chewy interior, a crackly, golden-brown bottom, and beautifully bubbled edges, this pizza delivers the satisfying texture of a pizzeria-style pie right in your own kitchen.
The secret lies in three simple techniques: allowing the dough to ferment slowly in the refrigerator, freezing individual dough portions for convenient future meals, and cooking the shaped dough in a very hot oven-safe pan before transferring it to the oven.
Best of all, you can prepare several portions ahead of time and keep them in the freezer. When pizza night arrives, you have homemade dough ready to turn into a delicious meal.
Preparation Time: 25 minutes Cold Fermentation: 24–72 hours Cooking Time: 10–15 minutes per pizza Servings: 4 individual pizzas Difficulty: Intermediate
### 2\. Origin
Pizza originated in Italy, with Naples playing a central role in the development of the modern pizza. Over generations, bakers refined dough fermentation, shaping, and high-temperature baking to produce flavorful crusts with distinctive textures.
Pan pizza developed into several styles around the world. Unlike traditional thin Neapolitan pizza, pan pizza often uses a more substantial crust and relies on contact with a hot cooking surface to develop a deeply browned bottom.
This recipe combines traditional dough fermentation with a practical modern technique: starting the pizza in a hot skillet on the stovetop before finishing it in the oven. The result is a homemade pizza with a crisp base and a tender, airy interior.
### 3\. Cultural Significance
Pizza is more than a convenient dinner. It is a meal associated with family gatherings, celebrations, weekend traditions, and sharing food with friends.
Homemade pizza also encourages creativity. Each person can choose a favorite sauce, cheese, or topping, making it easy to prepare different pizzas from the same batch of dough.
The freezer-friendly approach makes this tradition even more accessible. Preparing dough in advance means you can enjoy a homemade meal on a busy evening without having to start from scratch.
### 4\. Ingredients Quantity


### For the pizza dough
* 500 g (approximately 4 cups) bread flour
* 325 g (325 ml) cool water
* 10 g fine sea salt
* 2 g instant yeast
* 10 g olive oil
* 1 teaspoon sugar, optional
### For the toppings
* 1 cup (240 g) pizza sauce
* 300 g shredded mozzarella cheese
* 100–150 g pepperoni or your favorite cooked toppings
* 1 teaspoon dried oregano
* Fresh basil leaves, optional
* A little olive oil for the pan
These quantities make approximately four individual pizzas, depending on how much dough you use for each one.
### 5\. Optional Additions
Customize your pizza with these delicious ingredients:
* Garlic and herbs: Add garlic powder, oregano, or Italian seasoning to the dough or sauce.
* Extra cheese: Combine mozzarella with Parmesan or provolone.
* Vegetables: Try mushrooms, bell peppers, red onions, spinach, or olives.
* Spicy toppings: Add chili flakes, jalapeños, or spicy sausage.
* Fresh finish: Top the cooked pizza with fresh basil or a little extra-virgin olive oil.
* Whole-wheat variation: Replace up to 20–25% of the bread flour with whole-wheat flour, adding a little extra water if needed.
Keep moist toppings in moderation so the crust stays crisp.
### 6\. Tips for Success
* Weigh your ingredients: A kitchen scale gives more consistent dough than measuring flour by cups.
* Use a long, cold fermentation: Refrigerating the dough for 24–72 hours develops flavor and improves the crust’s texture.
* Allow the dough to warm up: After refrigeration or freezing, give the dough sufficient time to become relaxed and pliable before shaping.
* Handle the dough gently: Avoid pressing out every air bubble; some of those bubbles help create a light, airy crust.
* Preheat the skillet thoroughly: A hot, oven-safe skillet helps the bottom brown quickly. Cast iron works particularly well.
* Use a thin layer of oil: Too much oil can make the base greasy rather than crisp.
* Avoid excessive toppings: A heavy layer of sauce and cheese can prevent the center from cooking properly.
* Watch the heat: If the base browns too quickly before the top is cooked, reduce the stovetop heat and finish the pizza in the oven.
* Check your cookware: Use only a skillet rated for the oven temperature you choose, and protect your hands when handling it.
### 7\. Instructions

Step 1: Mix the dough
Combine the bread flour, instant yeast, and optional sugar in a large bowl. Add the water and mix until no dry flour remains. Let the mixture rest for 15–20 minutes, then add the salt and olive oil. Knead until the dough becomes smoother and elastic.

Step 2: Begin fermentation
Cover the dough and let it rest at room temperature for about 20–30 minutes. Give it a gentle fold if needed to strengthen the dough, then transfer it to a covered container in the refrigerator.

Step 3: Cold-ferment and portion
Refrigerate the dough for 24–72 hours. Divide it into four equal portions and shape each gently into a ball. Place the portions in lightly oiled, airtight containers. For easier handling, you can portion the dough before the cold fermentation instead.

Step 4: Freeze portions for later
If you’re not using the dough immediately, freeze the individual portions in freezer-safe airtight containers or bags. For the best results, thaw a portion overnight in the refrigerator, then let it sit covered at room temperature for approximately 1–2 hours, or until soft and easy to stretch. Dough should not be expected to cook well straight from frozen.

Step 5: Shape the pizza
Preheat your oven to 250°C (480°F), or as high as your oven-safe skillet and equipment safely permit. Gently stretch one dough portion into a round that fits your skillet. Let it rest for several minutes if it keeps shrinking back.

Step 6: Start the pizza in the skillet
Heat a lightly oiled oven-safe skillet over medium-high heat until thoroughly hot. Carefully place the dough in the skillet and cook for approximately 1–3 minutes, watching the bottom closely. Lower the heat if it begins to burn.

Step 7: Add the toppings
Spread a thin layer of pizza sauce over the dough. Add mozzarella, pepperoni, and your preferred toppings. Avoid overloading the center, and keep the skillet handle positioned safely.

Step 8: Finish in the oven
Transfer the skillet carefully to the preheated oven. Bake for approximately 5–10 minutes, or until the cheese is bubbling and the crust is cooked through. Cooking times vary by oven and skillet, so check the bottom and center before removing the pizza.

Step 9: Rest and serve
Remove the skillet with oven mitts and place it on a heatproof surface. Allow the pizza to rest for 2–3 minutes, then transfer it to a cutting board, slice, and serve.
### 8\. Description
This homemade pan pizza features a beautifully browned, crisp bottom, airy edges, and a soft, chewy center. The slow fermentation gives the dough a deeper flavor, while the hot skillet encourages the crust to develop a satisfying crunch.
The melted mozzarella, rich tomato sauce, and savory toppings create a classic pizza combination that can be adapted to suit almost any taste.
The best part is the convenience: with individual dough portions stored in the freezer, homemade pizza becomes an easy option for busy weeknights, spontaneous gatherings, or relaxed weekends.
### 9\. Nutritional Information
Approximate nutrition per serving, assuming four pizzas made from the full dough recipe with moderate amounts of sauce, mozzarella, and pepperoni:
| Nutrient | Approximate amount |
| ————- | —————— |
| Calories | 650–800 kcal |
| Protein | 25–32 g |
| Carbohydrates | 75–95 g |
| Fat | 22–32 g |
| Fiber | 3–5 g |
| Sugar | 4–7 g |
| Sodium | 900–1,400 mg |
Actual values depend on the flour, cheese, sauce, oil, and toppings used. These figures are estimates rather than laboratory-tested nutritional data.
### 10\. Conclusion
Homemade pan pizza proves that a little preparation can make a big difference. Slow-fermented dough, individual freezer portions, and a hot skillet create a pizza with a crispy base and flavorful, airy crust.
Once you have a batch of dough ready, you can enjoy fresh homemade pizza whenever the craving strikes without relying on frozen supermarket pizza.
### 11\. Recommendation
For the best results, prepare the dough at least one day ahead so it has time to ferment slowly. Freeze any portions you won’t use within a few days, and thaw them safely in the refrigerator before baking.
Serve your pizza with a fresh green salad, roasted vegetables, or a simple tomato and cucumber salad. For a lighter option, use a little less cheese and add extra vegetables.
My favorite tip: Keep the dough portions individually packaged and labeled with the preparation date. That way, you can plan ahead, reduce food waste, and enjoy fresh pizza with minimal effort.
### 12\. Embracing Healthful Indulgence
Homemade pizza can be part of a balanced eating pattern, and preparing it yourself gives you greater control over the ingredients.
* Add mushrooms, peppers, onions, and other vegetables for more variety and fiber.
* Use moderate amounts of cheese and processed meats.
* Try a partial whole-wheat crust for extra fiber.
* Choose a tomato sauce with little or no added sugar.
* Pair your pizza with a fresh salad for a more balanced meal.
* Adjust the salt and toppings to suit your preferences.
If you prefer to avoid white flour or dairy, you can experiment with a suitable whole-grain or gluten-free dough and dairy-free cheese. These substitutions may change the dough’s hydration, texture, and cooking time, so use a recipe designed for those ingredients when possible.
The real pleasure of homemade pizza is enjoying the flavors you love while knowing exactly what goes into every slice. With this make-ahead method, delicious, crispy pizza can be both convenient and satisfying.