Perfectly Crispy Bread Buns
### Introduction
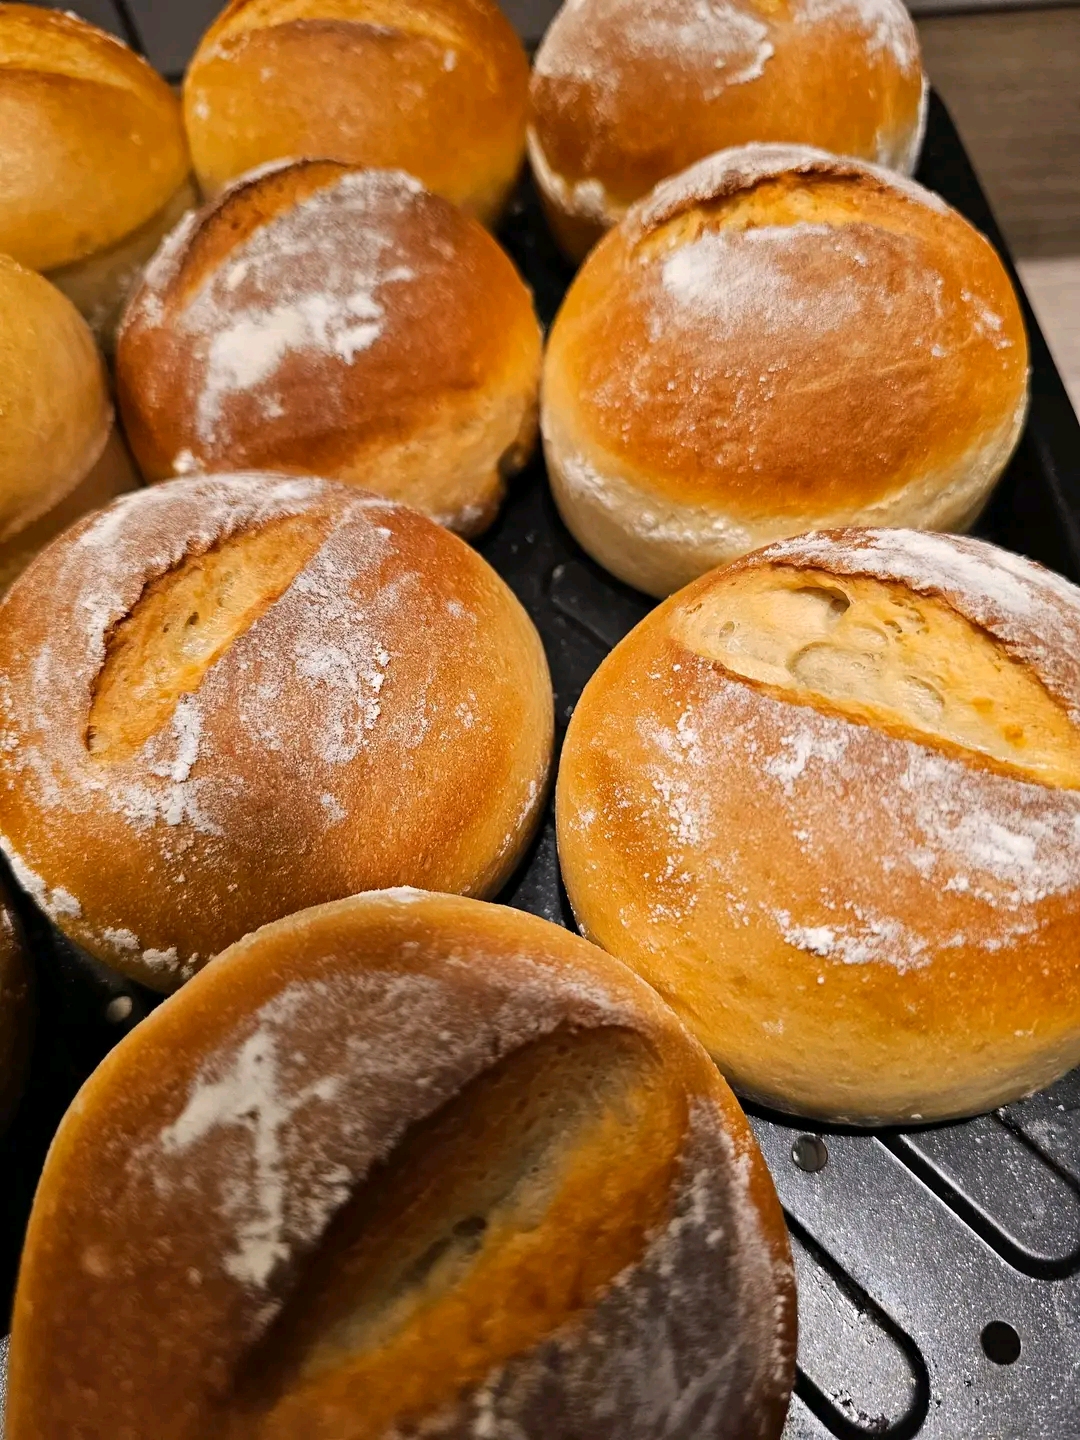
Perfectly Crispy Bread Buns are delicious homemade rolls with a golden, crunchy crust and a soft, tender interior. They are ideal for breakfast, sandwiches, burgers, or as a side to soups and hearty meals. With a few simple ingredients and the right baking technique, you can create bakery-style buns in your own kitchen.
The secret to achieving the perfect texture is allowing the dough to rise properly, shaping the buns evenly, and baking them at the right temperature. A little steam during baking helps develop a crisp crust while keeping the inside light and fluffy.
Preparation Time: 25 minutes Rising Time: 1½–2 hours Cooking Time: 20–25 minutes Total Time: Approximately 2½ hours Servings: 8 buns Difficulty: Easy to moderate
### Origin
Bread rolls have been prepared in different forms across Europe, the Middle East, and other parts of the world for centuries. Bakers have developed countless techniques to create breads with different crusts, shapes, and textures.
Crispy bread buns are inspired by traditional bakery rolls, including European crusty rolls and rustic artisan breads. Their signature crunchy exterior comes from proper dough fermentation, high baking temperatures, and steam during the early stages of baking.
Although crispy buns have many regional variations, their enduring popularity comes from their simplicity, versatility, and delicious contrast between a crunchy crust and a soft center.
### Cultural Significance
Bread is a staple in many cultures and often plays an important role in family meals, hospitality, and celebrations. Freshly baked rolls are enjoyed around breakfast tables, served alongside soups and stews, and used to prepare sandwiches for work, school, and picnics.
The aroma of bread baking in the oven brings a sense of warmth and comfort to the home. Homemade crispy buns also offer an opportunity to share traditional baking skills and enjoy fresh bread made with familiar ingredients.
Whether served with butter, cheese, eggs, or a hearty meal, these buns are a simple reminder that everyday food can be both comforting and memorable.
### Ingredients Quantity
For 8 crispy bread buns:
* 500 g (4 cups approximately) all-purpose flour or bread flour
* 300 ml (1¼ cups) lukewarm water
* 7 g (2¼ teaspoons) instant dry yeast
* 10 g (1¾ teaspoons) salt
* 1 teaspoon sugar, optional, to help activate the yeast
* 1 tablespoon olive oil, optional, for a slightly softer interior
* A little extra flour for shaping
* Water for creating steam in the oven, if suitable for your oven
### Optional Additions
Customize your bread buns with these simple variations:
* Sesame seeds: Sprinkle on top before baking for a nutty flavor.
* Poppy seeds: Add a delicate crunch and attractive finish.
* Garlic and herbs: Mix dried oregano, rosemary, or garlic powder into the dough.
* Whole-wheat flour: Replace up to one-quarter of the white flour for a heartier texture.
* Olive oil: Add an extra teaspoon for a slightly more tender crumb.
* Cheese: Mix a small amount of grated cheese into the dough for savory buns.
* Seeds: Add sunflower or pumpkin seeds for extra texture.
* Egg wash: Brush the tops with beaten egg before baking for a deeper golden finish, although this creates a different crust from traditional rustic rolls.
### Tips for Success
1\. Measure accurately. Too much flour can make the buns dense. Weighing the ingredients gives the most consistent results.
2\. Use lukewarm water. Water that is too hot can damage the yeast. Aim for approximately 35–40°C (95–104°F).
3\. Knead until smooth. Knead for 8–10 minutes by hand, or 5–7 minutes in a stand mixer, until the dough becomes elastic.
4\. Allow sufficient rising time. The dough should roughly double in size during the first rise. The exact time depends on the room temperature and yeast activity.
5\. Shape evenly. Divide the dough into equal portions so the buns bake at approximately the same rate.
6\. Avoid adding too much flour. A slightly tacky dough can produce a lighter interior. Add extra flour only if the dough is excessively sticky.
7\. Preheat the oven thoroughly. A hot oven helps the buns expand quickly and develop a crisp exterior.
8\. Use steam carefully. Steam during the initial baking stage can help create a thin, crisp crust. Only add water using a method approved for your oven; never pour water directly onto an oven’s glass door or heating elements.
9\. Cool on a wire rack. Air circulation helps preserve the crisp crust and prevents the bottoms from becoming soggy.
### Instructions
### Step 1: Prepare the dough
In a large mixing bowl, combine the flour, instant yeast, and optional sugar. Add the lukewarm water and mix until a rough dough forms.
Add the salt and optional olive oil. Mix until everything is incorporated.
### Step 2: Knead the dough
Transfer the dough to a lightly floured work surface. Knead for 8–10 minutes until smooth, elastic, and slightly tacky.
If using a stand mixer, knead on low to medium speed until the dough becomes elastic and pulls away from the sides of the bowl.
### Step 3: Let the dough rise
Place the dough in a lightly oiled bowl and cover with a clean kitchen towel or reusable cover.
Leave it in a warm, draft-free place for approximately 60–90 minutes, or until roughly doubled in size.
### Step 4: Divide and shape
Gently press the dough to release excess gas. Divide it into eight equal portions.
Shape each portion into a round bun by folding the edges underneath and gently rolling it against the work surface to create surface tension.
Place the buns on a baking tray lined with parchment paper, leaving enough space between them for expansion.
### Step 5: Complete the second rise
Cover the shaped buns loosely and let them rise for another 30–45 minutes, until noticeably puffy.
Meanwhile, preheat the oven to 220°C (425°F). If using a baking stone or steel, allow it to preheat thoroughly.
### Step 6: Prepare the crust
For a rustic appearance, dust the buns lightly with flour. Use a sharp knife or bread lame to make one shallow slash across the top of each bun.
If desired, sprinkle with sesame seeds or poppy seeds.
### Step 7: Bake until golden and crispy
Place the tray in the preheated oven. Introduce steam safely during the first 5–10 minutes if your oven permits this method.
Bake for approximately 20–25 minutes, until the buns are golden brown with a firm, crisp crust. Rotate the tray if necessary for even browning.
The buns should sound hollow when tapped on the bottom. If using a thermometer, the center should generally reach approximately 93–96°C (200–205°F).
### Step 8: Cool and serve
Transfer the buns to a wire rack and let them cool for at least 15–20 minutes before serving.
Enjoy them fresh while the crust is crisp and the interior remains soft and tender.
### Description
Perfectly Crispy Bread Buns offer an irresistible combination of a golden, crunchy exterior and a light, airy interior. Their simple flavor makes them suitable for both sweet and savory toppings, while their sturdy shape works beautifully for sandwiches and burgers.
Fresh from the oven, the buns have a wonderful bakery-style aroma and a satisfying crust that gives way to a soft crumb. They are delicious with butter, olive oil, cheese, eggs, or homemade spreads.
The recipe uses basic pantry ingredients and requires no special additives, making it a practical choice for anyone who enjoys homemade bread.
### Nutritional Information
Approximate nutrition per bun, assuming eight buns and using the ingredients listed without optional olive oil:
| Nutrient | Amount |
| ————- | ————- |
| Calories | 225–240 kcal |
| Protein | 7–8 g |
| Carbohydrates | 46–49 g |
| Fat | 1–2 g |
| Fiber | 1.5–2 g |
| Sugar | Less than 1 g |
| Sodium | 450–550 mg |
These values are estimates and will vary according to the flour brand, bun size, and amount of salt used.
For a higher-fiber version, replace some of the white flour with whole-wheat flour. Keep in mind that this may produce a denser texture and require a small adjustment to the water quantity.
### Conclusion
Perfectly Crispy Bread Buns are a wonderful addition to any home baker’s recipe collection. With their crunchy golden crust, soft interior, and versatile flavor, they are suitable for everything from simple breakfasts to homemade burgers and family dinners.
The recipe relies on straightforward ingredients and a few essential techniques: proper kneading, patient rising, a hot oven, and careful cooling. Once you master these steps, you can easily adapt the buns with herbs, seeds, or other favorite additions.
### Recommendation
For the best flavor and texture, enjoy the buns on the day they are baked. Serve them with scrambled eggs, cheese, fresh tomatoes, homemade soup, or your favorite sandwich fillings.
For storage, keep completely cooled buns in a paper bag or bread box for about 1–2 days. A sealed container helps prevent drying but may soften the crust.
To refresh the crust, warm the buns in an oven at 180°C (350°F) for approximately 5–8 minutes. For longer storage, freeze them in an airtight freezer bag for up to 3 months and thaw before reheating.
### Embracing Healthful Indulgence
Homemade crispy bread buns can be enjoyed as part of a balanced diet. Baking them yourself allows you to control the ingredients, adjust the salt, and avoid unnecessary additives.
For a more nourishing variation, replace a portion of the white flour with whole-wheat flour or add seeds for extra fiber and healthy fats. Pair a bun with eggs, lean protein, or vegetables to create a more balanced meal.
If you prefer to avoid white flour, you can experiment with whole-grain bread recipes, oat-based alternatives, or other flour blends. However, these alternatives require different ingredient ratios and techniques to achieve a similarly crisp crust and light interior.
The key is to enjoy the bread mindfully, choose ingredients that suit your needs, and appreciate the satisfaction of freshly baked food made at home.