The Ultimate Soft and Fluffy Homemade Pita Bread Recipe
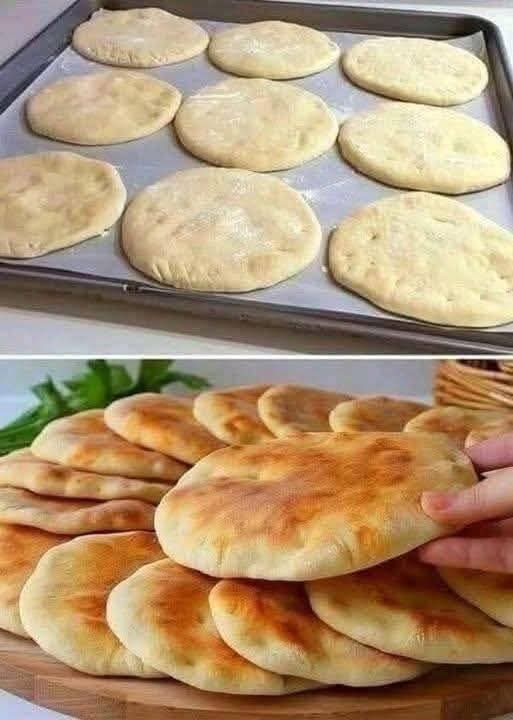
There is an unmatched culinary satisfaction in watching a flatbread puff up into a perfect, hollow balloon inside a scorching oven or on a hot skillet. If you want to elevate your home baking skills, this ultimate homemade pita bread recipe delivers a pocket bread that is infinitely superior to any store-bought alternative. Inspired by the uniform dough discs and beautiful, golden-speckled finished rounds showcased in 1000005885.jpg, this guide simplifies the traditional process of making pocket pita. By balancing simple yeast dough mechanics with proper heat application, this recipe creates a bread that is incredibly soft, pliable, and sturdy enough to hold your favorite sandwich fillings without tearing.
The magic of a great pita bread lies in its distinct internal pocket, a structural feat achieved through steam expansion. Many homemade flatbreads turn out dense or fail to separate properly because the dough was under-hydrated or the cooking surface lacked the necessary heat. This comprehensive WordPress guide walks you through selecting the right flour, mastering the proofing cycle, rolling the discs uniformly, and choosing between oven and stove-top baking methods. Get ready to transform basic pantry staples into soft, bakery-quality flatbreads that are perfect for dipping, stuffing, or serving alongside Mediterranean and Middle Eastern spreads.
Why This Homemade Pita Bread Recipe Works
Baking pita bread is a masterclass in thermodynamic kitchen science. Unlike thick loaves of bread that rely entirely on yeast for structural height, a pita pocket relies on intense, rapid heat vaporization to force its thin walls apart. This recipe optimizes dough elasticity and moisture content to ensure a reliable puff every single time.
The Role of High Hydration and Steam
The foundational secret to getting your flatbread to puff open like the ones pictured in 1000005885.jpg is high moisture content. As the thin dough disc makes contact with an intensely hot surface, the water trapped inside the dough instantly vaporizes into steam. Because the outer edges of the dough seal rapidly from the direct heat, the expanding steam has nowhere to escape, forcing the top and bottom layers of dough to separate into a hollow pocket.
Gluten Elasticity and Uniform Rolling
To support the rapid expansion of steam without tearing, the dough must be highly elastic. This recipe utilizes a dedicated kneading process to build a strong gluten framework that stretches smoothly under pressure. Additionally, rolling the dough to an even thickness is crucial. If one side of the disc is thinner than the other, the steam will pierce the delicate surface and escape, preventing the bread from ballooning.
Proper Proofing for Ultimate Tenderness
While steam creates the pocket, yeast and proper resting periods create the soft, pillow-like texture. A two-stage rising process allows the starches to ferment slightly, which relaxes the gluten strands just enough to make rolling effortless and deepens the natural wheat flavor. The final short rest after rolling ensures the dough is calm and full of microscopic air bubbles before it hits the heat.
Essential Ingredients for Soft Flatbreads
Before pulling out your mixing bowls, gather fresh, straightforward ingredients. Because this traditional recipe uses a minimal component list, the accuracy of your measurements ensures a flawless rise.
Selecting the Right Flour Type
For a sturdy pita that can easily hold wet ingredients like hummus, falafel, or grilled meats without breaking, use a high-quality unbleached all-purpose flour or bread flour. Bread flour provides a slightly higher protein content, yielding an ultra-sturdy, chewy pocket. If you prefer a rustic twist, you can substitute up to one-third of the total volume with whole wheat flour.
Active Dry vs. Instant Yeast
Both active dry yeast and instant rapid-rise yeast work beautifully in this recipe. Active dry yeast requires blooming in warm water with a touch of sugar for five minutes until foamy, which serves as an excellent visual check to ensure your yeast is alive. Instant yeast can be mixed directly into the dry ingredients, shortening your prep time significantly.
The Importance of Olive Oil
Adding a splash of extra virgin olive oil to the dough matrix serves a dual purpose. It coats the gluten strands to keep the interior crumb exceptionally soft and tender for days, and it adds a subtle, authentic Mediterranean flavor notes to the finished bread.
Step-by-Step Instructions: Baking the Perfect Pita
Follow these detailed steps carefully to replicate the beautiful baking preparation and golden, stacked presentation displayed in 1000005885.jpg. Precision during the rolling and heating phases guarantees success.
Step 1: Activating the Yeast
In a large mixing bowl or the bowl of your stand mixer, combine 1 and 1/4 cups of warm water (roughly 105°F to 110°F), 2 teaspoons of active dry yeast, and 1 teaspoon of granulated sugar. Stir gently and let the mixture sit undisturbed for 5 to 7 minutes. You will know it is ready when a thick, frothy layer of foam forms on the surface of the water.
Step 2: Mixing and Kneading the Dough
Add 3 cups of unbleached all-purpose flour, 1 and 1/2 teaspoons of fine sea salt, and 2 tablespoons of extra virgin olive oil to the foamy yeast mixture. Stir with a wooden spoon until a shaggy, cohesive dough begins to form around the sides of the bowl. Turn the dough out onto a lightly floured work surface. Knead the dough vigorously for 8 to 10 minutes using the heels of your hands, or use your stand mixer fitted with the dough hook attachment for 6 minutes on medium-low speed. The dough should become silky, smooth, and slightly tacky but not sticky to your fingers.
Step 3: The Bulk Fermentation Rise
Shape the kneaded dough into a tight, smooth ball. Lightly grease a large bowl with a few drops of olive oil and place the dough inside, turning it once to coat the entire surface. Cover the bowl with a damp kitchen towel or a sheet of plastic wrap. Place the bowl in a warm, draft-free spot in your kitchen and let the dough rise for 1 to 1.5 hours, or until it has fully doubled in size.
Step 4: Portioning and Pre-Shaping
Gently punch down the risen dough to deflate the large gas bubbles. Turn it onto your work surface and divide it into 8 equal portions using a bench scraper. Roll each portion firmly against the counter under your cupped palm to create a smooth, tight dough ball. Arrange the balls on a baking sheet, cover them loosely with a damp towel, and let them rest for 15 minutes to relax the gluten before rolling.
Step 5: Rolling the Dough Discs
Working with one dough ball at a time (keeping the others covered), flatten a ball into a disk with your palm. Use a floured rolling pin to gently roll the dough outward from the center into a uniform circle, roughly 6 to 7 inches in diameter and about 1/4-inch thick. Avoid rolling them too thin, or they will turn into crispy chips instead of soft bread. Place the rolled discs onto a parchment-lined baking sheet, mirroring the top panel preparation of 1000005885.jpg. Cover them lightly and let them proof a final time for 15 to 20 minutes.
Step 6: Cooking to Puffed Perfection (Oven Method)
While the dough discs take their final rest, preheat your oven to 500°F (260°C). Place a heavy cast-iron skillet, a baking stone, or a large upside-down baking sheet on the middle rack to heat up with the oven. The cooking surface must be intensely hot. Carefully flip 2 or 3 dough discs directly onto the scorching hot surface. Bake for 2 to 3 minutes; watch through the oven window as the dough balloons dramatically. Flip the pita using tongs and bake for 1 additional minute until light golden patches appear, matching the stunning finish shown in the bottom panel of 1000005885.jpg. Transfer the hot pitas immediately to a basket lined with a clean towel to keep them soft and steamy.
Expert Secrets for Mastering the Skillet Stove-Top Method
If you prefer not to fire up your oven to maximum temperature, you can achieve the exact same blistered, golden-brown finish visible in the bottom section of 1000005885.jpg using a cast-iron skillet on your stove-top.
Managing Cast-Iron Skillet Heat
- Preheat thoroughly: Set your cast-iron skillet or non-stick griddle over medium-high heat for at least 5 to 8 minutes before cooking. A drop of water flicked onto the surface should dance and evaporate instantly.
- The first flip timeline: Lay the rolled dough disc carefully into the dry, hot skillet. Cook for a brief 30 seconds until tiny bubbles begin to dimple the surface, then flip it over immediately. This initial quick flip seals the bottom layer and creates the structural integrity needed to trap steam.
- Press gently to encourage puffing: Cook the second side for 1 to 2 minutes until light golden spots form, then flip it back to the original side. If the pita stubbornly stalls and refuses to balloon completely, use a clean kitchen towel or a flat spatula to press down very gently on an area where air is accumulating. This redirects the internal steam stream to force the rest of the pocket open.
Nutritional Overview and Ingredient Alternatives
Homemade pita bread is a wholesome, clean carbohydrate option completely free of the chemical softeners and artificial shelf-life extenders found in commercial options.
| Ingredient Component | Role in Dough Structure | Ideal Alternative Substitution |
|---|---|---|
| All-Purpose Flour | Forms core gluten and pocket strength | Bread flour or standard whole wheat flour |
| Active Dry Yeast | Ferments sugar and aerates crumb | Instant rapid-rise yeast or sourdough starter |
| Extra Virgin Olive Oil | Softens texture and adds aroma | Avocado oil, melted ghee, or can be omitted |
| Granulated Sugar | Feeds yeast to speed activation | Pure honey, maple syrup, or cane sugar |
| Warm Water | Hydrates flour proteins to form dough | Warm milk (creates a richer, softer crumb) |
If you are incorporating whole wheat flour into this recipe, increase the warm water volume by 1 to 2 tablespoons, as whole grains naturally absorb more moisture than refined white flours.
Storing, Freezing, and Reheating Homemade Pita Bread
Because this fresh bread contains no artificial preservatives, proper storage techniques ensure your pitas stay as soft as the fresh stack handled in 1000005885.jpg.
Keeping Pitas Fresh at Room Temperature
Once the baked pitas have cooled completely inside their clean cloth kitchen towel, stack them neatly and place them inside a large airtight Ziploc plastic bag. Storing them in a sealed container traps residual moisture, keeping the bread perfectly soft and bendable at room temperature for up to three days. Avoid storing them in the refrigerator, as the cold environment causes the starches to recrystallize rapidly, turning the bread dry and stale.
Freezing for Easy Meal Prep
Pita bread freezes beautifully, making it a fantastic make-ahead option for busy weeknight dinners. Wrap the completely cooled pitas in stacks of four using plastic wrap, then slide the bundles into a heavy-duty freezer bag. They can be frozen safely for up to three months. To use, simply pull out the desired number of rounds and thaw them on your counter for 15 minutes before refreshing.
The Correct Way to Reheat and Open Pitas
- The Skillet Refresh: Place a dry skillet over medium heat. Warm the pita for 30 to 45 seconds per side until warm and pliable. This restores the crisp exterior and soft interior texture perfectly.
- The Direct Flame Method: For a rustic, charred finish, hold the pita with metal tongs directly over an open gas stove burner flame for 10 seconds per side.
- Opening the Pocket: To cleanly open your pita into a perfect sandwich envelope like the round handled in 1000005885.jpg, use a sharp serrated bread knife to slice off a thin sliver of the top edge. Slide your fingers inside gently to separate the steam-puffed walls.
Frequently Asked Questions (FAQs)
Why did my pita bread fail to puff up into a pocket?
A failure to puff usually comes down to insufficient heat or uneven rolling. If your oven or skillet isn’t hot enough, the water inside the dough won’t turn into steam fast enough to force the layers apart. Alternatively, if you accidentally rolled a crease or thin spot into the disc, a tiny hole will form during cooking, allowing the steam to escape instead of expanding the pocket.
Can I make the pita dough ahead of time and bake it later?
Yes, absolutely. You can prepare the dough through the mixing and kneading phase, place it in an oiled bowl covered tightly with plastic wrap, and store it in your refrigerator overnight for a slow, cold rise. Cold fermentation slows down the yeast activity while deepening the complex, artisanal flavor profile of the dough. Bring the dough back to room temperature on your counter for 30 minutes before portioning and rolling.
What are the best dishes to serve alongside fresh pita bread?
Fresh pita bread is an incredibly versatile vehicle for a wide array of savory dishes. It pairs wonderfully with classic dips like creamy homemade hummus, smoky baba ganoush, or zesty tzatziki. It is also the ultimate bread companion for stuffing with crispy hot falafel, grilled chicken shawarma, or a fresh Greek salad tossed with feta cheese and kalamata olives.
Conclusion: The Perfect Pocket Every Single Time
Mastering the art of homemade pita bread is an incredibly rewarding achievement for any passionate home cook. By combining a strong, well-kneaded yeast dough with high moisture levels and intense, direct heat, you unlock a spectacular kitchen reaction that yields a beautifully hollow, exceptionally soft flatbread. The simple commitment to uniform rolling and proper preheating ensures a flawless performance with every single batch.
The next time you plan a Mediterranean spread or want to upgrade your weekday sandwich routine, roll out your dough discs, fire up your oven or skillet, and recreate the gorgeous, golden-blistered masterpieces displayed so beautifully in 1000005885.jpg. With its pillowy texture, versatile pocket structure, and clean flavor profile, this classic homemade pita recipe is guaranteed to become a permanent favorite in your digital recipe database.