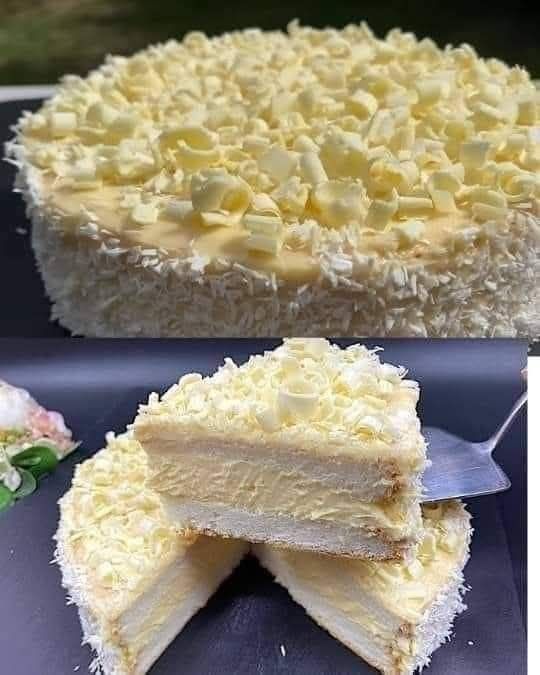
Are you craving a light and fluffy dessert, but don’t have hours to spare? Look no further! This 5-Minute Angel Food Cake recipe will have you baking up a mouth-watering, soft, and delicate cake in no time. The beauty of this cake lies in its simplicity, quick preparation, and the heavenly texture that makes it an all-time favorite for every occasion.
Whether you’re hosting a special event, need a last-minute dessert, or just want something sweet to enjoy with family and friends, this cake fits the bill. And, don’t worry—you don’t need to be a baking expert to make this cake. It requires minimal ingredients, and with easy-to-follow steps, you’ll be on your way to dessert bliss in just five minutes.
Why Angel Food Cake?
Angel food cake is famous for its incredibly light and airy texture. Made without butter or egg yolks, it relies on whipped egg whites to achieve its soft, cloud-like consistency. This makes it a wonderful choice for anyone looking for a lighter dessert option that doesn’t sacrifice flavor. Whether you are preparing for a formal gathering or a casual dinner, angel food cake never fails to impress with its delicate sweetness and fluffy texture.
This 5-minute version takes the classic recipe and simplifies it, reducing the prep time without compromising on flavor or texture. So if you find yourself in a bind and need a showstopper dessert fast, this recipe is your secret weapon.
Ingredients You Will Need
The ingredients required for this cake are simple and easy to find in most kitchens. Here’s what you’ll need to gather:
6 Eggs: The foundation of angel food cake, the egg whites provide the structure and the fluffy texture that makes this cake so special.
150 grams of sugar: Sugar is not only essential for sweetness but also helps stabilize the egg whites, giving them that perfect meringue-like consistency.
5 grams vanilla sugar: For added flavor that complements the sweetness of the cake.
50 grams flour: Flour adds a light structure to the cake, making it rise beautifully as it bakes.
300 grams sour cream: This ingredient adds richness and moisture, giving the cake a soft texture.
70 grams sugar (for cream filling): For the cream that will add flavor and richness to your cake layers.
1/8 teaspoon lemon juice: This helps balance the sweetness and adds a hint of tartness.
70 grams flour (for cream filling): Flour is used to thicken the cream filling and give it a custard-like consistency.
80 grams powdered sugar: For dusting the cake at the end, giving it that classic angel food cake look.
100 grams of prince cookies: Crushed prince cookies add a crunchy element that contrasts perfectly with the soft cake.
Powdered coconut: For a decorative finish that adds a tropical flair.
Dark chocolate: For melting and drizzling on top of the cake for a glossy, indulgent touch.
Step-by-Step Instructions
Step 1: Preheat the Oven
Begin by preheating your oven to 180°C (350°F). This temperature ensures that the cake will bake perfectly, achieving a golden brown color and the ideal texture. Preheating the oven is an essential step in baking, as it ensures that the cake begins cooking immediately when placed inside.
Step 2: Prepare the Cake Batter
Separate the Eggs: Carefully separate the egg whites from the yolks. You can do this by cracking the egg and transferring the yolk between the two halves of the shell, allowing the egg whites to fall into a separate bowl. Be sure to separate the eggs carefully, as even a small amount of yolk can prevent the egg whites from whipping properly.
Whisk the Egg Yolks and Sugar: In a large mixing bowl, whisk together the egg yolks, 150 grams of sugar, and the 5 grams of vanilla sugar. You can use a hand whisk or an electric mixer. Whisk the ingredients until the mixture becomes frothy and light in color. This process is known as creaming, and it’s essential for achieving a smooth batter.
Add the Flour: Gradually sift 20 grams of flour into the yolk-sugar mixture, stirring until fully combined. This will help thicken the batter slightly and give it structure. Stir gently to maintain the fluffiness.
Step 3: Whip the Egg Whites
Beat the Egg Whites: In a clean mixing bowl, beat the egg whites with a pinch of salt until stiff peaks form. This means that when you lift the beaters from the bowl, the egg whites should stand up on their own without drooping. This step is critical, as stiff egg whites give angel food cake its light texture.
Step 4: Combine the Ingredients
Fold in the Egg Whites: Gently fold the whipped egg whites into the yolk mixture. Be careful not to deflate the whites—this is key to keeping the cake airy and light. Use a spatula to cut through the batter and gently fold the ingredients together. It’s important to maintain the volume of the whipped egg whites for the best texture.
Step 5: Bake the Cake
Prepare the Cake Pan: Grease a 20 cm cake pan with butter or oil to prevent the cake from sticking. Alternatively, you can line the pan with parchment paper.
Pour the Batter into the Pan: Once the batter is mixed, pour it into the prepared cake pan. Use a spatula to smooth the top and ensure it’s evenly distributed.
Bake: Place the cake in the oven and bake for 20-25 minutes, or until a toothpick inserted into the center of the cake comes out clean. The cake should also be golden brown on top. Keep an eye on it towards the end of the baking time to avoid overcooking.
Step 6: Prepare the Cream Filling
While the cake is baking, you can prepare the cream filling. In a mixing bowl, combine 300 grams of sour cream, 70 grams of sugar, 70 grams of flour, and 1/8 teaspoon of lemon juice. Whisk until smooth and creamy. This filling will serve as a rich and luscious layer between the cake.
Step 7: Assemble the Cake
Cool the Cake: Allow the cake to cool completely. Once cool, slice the cake horizontally to create two layers.
Spread the Cream Filling: Spread a generous amount of the cream filling between the two layers of cake. You can also spread a thin layer on top if you prefer a more decadent dessert.
Step 8: Garnish and Serve
Decorate the Cake: Drizzle melted dark chocolate over the top of the cake. This will create a shiny, delicious finish that adds richness to the flavor. Sprinkle powdered coconut over the top for a tropical flair, and dust with powdered sugar to give the cake a classic angel food appearance.
Slice and Serve: Carefully slice the cake into even pieces and serve. This cake is light, rich, and perfect for any occasion.
Why You’ll Love This Recipe
Quick and Easy: In just five minutes, you can prepare a delicious cake that doesn’t require hours of work.
Light and Fluffy: The cake is soft, light, and airy, with a texture that melts in your mouth.
Customizable: You can change the flavor profile by adding different fillings or toppings, making it versatile for all occasions.
Impressive: The combination of the soft cake, creamy filling, and glossy chocolate drizzle will impress your guests and make you the star of the party.
Conclusion
This 5-Minute Angel Food Cake is a true baking hack for anyone who loves desserts but is short on time. With minimal ingredients, easy steps, and the result being a moist, fluffy cake, it’s the perfect solution when you want something both simple and impressive. Whether you’re celebrating a special occasion or treating yourself to a delicious dessert, this cake will satisfy your sweet tooth without taking up hours in the kitchen. Enjoy every bite! 🍰✨
More Articles You Might Like
-
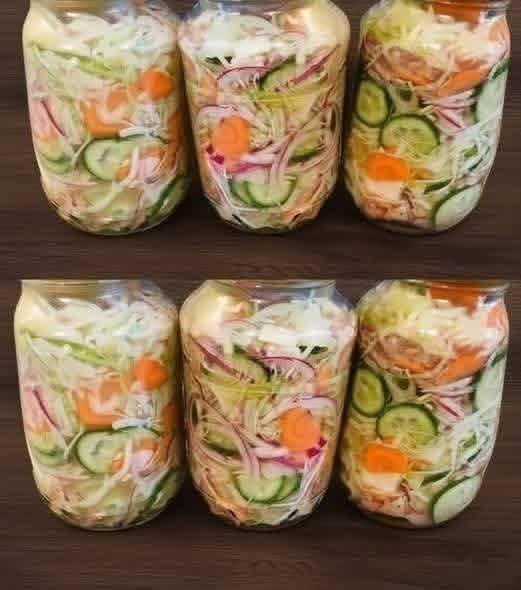
The Ultimate Guide to Homemade Pickled Crisp Summer Vegetable Salad
The Ultimate Guide to Homemade Pickled Crisp Summer Vegetable Salad As the warm weather settles in, our bodies naturally crave meals that are light, refreshing, and vibrant. Spending hours over a hot stove loses its appeal, making crunchy, chilled side dishes the true stars of the season. If you are searching for a foolproof way…
-
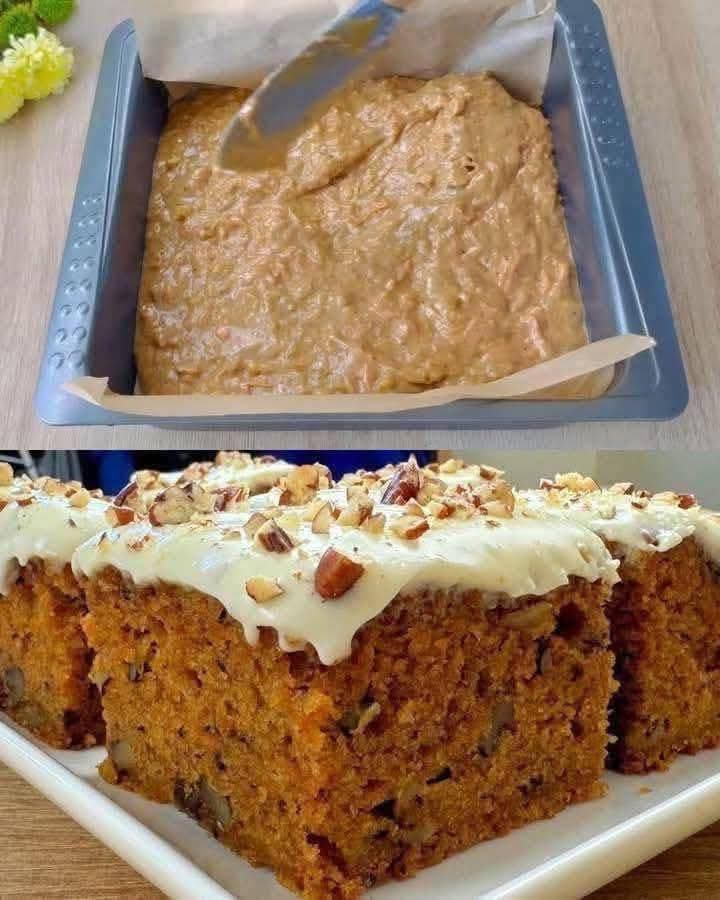
The Ultimate Classic Carrot Cake with Cream Cheese Frosting
The Ultimate Classic Carrot Cake with Cream Cheese Frosting When it comes to traditional baking, few desserts evoke the same sense of warmth, nostalgia, and pure comfort food indulgence quite like a perfectly baked carrot cake. A truly great carrot cake is a study in textures and balanced flavors—it should be incredibly moist, tightly packed…
-
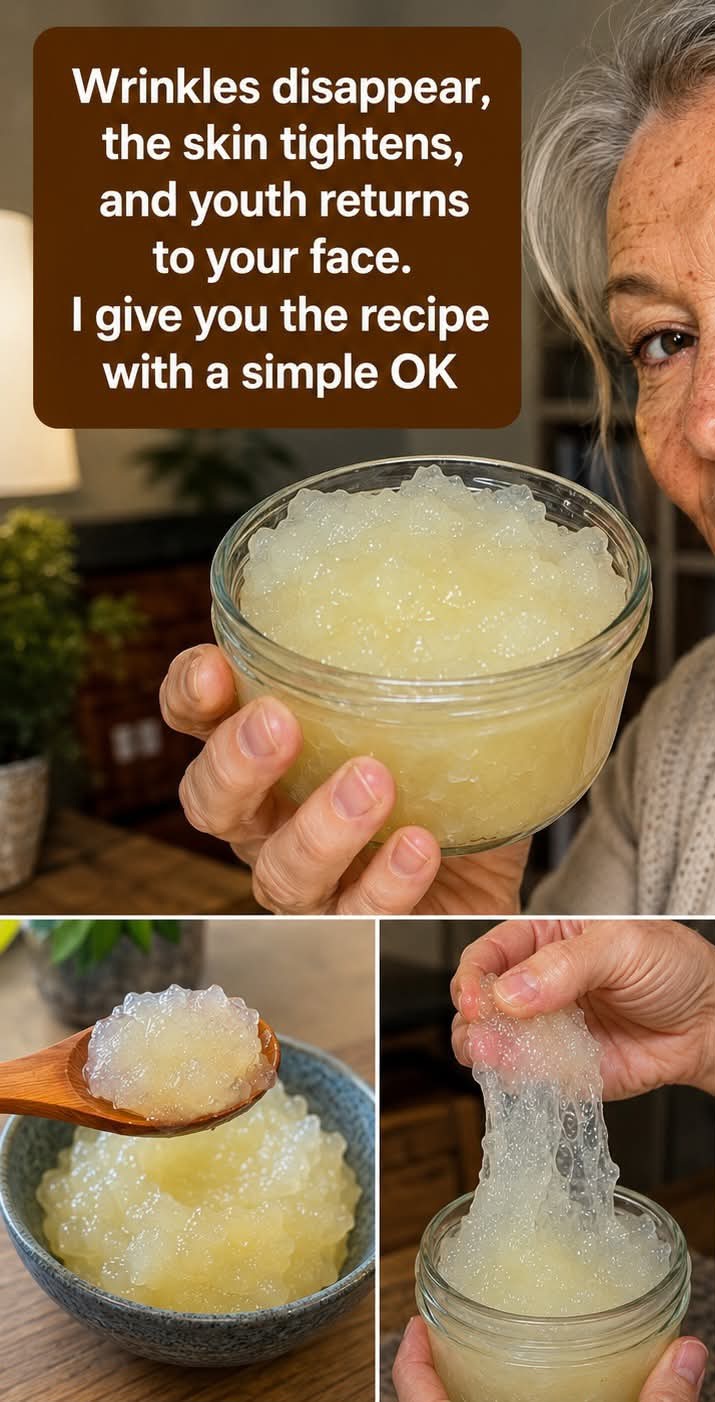
The Science of Sea Moss Gel for Aging Skin Fact vs Fiction
The Science of Sea Moss Gel for Aging Skin Fact vs Fiction As the years pass, maintaining a radiant, firm, and smooth complexion becomes a primary goal for many skincare enthusiasts. The natural aging process, combined with environmental stressors like sun exposure and pollution, gradually depletes our skin’s underlying structural framework. Recently, viral trends on…