
There’s something truly magical about a dessert that brings back memories of home, family gatherings, and the sweet aroma of chocolate filling the kitchen. Old Fashioned Chocolate Pie is one of those timeless recipes that feels like a warm hug — rich, creamy, and irresistibly decadent.
Whether you’re making it for a holiday, a special occasion, or just to satisfy a chocolate craving, this pie is a showstopper. It’s simple enough for beginners but luxurious enough to impress your guests. Let’s walk through the recipe step by step so you can bring this classic dessert to life in your own kitchen!
Why This Recipe Works
This chocolate pie is made with pantry staples but delivers an extraordinary flavor and texture. The silky-smooth chocolate filling is made from scratch, perfectly balanced between rich cocoa, sweet sugar, and velvety milk. It nestles into a crisp, flaky pie crust and gets topped with a cloud of whipped cream — creating a dessert that’s as beautiful as it is delicious.
Here’s why you’ll love it:
Classic Flavor: The combination of cocoa and vanilla creates an authentic, old-fashioned taste.
Perfect Texture: The filling thickens beautifully, giving you that dreamy custard-like consistency.
Simple Ingredients: No fancy tools or hard-to-find ingredients — just good old-fashioned baking basics.
Crowd-Pleaser: It’s a hit with kids and adults alike, making it a go-to dessert for gatherings.
What You’ll Need for This Recipe
Let’s break down the ingredients to see what makes this pie so special:
🥧 For the Pie:
1 pre-baked pie crust: Store-bought or homemade, choose what works best for you.
2 cups whole milk: Full-fat milk gives the pie its rich, creamy texture.
¾ cup granulated sugar: For the perfect level of sweetness.
¼ cup unsweetened cocoa powder: The star of the show — use high-quality cocoa for the best flavor.
3 tbsp cornstarch: Helps thicken the filling to the perfect consistency.
¼ tsp salt: A pinch of salt balances out the sweetness and enhances the chocolate flavor.
4 large egg yolks: Adds richness and helps the filling set properly.
2 tbsp unsalted butter: For a smooth, glossy finish.
1 tsp vanilla extract: Adds warmth and depth to the chocolate.
🍦 For the Topping:
Whipped cream: Sweet, fluffy, and the perfect contrast to the rich filling.
How to Make Old Fashioned Chocolate Pie
Follow these simple steps, and you’ll have a stunning homemade chocolate pie ready to wow everyone at the table!
🥄 Step 1: Prepare the Pie Crust
If using a store-bought crust, bake according to package directions and let it cool. If making a homemade crust, roll it out, place it in a pie dish, and blind bake until golden. Set aside to cool.
Tip: You can make the crust a day in advance to save time!
🥄 Step 2: Make the Chocolate Filling
In a medium saucepan, whisk together the milk, sugar, cocoa powder, cornstarch, and salt until smooth.
Place the saucepan over medium heat and cook, whisking constantly, until the mixture thickens and starts to bubble. This usually takes 5–7 minutes.
Tip: Don’t rush this step! Stirring constantly prevents lumps and ensures the filling thickens evenly.
🥄 Step 3: Temper the Egg Yolks
In a small bowl, whisk the egg yolks. To prevent scrambling, slowly pour about 1 cup of the hot chocolate mixture into the egg yolks, whisking constantly to temper them.
Gradually pour the tempered egg mixture back into the saucepan, still whisking to combine.
🥄 Step 4: Cook Until Thickened
Cook the filling for an additional 2–3 minutes, stirring constantly, until thick and glossy.
Remove from heat and stir in the butter and vanilla extract until fully incorporated.
🥄 Step 5: Assemble the Pie
Pour the hot chocolate filling into the cooled pie crust, spreading it out evenly.
Let the pie cool to room temperature, then transfer it to the refrigerator to chill for at least 4 hours, or until fully set.
Tip: For the cleanest slices, refrigerate the pie overnight!
🥄 Step 6: Top and Serve
Before serving, top the pie with whipped cream. You can spread it across the entire pie or pipe decorative swirls for a bakery-style finish.
Slice, serve, and enjoy every decadent bite!
Tips + Tricks for Recipe Success
Use Quality Cocoa Powder: The better your cocoa, the richer your pie will taste. Dutch-processed cocoa gives a deeper flavor, while natural cocoa is lighter and more classic.
Keep Stirring: Constant whisking is key to a smooth, lump-free filling.
Chill Thoroughly: Let the pie chill completely before slicing to avoid a runny filling.
Make Ahead Friendly: This pie can be made a day in advance — it actually tastes even better after resting in the fridge!
Serving Suggestions
Pair this luscious chocolate pie with:
Fresh berries: Strawberries or raspberries add a lovely tart contrast.
Coffee or espresso: The bitterness of coffee enhances the chocolate flavor.
Chocolate shavings: Sprinkle extra chocolate on top for a fancy finish.
How to Store Leftovers
Store leftover pie in an airtight container in the refrigerator for up to 4 days. You can also freeze the pie (without whipped cream) for up to 2 months — just thaw in the fridge overnight before serving.
Final Thoughts: A Slice of Heaven
This Old Fashioned Chocolate Pie is the definition of comfort food. It’s rich, velvety, and packed with nostalgic charm — a dessert that feels like it came straight from Grandma’s kitchen. Whether you’re sharing it with loved ones or sneaking a slice for yourself, each bite is pure bliss.
So go ahead, gather your ingredients, and whip up this chocolatey delight. And don’t forget to snap a pic before digging in — your friends will want this recipe too!
Happy baking!
More Articles You Might Like
-
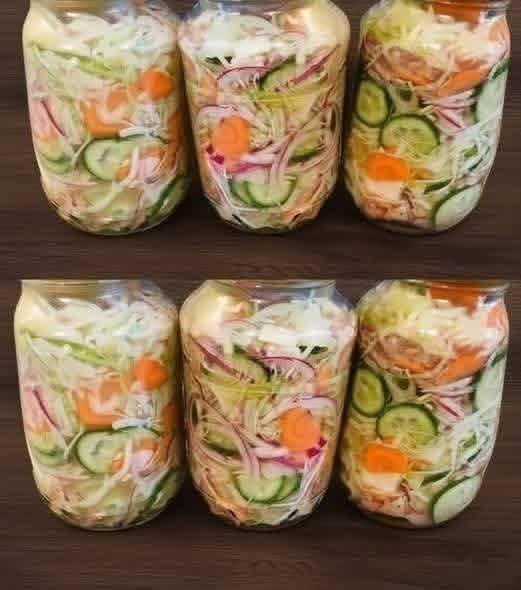
The Ultimate Guide to Homemade Pickled Crisp Summer Vegetable Salad
The Ultimate Guide to Homemade Pickled Crisp Summer Vegetable Salad As the warm weather settles in, our bodies naturally crave meals that are light, refreshing, and vibrant. Spending hours over a hot stove loses its appeal, making crunchy, chilled side dishes the true stars of the season. If you are searching for a foolproof way…
-
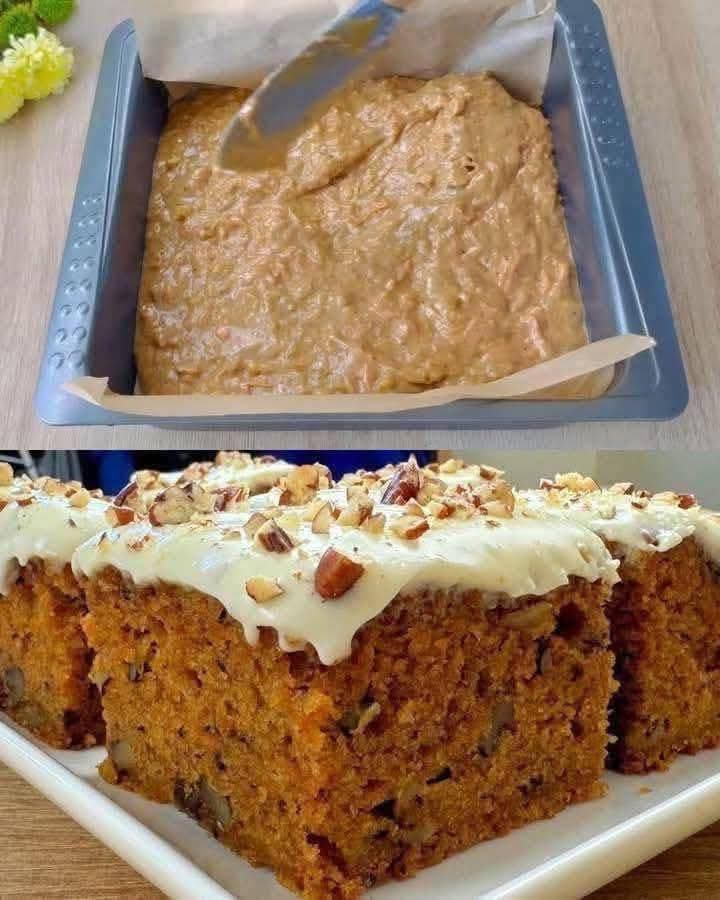
The Ultimate Classic Carrot Cake with Cream Cheese Frosting
The Ultimate Classic Carrot Cake with Cream Cheese Frosting When it comes to traditional baking, few desserts evoke the same sense of warmth, nostalgia, and pure comfort food indulgence quite like a perfectly baked carrot cake. A truly great carrot cake is a study in textures and balanced flavors—it should be incredibly moist, tightly packed…
-
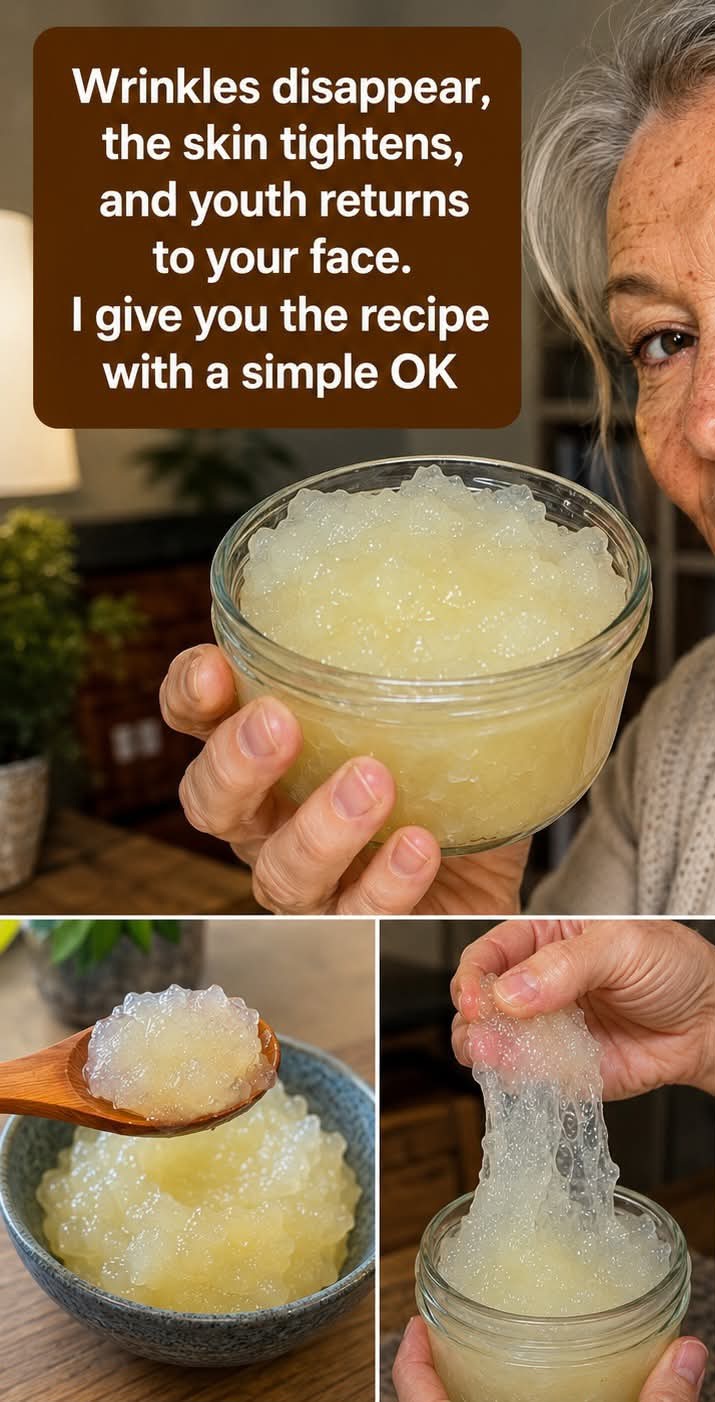
The Science of Sea Moss Gel for Aging Skin Fact vs Fiction
The Science of Sea Moss Gel for Aging Skin Fact vs Fiction As the years pass, maintaining a radiant, firm, and smooth complexion becomes a primary goal for many skincare enthusiasts. The natural aging process, combined with environmental stressors like sun exposure and pollution, gradually depletes our skin’s underlying structural framework. Recently, viral trends on…