Growing garlic indoors is an incredibly rewarding experience. Not only does it offer the opportunity to have fresh garlic at your fingertips year-round, but it also provides an easy and cost-effective way to add a flavorful touch to your cooking. Whether you’re a seasoned gardener or just beginning your journey with indoor plants, growing garlic indoors can be a simple and enjoyable task. This guide will take you through everything you need to know, from selecting the right bulbs to harvesting your crop.
Why Grow Garlic Indoors?
Before we dive into the steps of growing garlic indoors, let’s discuss why this is such a great idea. Growing garlic in containers indoors allows you to enjoy fresh, organic garlic throughout the year, even during the cold winter months when outdoor gardening may not be an option. Indoor garlic cultivation also takes up minimal space and is relatively low-maintenance, making it an ideal project for both beginners and experienced gardeners. Plus, growing your own garlic is more affordable in the long run and gives you the satisfaction of knowing exactly where your food comes from.
Step 1: Selecting the Right Garlic Bulbs
The first step in growing garlic indoors is choosing the right bulbs. It’s important to note that you cannot just use garlic from the supermarket, as many store-bought bulbs are treated with chemicals to prevent sprouting. Instead, you should select certified organic garlic bulbs from a local nursery, garden center, or online store.
For indoor growing, hardneck garlic varieties are typically the best option because they produce fewer but larger cloves, and they tend to adapt better to indoor environments. Some popular hardneck varieties include ‘Rocambole’, ‘Purple Stripe’, and ‘Creole’. However, softneck varieties like ‘Silverskin’ or ‘Artichoke’ can also grow indoors with proper care.
Choose bulbs that are firm and free from mold or damage. Select bulbs that are large and healthy as these will give you the best results when planted.
Step 2: Preparing the Containers
Garlic needs a deep container to grow properly. The container should be at least 8-10 inches deep to allow the garlic cloves to form full-sized bulbs. You can use plastic pots, ceramic pots, or even repurposed containers, as long as they have drainage holes at the bottom. Proper drainage is crucial to prevent waterlogging, which can lead to root rot.
Fill the container with well-draining potting mix. A high-quality, organic potting mix will work well, but you can also mix your own by combining equal parts of compost, perlite, and potting soil. Garlic thrives in loose, fertile soil that allows the roots to spread easily. Avoid heavy clay soils, as they may compact and hinder growth.
Step 3: Planting the Garlic Cloves
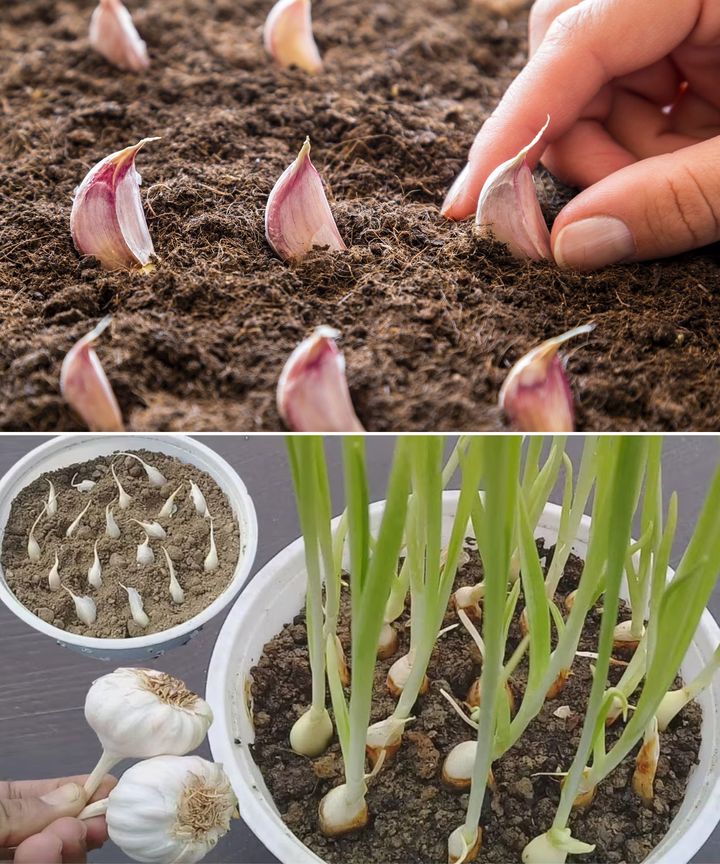
Once your container is ready, it’s time to plant the garlic. Start by breaking apart the garlic bulb into individual cloves. Leave the papery skin on the cloves, as it helps protect them during the growing process.
Next, plant each garlic clove with the pointed end facing up. The cloves should be planted about 2 inches deep and spaced about 4-6 inches apart. If you’re planting multiple cloves in one container, ensure that they have enough room to grow without overcrowding. You can plant several cloves in a single container, but be mindful that garlic needs space to develop its roots.
Water the soil gently after planting to settle the soil around the cloves. Avoid overwatering, as garlic prefers a moderately moist environment.
Step 4: Providing Proper Light
Garlic requires a lot of sunlight to grow well, so choosing the right spot in your home is essential. Ideally, place your garlic container on a south-facing windowsill, where it will receive 6-8 hours of direct sunlight per day. If natural sunlight is limited, consider using a grow light to supplement.
A grow light can help provide the necessary light spectrum for your garlic to thrive. Hang the grow light 6-8 inches above the garlic and set it to run for around 12 hours each day. Keep the temperature in the room between 65-75°F (18-24°C), as garlic prefers a cool to moderate temperature range.
Step 5: Watering and Fertilizing
Garlic requires consistent moisture, but it doesn’t like soggy soil. Water your garlic whenever the top inch of soil feels dry, being careful not to overwater. Garlic is particularly sensitive to root rot, so ensure the container has proper drainage and avoid letting water accumulate in the bottom of the pot.
To keep your garlic healthy, it’s a good idea to fertilize it every 2-3 weeks. A balanced, all-purpose fertilizer is ideal, but you can also use organic options like compost, fish emulsion, or seaweed extract. Fertilizing provides the nutrients needed for strong growth and healthy bulb development. Avoid fertilizing too heavily, as this can lead to lush foliage growth at the expense of bulb production.
Step 6: Mulching and Weeding
Although garlic is a relatively low-maintenance plant, it still benefits from some care. Applying mulch around the base of the garlic cloves helps retain moisture, regulate soil temperature, and reduce the growth of weeds. Use organic mulch like straw, grass clippings, or shredded leaves to cover the soil. Be sure not to pile mulch directly against the garlic cloves, as this can cause them to rot.
Weeding is another important task. Weeds can compete with garlic for nutrients, so it’s important to remove any unwanted plants regularly. Since garlic has shallow roots, be gentle when pulling weeds to avoid disturbing the garlic roots.
Step 7: Monitoring Growth and Addressing Issues
Garlic is relatively disease-resistant, but it’s still important to monitor it regularly for pests and other issues. Keep an eye out for aphids, thrips, or fungal infections, and address them promptly with natural remedies like neem oil or insecticidal soap.
If the garlic leaves start to turn yellow or appear stunted, this could be a sign of nutrient deficiencies or environmental stress. Ensure that your garlic is getting enough sunlight, water, and nutrients. If necessary, replant in a larger container to provide more space for the roots.
Step 8: Harvesting the Garlic
Garlic typically takes 6-8 months to mature, depending on the variety and growing conditions. Once the leaves begin to yellow and die back, it’s time to harvest the garlic. Gently dig up the bulbs using a small shovel or gardening fork, taking care not to damage the delicate garlic bulbs.
After harvesting, allow the garlic to cure in a cool, dry, and well-ventilated area for 2-3 weeks. This helps the skins dry and harden, which improves the shelf life of the garlic.
Once the garlic has fully cured, trim the roots and leaves and store the bulbs in a cool, dark place. You can also braid softneck varieties together for easy storage.
Conclusion
Growing garlic indoors is a simple yet rewarding project that brings a touch of nature to your home. With minimal effort, you can cultivate your own supply of fresh garlic, adding flavor to your meals while reducing your grocery bills. By following these steps, you’ll enjoy a bountiful harvest and the satisfaction of growing your own garlic from start to finish. Happy gardening!
More Articles You Might Like
-

Demystifying Hand Numbness and Tingling Understanding Tenosynovitis and Nerve Compression
Demystifying Hand Numbness and Tingling Understanding Tenosynovitis and Nerve Compression Experiencing a sudden or chronic sensation of numbness and “pins and needles” in your hands or feet can be both disruptive and concerning. In the digital space, these common neurological symptoms are frequently used as hooks to drive social media engagement. A clear example of…
-

The Reality Behind Viral Sublingual Health Trends Science vs Clickbait
The Reality Behind Viral Sublingual Health Trends Science vs Clickbait In the age of social media, health hacks and wellness shortcuts frequently go viral, promising monumental physiological shifts with minimal effort. A prominent example of this phenomenon is captured in the image 1000005836.jpg, which features a striking visual of a brown powder placed under a…
-

The Ultimate Garden Vegetable Soup A Comforting Nutrient Dense Classic
The Ultimate Garden Vegetable Soup A Comforting Nutrient Dense Classic When the seasons shift or you are simply craving a clean, home-cooked meal that nourishes from the inside out, nothing satisfies quite like a pot of rustic vegetable soup. Combining an array of fresh garden produce into a steaming, golden broth creates a comforting experience…