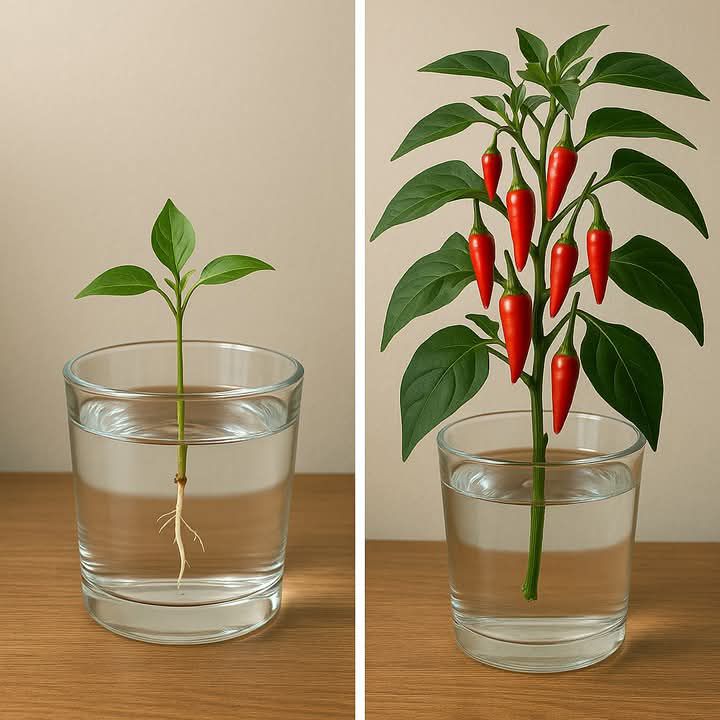
Craving homegrown heat without the mess of soil? Learning how to grow chili plants in water is not only possible—it’s also surprisingly simple. Whether you’re a beginner with no garden space or a pepper lover looking for a fun way to propagate chili seeds indoors, this method offers a clean, efficient, and rewarding way to start your own indoor pepper garden.
In this easy-to-follow guide, we’ll walk you through everything you need to know about growing chili plants in water—from seed to transplant—with tips for success and troubleshooting along the way.
🌱 What You’ll Need
Before you begin, gather these easy-to-find supplies:
Ripe Chili Peppers: Choose your favorite variety (jalapeño, cayenne, Thai, habanero—you name it). Store-bought or homegrown work fine.
Clear Glass or Jar: Mason jars or any clear cup will do. A lid or plastic wrap can help maintain moisture.
Toothpicks: For suspending the chili above the water.
Fresh Water: Preferably filtered or dechlorinated.
Sunny Windowsill or Grow Light: Chili plants love warmth and bright, indirect light.
Potting Soil (Optional): Needed only when you’re ready to transplant.
🪴 Step-by-Step Instructions
1. Choose Your Peppers
Start with ripe and firm chili peppers, preferably red or orange. These contain fully developed seeds.
Fresh vs. Dried: Fresh peppers work best. However, if you’re using dried chilies, make sure they haven’t been heat-treated (which kills seed viability).
Slice open the pepper and gently remove the seeds, placing them on a paper towel to dry for 12–24 hours.
💡 Tip: Want to try multiple varieties? Label each container so you know which is which when they sprout!
2. Prepare the Container
Use a clean, clear glass or jar. Sanitize it with warm soapy water to prevent mold or bacteria.
If you’re using a container without a lid, cover the top with plastic wrap to help maintain humidity during germination.
3. Insert Toothpicks
Take a whole pepper pod or a seed section and insert 3–4 toothpicks around the sides, about a third of the way down from the top.
This setup helps suspend the chili just above the water—close enough to benefit from the moisture but not soaking in it, which prevents rotting.
4. Suspend the Pepper
Rest the toothpicks on the rim of your jar so the bottom tip of the pepper or seed pod hovers just above the water.
If you’re germinating just the seeds, you can place them on a moist paper towel suspended over the jar’s opening, or use a seed sprouting lid.
5. Add Water
Fill the jar with room-temperature water just below the tip of the pepper. You don’t want the seeds sitting in water—only close enough to be exposed to constant moisture and humidity.
🚫 Avoid submerging the chili—this can cause the seeds inside to rot before sprouting.
6. Provide Light & Warmth
Place your setup in a sunny spot with indirect sunlight, such as a south- or east-facing window.
Chili seeds germinate best at temperatures between 70–85°F (21–29°C).
No sun? No problem. Use a grow light for 12–16 hours per day to keep them warm and bright.
7. Maintain Clean Water
Fresh water is key to healthy growth:
Change the water every 2–3 days to prevent mold, bacteria, and algae buildup.
Rinse the container if you see any film forming.
Keep the seeds in a humid and clean environment for the best chance of germination.
8. Watch the Roots Grow
After 1–3 weeks, you should see small white roots sprouting from the bottom of the pepper. The sprouts may push out from seed holes or around the base.
Once roots reach 2–3 inches long, your baby chili plant is ready for the next phase!
9. Transplant When Ready
Once your chili sprout has healthy roots and maybe even a small green shoot, it’s time to move it into soil.
Here’s how:
Fill a small pot with well-draining potting mix (a mix for vegetables or herbs is ideal).
Create a small hole and gently place the rooted sprout in, covering the roots and stabilizing the base.
Water lightly but thoroughly to help the roots settle in.
🌿 Tip: Harden off the plant by placing it in indirect sunlight for a few days before full sun exposure.
10. Continue Care Indoors
After transplanting, treat your chili plant like any other houseplant:
Sunlight: At least 6–8 hours of bright light a day.
Watering: Keep the soil moist but not soggy. Allow the top inch to dry out between waterings.
Feeding: Once it’s a few weeks old, feed with a diluted liquid fertilizer every 2–3 weeks.
With care, your chili plant will flower and start producing small peppers in 60–90 days—and you’ll have your own spicy supply ready to harvest right from your windowsill.
🌟 Why Grow Chili Plants in Water?
Still on the fence? Here’s why this method is awesome:
No soil mess: Great for small spaces or apartments.
Fun for kids and beginners: Watch roots and shoots grow in real-time!
Low maintenance: No weeding, no bugs, just fresh water and patience.
Budget-friendly: One pepper can yield multiple plants!
🌶️ Troubleshooting Tips
No roots forming? Try warmer temperatures or switch to a different chili variety.
Mold in water? Clean the jar and reduce humidity.
Seeds rotting? Ensure they aren’t touching water directly—just close enough to stay moist.
🌞 Final Thoughts: How to Grow Chili Plants in Water
Learning how to grow chili plants in water is a simple and enjoyable way to add some spice to your indoor garden. With just a jar, a pepper, and a sunny spot, you’ll soon have thriving plants that are as beautiful as they are functional. Whether you transplant them later or keep them as hydroponic houseplants, the journey from seed to sprout is one worth trying.
So go grab a chili from your fridge or spice rack and start growing your own pepper plant today—it’s easier (and hotter 🌶️) than you think!
More Articles You Might Like
-
Texas Toast Sloppy Joes: The Crunchy, Cheesy Upgrade You Didn’t Know You Needed
There’s something timeless about sloppy joes. For generations, this saucy, savory, and slightly sweet ground beef sandwich has been a go-to comfort food in American kitchens. It’s quick, filling, and family-friendly—perfect for busy weeknights. But what if we told you there’s a way to take this classic dish up a notch? Enter the Texas Toast…
-
Classic Pig Pickin’ Cake
When it comes to Southern desserts, few sweets shine as brightly as the Classic Pig Pickin’ Cake. This nostalgic cake, sometimes called a “Mandarin Orange Cake,” has roots deep in Southern tradition. It gets its playful name from its frequent appearance at pig pickin’s—Southern-style barbecue gatherings where communities come together to enjoy slow-cooked pork, sides,…
-
Lemon Garlic Butter Chicken with Creamy Parmesan Pasta
There’s something irresistible about the combination of tender, golden-browned chicken paired with a creamy pasta coated in Parmesan cheese. Add the brightness of lemon, the depth of garlic, and the richness of butter, and you have a recipe that feels indulgent yet approachable enough for a weeknight dinner. Lemon Garlic Butter Chicken with Creamy Parmesan…


