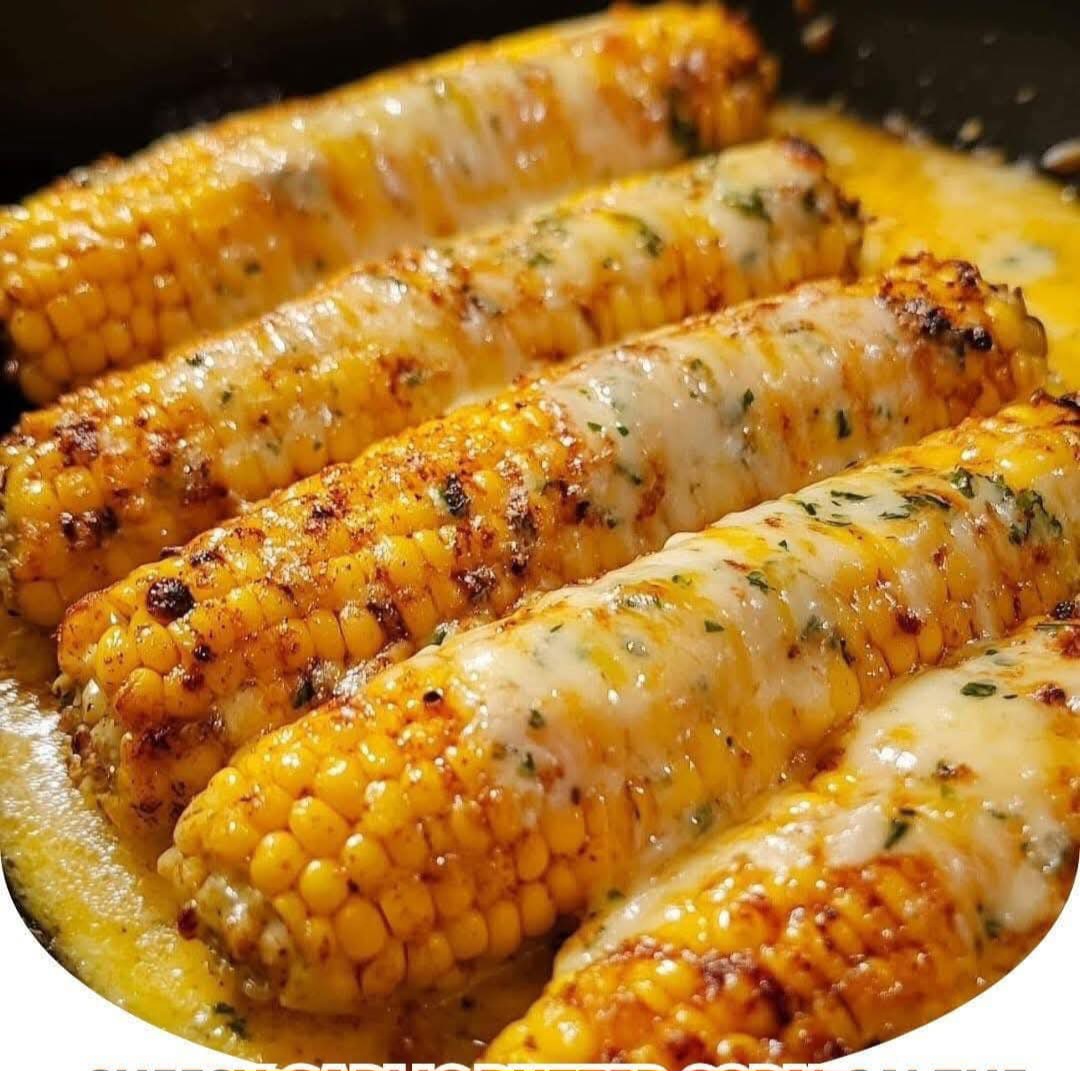
Corn on the cob is a beloved summer staple, often associated with backyard barbecues, cookouts, and warm, sunny days. While traditional buttered corn is always a hit, adding a cheesy, garlicky twist elevates this classic side dish to a whole new level. This Cheesy Garlic Butter Corn on the Cob recipe is packed with flavor, easy to make, and guaranteed to impress your family and guests. Whether you’re hosting a summer gathering or just craving something delicious, this recipe will quickly become a favorite.
Why This Recipe Works
Easy Preparation: With just a few simple steps, you can transform plain corn into a gourmet dish.
Bold Flavors: The combination of garlic butter, Parmesan, and mozzarella creates a rich and savory bite every time.
Perfect for Any Occasion: Whether it’s a BBQ, a weeknight dinner, or a holiday feast, this corn is a versatile side dish.
Customizable: You can experiment with different cheeses, spices, and toppings to make it your own.
Ingredients You’ll Need
4 ears of corn, husked
4 tbsp unsalted butter, melted
2 cloves garlic, minced
½ tsp salt
½ tsp black pepper
½ tsp paprika (optional, for a smoky kick)
¼ cup grated Parmesan cheese
¼ cup shredded mozzarella or cheddar cheese
2 tbsp fresh parsley, chopped (for garnish)
1 tbsp olive oil (for grilling, if needed)
How to Make Cheesy Garlic Butter Corn on the Cob
Step 1: Prepare the Corn
If using fresh corn, remove the husks and silk. Rinse the ears under running water and pat dry. If using frozen corn, allow it to thaw before cooking.
Step 2: Make the Garlic Butter
In a small bowl, combine melted butter, minced garlic, salt, black pepper, and paprika. Stir well to distribute the flavors evenly.
Step 3: Cook the Corn
You can prepare this corn in three different ways:
Grilling Method:
Preheat the grill to medium heat.
Brush each ear of corn lightly with olive oil to prevent sticking.
Place the corn on the grill and cook for about 10–12 minutes, turning every few minutes until slightly charred and tender.
Remove from the grill and immediately brush with the garlic butter mixture.
Boiling Method:
Fill a large pot with water and bring it to a boil.
Add the corn and cook for about 5–7 minutes, until tender.
Drain and brush with the garlic butter mixture while still hot.
Oven-Roasting Method:
Preheat the oven to 400°F (200°C).
Place the husked corn on a baking sheet lined with parchment paper.
Brush with olive oil and bake for 20–25 minutes, turning halfway through.
Remove from the oven and brush with the garlic butter mixture.
Step 4: Add the Cheese
While the corn is still hot, sprinkle grated Parmesan cheese and shredded mozzarella (or cheddar) over each ear. The heat will help the cheese melt and adhere to the corn.
Step 5: Garnish and Serve
Top with freshly chopped parsley for a pop of color and added freshness. Serve immediately while warm and cheesy.
Tips & Tricks for the Best Cheesy Garlic Butter Corn
Use Fresh Corn: Fresh, in-season corn will give you the best results in terms of sweetness and texture.
Adjust the Cheese: If you love extra cheese, feel free to add more or try different varieties like feta or gouda.
Spice It Up: For a little heat, sprinkle red pepper flakes or cayenne pepper over the finished corn.
Make it Extra Crispy: If you want an extra crispy cheese layer, place the corn under the broiler for 1–2 minutes after adding the cheese.
Add a Drizzle: A light drizzle of honey or balsamic glaze can bring a unique sweet-savory balance.
Serving Suggestions
This cheesy garlic butter corn pairs well with many dishes. Here are a few ideas:
Grilled Meats: Serve alongside grilled chicken, steak, or ribs.
BBQ Favorites: Pair with burgers, pulled pork, or smoked sausages.
Summer Salads: Complement the dish with a fresh garden salad or coleslaw.
Tex-Mex Night: Add to tacos, nachos, or burrito bowls for an extra cheesy twist.
How to Store and Reheat Leftovers
Storage:
Store leftover corn in an airtight container in the refrigerator for up to 3 days.
If possible, store the cheese separately to prevent it from becoming too soggy.
Reheating:
Oven: Reheat at 350°F (175°C) for 10 minutes.
Microwave: Heat in 30-second intervals until warm.
Grill: Reheat on the grill for 2–3 minutes to restore crispiness.
Frequently Asked Questions
Can I use frozen corn?
Yes! If using frozen corn on the cob, allow it to thaw completely and follow the same cooking methods.
What’s the best cheese for this recipe?
Parmesan adds a salty, nutty flavor, while mozzarella or cheddar brings gooey goodness. Feel free to mix and match your favorites.
Can I make this ahead of time?
While fresh is best, you can cook the corn and store it in the fridge. When ready to serve, reheat and add cheese just before serving.
Can I make this dairy-free?
Yes! Swap out the butter for vegan butter and use dairy-free cheese alternatives.
Final Thoughts
This Cheesy Garlic Butter Corn on the Cob recipe is an irresistible twist on a beloved classic. It’s rich, flavorful, and incredibly easy to make. Whether you grill, bake, or boil the corn, the combination of butter, garlic, and cheese creates a side dish that will keep everyone coming back for more. Try this recipe at your next gathering and watch it disappear in minutes!
Are you a fan of cheesy, garlicky goodness? Let us know how you customized your corn in the comments below!
More Articles You Might Like
-

Texas Toast Sloppy Joes: The Crunchy, Cheesy Upgrade You Didn’t Know You Needed
There’s something timeless about sloppy joes. For generations, this saucy, savory, and slightly sweet ground beef sandwich has been a go-to comfort food in American kitchens. It’s quick, filling, and family-friendly—perfect for busy weeknights. But what if we told you there’s a way to take this classic dish up a notch? Enter the Texas Toast…
-

Classic Pig Pickin’ Cake
When it comes to Southern desserts, few sweets shine as brightly as the Classic Pig Pickin’ Cake. This nostalgic cake, sometimes called a “Mandarin Orange Cake,” has roots deep in Southern tradition. It gets its playful name from its frequent appearance at pig pickin’s—Southern-style barbecue gatherings where communities come together to enjoy slow-cooked pork, sides,…
-

Lemon Garlic Butter Chicken with Creamy Parmesan Pasta
There’s something irresistible about the combination of tender, golden-browned chicken paired with a creamy pasta coated in Parmesan cheese. Add the brightness of lemon, the depth of garlic, and the richness of butter, and you have a recipe that feels indulgent yet approachable enough for a weeknight dinner. Lemon Garlic Butter Chicken with Creamy Parmesan…