A Walipini greenhouse, also known as a pit greenhouse, is an innovative, underground greenhouse design that can help you grow crops year-round, even in colder climates. The name “Walipini” comes from the Aymara language, meaning “place of warmth.” This greenhouse relies on natural earth insulation to maintain a stable temperature, offering protection from frost and helping extend the growing season.
Building a Walipini is a cost-effective and sustainable option for gardeners who want to grow fresh produce year-round. Here’s how to build your own Walipini greenhouse step by step.
1. Choose the Right Location
Sunlight: Select a sunny spot that receives plenty of sunlight throughout the day, especially during the winter months. The Walipini works best when positioned north to south, as this allows it to capture the maximum amount of solar energy.
Sheltered Area: Ideally, the location should be somewhat sheltered from the wind, as strong winds can cool the temperature inside the greenhouse and increase heating costs.
2. Determine the Size of Your Walipini
Dimensions: The size of the Walipini depends on how much space you need for planting. A typical size is about 20 feet long and 10 feet wide, but you can adjust the dimensions based on your available space and planting needs.
Depth: A Walipini should be 4–6 feet deep to take advantage of the earth’s natural insulation. The deeper you dig, the more stable the internal temperature will be.
3. Excavate the Pit
Dig the Pit: Start by excavating the area for your Walipini. You will need to dig a pit about 4-6 feet deep and the width and length you have decided for your greenhouse. Use a shovel, pickaxe, or mini-excavator for larger areas.
Shape the Pit: Ensure that the pit has sloping sides to allow water runoff. A slight slope (about 10-15 degrees) is ideal for drainage and prevents water from collecting inside the greenhouse.
Soil Considerations: If you have clay-heavy soil, you may need to improve drainage by adding organic material or sand to the bottom of the pit.
4. Build the Back Wall
Material: The back wall of a Walipini is crucial for insulation. It is typically built with thick, sturdy materials like concrete, cinder blocks, or treated wood.
Height: The back wall should be about 3-4 feet tall. It helps trap heat from the sun and maintain a stable internal temperature.
Insulation: For added insulation, you can cover the back wall with foam board or reflective material to retain heat during colder months.
5. Construct the Front Wall
Glass or Polycarbonate Panels: The front of the Walipini is the most important for capturing sunlight. Use polycarbonate sheets or glass for the front wall. Polycarbonate is a better choice because it provides better insulation while allowing sunlight to filter in.
Angle: Angle the front wall at a 45-degree angle (or slightly less depending on your climate). This will allow it to capture the most sunlight, especially in winter when the sun is lower in the sky.
Frame: Build the frame for the front wall out of wood, metal, or another sturdy material. Ensure it is well-secured to withstand wind and other elements.
6. Add the Roof
Material: The roof of your Walipini should be made from clear plastic or polycarbonate roofing panels. These materials are lightweight, durable, and allow light to penetrate while providing insulation.
Roof Slope: The roof should slope toward the back of the greenhouse to allow rain and snow to slide off easily. The angle should be similar to that of the front wall to maintain consistency in capturing sunlight.
Ventilation: Install ventilation holes or vents at the top of the roof to allow hot air to escape. Proper ventilation is essential to prevent overheating in the summer months.
7. Create Good Drainage
Gravel Layer: Place a layer of gravel at the bottom of the pit to improve drainage. This will help prevent water from pooling and causing root rot.
Drainage System: Install a drainage system around the Walipini to direct excess water away from the structure. You can install perforated pipes around the pit to help guide water to a drain or absorption area.
8. Fill the Pit with Soil
Filling the Pit: Once the basic structure is built, fill the pit with high-quality garden soil. If you want to grow vegetables or plants with deeper roots, make sure to add enough soil depth.
Soil Preparation: Enrich the soil with compost, organic matter, or well-rotted manure to improve fertility and encourage healthy plant growth.
Leveling the Soil: Ensure the soil is level to create an even surface for planting.
9. Planting in Your Walipini
Seasonal Crops: Depending on the climate, you can plant crops such as tomatoes, lettuce, herbs, peppers, cucumbers, and even tropical plants inside the Walipini year-round.
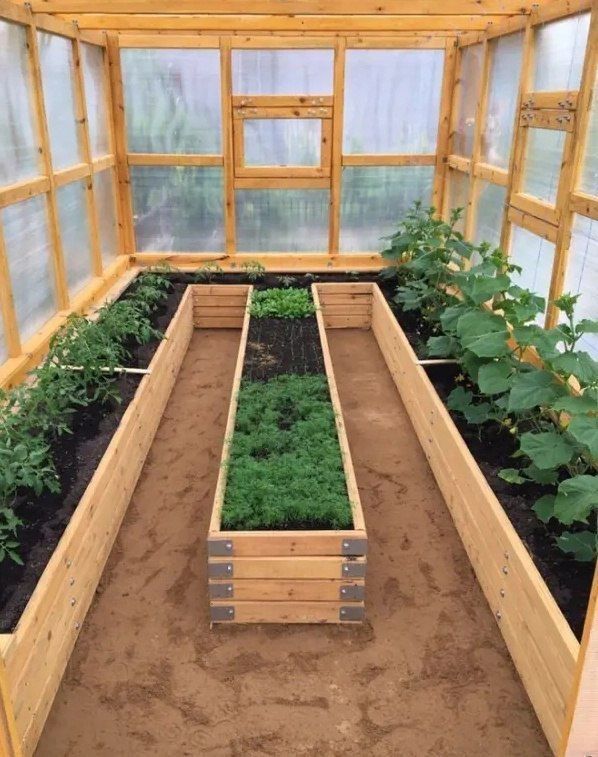
Raised Beds: To maximize space and improve drainage, you can create raised garden beds inside the Walipini. Use wooden planks or concrete blocks to construct these beds, and fill them with nutrient-rich soil.
Watering: Install a drip irrigation system or soaker hoses to ensure your plants receive consistent moisture. Drip irrigation is an efficient way to water your crops and minimize water wastage.
10. Maintain and Monitor Temperature & Humidity
Temperature Control: During the day, the Walipini will naturally warm up due to solar energy. However, it’s important to monitor the temperature using a thermometer. If it gets too hot, open the vents or the roof slightly for ventilation. At night, the earth will help keep the temperature stable.
Humidification: To maintain the proper humidity for plant growth, you can mist the air inside the Walipini or use a humidity tray (a shallow container with water and stones) to increase moisture levels.
Additional Tips for Success
Winterizing: In colder climates, you may need to insulate the front wall or cover the greenhouse with frost cloth during the winter to retain more heat.
Energy-Efficiency: Consider installing a solar-powered fan for ventilation or even a small solar heater to help maintain temperature consistency.
Pest Control: Install mesh screens or other protective measures to keep pests out while still allowing airflow.
Building a Walipini greenhouse is a great way to grow plants year-round in an eco-friendly, cost-effective manner. By harnessing the earth’s natural insulation and using solar energy, you can create a stable, productive growing environment for your plants, no matter the weather outside. Happy gardening! 🌱🌞
More Articles You Might Like
-

Texas Toast Sloppy Joes: The Crunchy, Cheesy Upgrade You Didn’t Know You Needed
There’s something timeless about sloppy joes. For generations, this saucy, savory, and slightly sweet ground beef sandwich has been a go-to comfort food in American kitchens. It’s quick, filling, and family-friendly—perfect for busy weeknights. But what if we told you there’s a way to take this classic dish up a notch? Enter the Texas Toast…
-

Classic Pig Pickin’ Cake
When it comes to Southern desserts, few sweets shine as brightly as the Classic Pig Pickin’ Cake. This nostalgic cake, sometimes called a “Mandarin Orange Cake,” has roots deep in Southern tradition. It gets its playful name from its frequent appearance at pig pickin’s—Southern-style barbecue gatherings where communities come together to enjoy slow-cooked pork, sides,…
-

Lemon Garlic Butter Chicken with Creamy Parmesan Pasta
There’s something irresistible about the combination of tender, golden-browned chicken paired with a creamy pasta coated in Parmesan cheese. Add the brightness of lemon, the depth of garlic, and the richness of butter, and you have a recipe that feels indulgent yet approachable enough for a weeknight dinner. Lemon Garlic Butter Chicken with Creamy Parmesan…