If you’re searching for the perfect pie crust recipe, look no further than Ruth’s Grandma’s Pie Crust. This recipe has stood the test of time, passed down for over a century, and remains a no-fail favorite. With a simple combination of pantry staples, it creates a flaky, buttery crust that’s ideal for both sweet and savory pies. Whether you’re baking an apple pie or a hearty quiche, this crust will elevate your dish to the next level.
Why This Recipe Works
Generational Wisdom: This recipe has been perfected over the years, making it reliable and consistent.
Simple Ingredients: Flour, shortening, sugar, and salt come together to create a balanced, versatile crust.
Flaky Perfection: The shortening ensures a tender, flaky texture every time.
Beginner-Friendly: With clear instructions and straightforward steps, even novice bakers can master this crust.
Ingredients You’ll Need
4 cups all-purpose flour: The base of the crust, providing structure.
1 ¾ cups shortening: Ensures the crust is flaky and tender.
3 tablespoons white sugar: Adds a subtle sweetness, balancing the flavors (can be reduced for savory pies).
2 teaspoons salt: Enhances flavor and balances the sweetness.
How to Make Ruth’s Grandma’s Pie Crust
Step 1: Combine Dry Ingredients
In a large mixing bowl, whisk together the flour, sugar, and salt. This ensures the ingredients are evenly distributed.
Step 2: Cut in the Shortening
Add the shortening to the bowl. Using a pastry cutter, two knives, or your fingers, cut the shortening into the flour mixture until it resembles coarse crumbs. The small chunks of shortening are what give the crust its flakiness.
Step 3: Add Liquid (Optional)
Depending on your pie crust preference, you can add a few tablespoons of ice-cold water to help the dough come together. Add one tablespoon at a time, mixing gently after each addition.
Step 4: Form the Dough
Divide the dough into two or three equal portions, depending on your pie size. Shape each portion into a flat disc, wrap in plastic wrap, and refrigerate for at least 30 minutes. Chilling the dough makes it easier to roll out and helps prevent shrinkage during baking.
Step 5: Roll Out the Dough
Lightly flour your work surface and rolling pin. Roll out one dough disc into a circle about ⅛-inch thick, ensuring it’s large enough to fit your pie dish with some overhang.
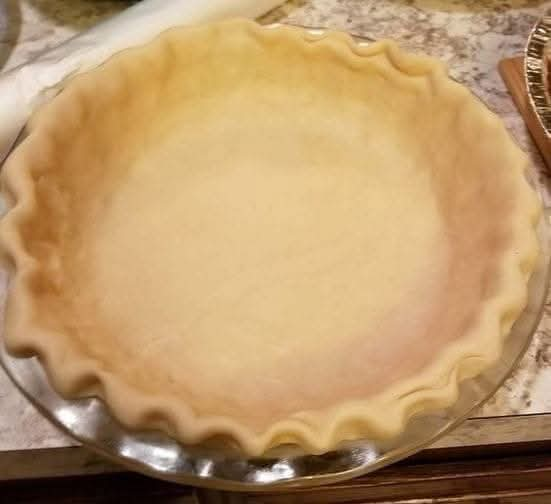
Step 6: Assemble Your Pie
Carefully transfer the rolled-out dough to your pie dish. Trim the edges, leaving about ½ inch hanging over the rim. For a double-crust pie, repeat the rolling process for the top layer.
Step 7: Bake as Needed
Depending on your pie recipe, you may need to pre-bake the crust (blind baking) or bake it with the filling.
Tips for Recipe Success
Keep It Cold: Use cold shortening and, if adding water, make sure it’s ice-cold. This helps create a flaky crust.
Don’t Overwork the Dough: Overmixing can make the crust tough. Handle it just enough to bring it together.
Chill the Dough: Letting the dough rest in the fridge prevents shrinkage and makes it easier to handle.
Use Parchment for Rolling: Rolling the dough between two sheets of parchment paper can prevent sticking and tearing.
Why You’ll Love This Pie Crust
Timeless and Reliable: A recipe that has delighted generations of pie lovers.
Versatile: Perfect for sweet pies, savory quiches, and everything in between.
Flaky and Tender: Achieves the ideal texture for any pie.
Easy to Customize: Adjust the sugar or add spices to suit your recipe.
Perfect Pairings for Ruth’s Grandma’s Pie Crust
This crust is versatile enough to complement a variety of fillings. Here are some ideas:
Sweet Pies: Apple, cherry, peach, pumpkin, or pecan.
Savory Pies: Chicken pot pie, quiche Lorraine, or meat pie.
Tarts: Lemon curd or fresh fruit tarts.
Variations to Try
Butter Substitution: Replace half of the shortening with butter for a richer flavor.
Whole Wheat Crust: Substitute half of the all-purpose flour with whole wheat flour for a nuttier taste.
Herb-Infused Crust: Add dried herbs like rosemary, thyme, or sage for savory pies.
Cinnamon Sugar Crust: Mix a teaspoon of cinnamon into the dough for sweet pies.
Storage and Freezing Tips
Refrigerate the Dough: Wrapped tightly in plastic wrap, the dough will keep in the refrigerator for up to 3 days.
Freeze for Later: You can freeze the dough discs for up to 3 months. Thaw in the refrigerator overnight before using.
Pre-Baked Crusts: If pre-baking, store the baked crust at room temperature for up to 2 days or freeze for up to 1 month.
A Bit of Pie Crust History
Pie crusts have been a staple in baking for centuries, with variations appearing in cuisines around the world. In the early 20th century, shortening became a popular ingredient for pie crusts due to its affordability and ability to create a tender, flaky texture. Ruth’s Grandma’s recipe is a testament to this classic baking era, offering a no-fail approach that’s as reliable today as it was 100 years ago.
Final Thoughts
Ruth’s Grandma’s Pie Crust is more than just a recipe—it’s a piece of history, a connection to the past, and a timeless addition to any baker’s repertoire. Whether you’re making a comforting apple pie for the holidays or a savory quiche for brunch, this crust will deliver every time.
With its simple ingredients, easy preparation, and unbeatable flavor, this no-fail pie crust deserves a spot in your kitchen. So, roll up your sleeves, dust off your rolling pin, and give this classic recipe a try. Your pies will never be the same—and neither will your reputation as a baker!