Making your own cheese at home might sound complicated, but with this simple method, you can create fresh, flavorful cheese using just a few ingredients and a little bit of patience. Forget about buying expensive store-bought cheese – this recipe lets you make your own delicious cheese at home with vinegar and milk!
Why This Recipe Works
Simple Ingredients: You only need milk, vinegar, salt, butter, and herbs to create a delicious cheese.
Quick and Easy: This homemade cheese recipe requires minimal time and effort – perfect for beginners.
Customizable: You can adjust the salt and herbs to suit your personal taste or even experiment with different flavorings.
Fresh and Flavorful: Nothing beats the taste of fresh, homemade cheese made from scratch.
Ingredients You’ll Need
1.5 liters of milk (6 1/3 cups): Full-fat milk works best for making cheese, but you can also use low-fat milk if preferred.
Salt, to taste: Adds flavor to the cheese. You can start with a pinch and add more as needed.
2 tablespoons apple cider vinegar (30 ml): The acid in vinegar helps curdle the milk, forming the cheese curds.
50 grams melted butter (1/4 cup): Adds richness and creaminess to the cheese.
1 tablespoon Provencal herbs (15 g): For a herbed flavor, adding a mix of herbs like rosemary, thyme, and oregano.
How to Make Homemade Cheese with Vinegar
Step 1: Heat the Milk
In a large pot, pour the 1.5 liters of milk and slowly heat it over medium heat. Stir occasionally to prevent the milk from scorching at the bottom. Heat the milk until it reaches about 80°C (175°F), just before it starts to boil. Keep an eye on it to avoid overflowing.
Step 2: Add Vinegar and Stir
Once the milk is heated, add the 2 tablespoons of apple cider vinegar. Stir gently to mix the vinegar into the milk. You’ll notice the milk begin to curdle and separate into curds (solid) and whey (liquid). Allow it to sit for a few minutes to let the curds fully form.
Step 3: Strain the Curds
Place a fine mesh strainer or cheesecloth over a bowl and carefully pour the curdled milk through it. Allow the whey (the liquid) to drain, leaving only the cheese curds behind. You can save the whey for other recipes like smoothies or baking if you’d like.
Step 4: Add Butter, Salt, and Herbs
Transfer the curds back into the pot. Add 50 grams of melted butter, a pinch of salt (to taste), and the 1 tablespoon of Provencal herbs. Stir everything together until the butter melts into the curds and the flavors are evenly distributed.
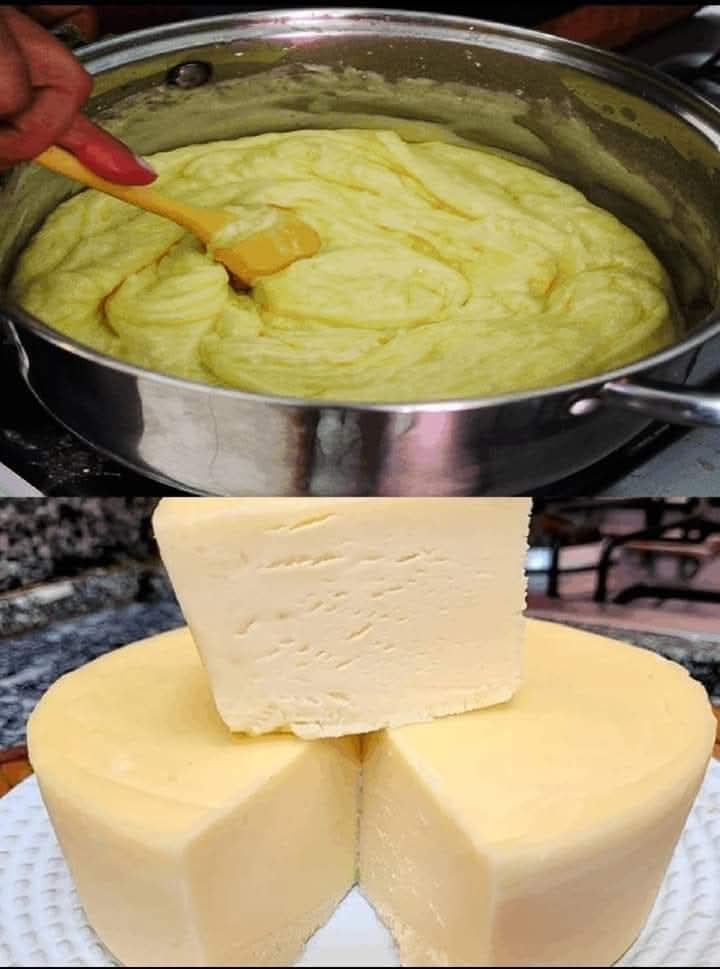
Step 5: Shape the Cheese
Once everything is mixed, you can either leave the cheese in the bowl to enjoy it as is or transfer it to a mold for shaping. If you’re shaping it, press the curds into a small bowl or cheese mold and gently press to compact them. You can also wrap the cheese in cheesecloth and press it under a weight to help it set.
Step 6: Chill and Set
Place the cheese in the fridge to chill for about 1 hour, allowing it to firm up and set. Once it’s chilled and ready to serve, remove it from the mold or cheesecloth.
Step 7: Serve and Enjoy
Slice or crumble your fresh, homemade cheese and enjoy it on sandwiches, salads, or simply as a snack. You can also pair it with crackers, fresh fruit, or olives.
Tips for Recipe Success
Milk Temperature: Be sure to heat the milk slowly and avoid letting it boil, as this can cause the curds to become tough.
Vinegar Amount: Adjust the vinegar based on how much curdling you want. More vinegar will create firmer curds, while less will produce a softer cheese.
Herb Variations: Experiment with different herbs to customize the flavor. Fresh basil, thyme, or garlic powder can all be great additions.
Use Cheesecloth: If you want a smoother, firmer cheese, wrap it in cheesecloth and press it to remove excess whey. This will also help the cheese hold its shape.
Why You’ll Love This Homemade Cheese
Quick and Easy: It’s a simple process with minimal ingredients and tools required.
Customizable: Add your favorite herbs and seasonings to make the cheese your own.
Fresh and Homemade: The taste of fresh cheese made from scratch is unbeatable and much more satisfying than store-bought options.
No Special Equipment Needed: You don’t need fancy cheese-making tools—just basic kitchen supplies.
Serving Suggestions
On a Cheese Platter: Pair your homemade cheese with crackers, olives, and fruits like grapes and apples for a delicious cheese platter.
In Sandwiches: Use your fresh cheese as a spread in sandwiches or wraps, paired with fresh vegetables and your choice of protein.
With Pasta: Crumble or grate the cheese and add it to pasta dishes for a fresh twist on classic Italian recipes.
With Bread: Enjoy your homemade cheese on fresh, crusty bread with a drizzle of honey or balsamic vinegar.
Storage Tips
Refrigerate: Store your homemade cheese in an airtight container in the refrigerator for up to 4–5 days.
Freeze: If you want to store it longer, you can freeze the cheese for up to a month. Just be aware that the texture may change slightly after freezing.
Final Thoughts
Making homemade cheese with vinegar is a rewarding and simple process that’s perfect for beginners or anyone looking to avoid store-bought options. With just a few ingredients, you can create fresh, flavorful cheese that will elevate any meal. Whether you’re using it for sandwiches, salads, or as a standalone snack, this homemade cheese is bound to become a staple in your kitchen.
Enjoy the rich, creamy goodness of your very own homemade cheese, and let your creativity shine through with various flavorings and pairings!